
¶ How to Access PocketCloud Files via Samba?
Samba is a file-sharing service based on the SMB/CIFS (Server Message Block / Common Internet File System) protocol, widely used for file and printer sharing between Linux, macOS, and Windows systems. With Samba, users can access shared directories on remote servers as if they were local, enabling cross-platform file sharing and collaboration.
Samba provides the following main features:
- File Sharing – Allows users to access, upload, download, and manage shared files or folders over the network.
- Printer Sharing – Supports network printer sharing, allowing multiple devices to use the same printer.
- User Access Control – Enables administrators to set permissions for different users or groups, ensuring data security.
- Cross-Platform Compatibility – Works seamlessly with Windows, Linux, and macOS systems, supporting multiple client types.
¶ Enable Samba
By default, Samba is disabled. You need to manually enable it by following these steps:
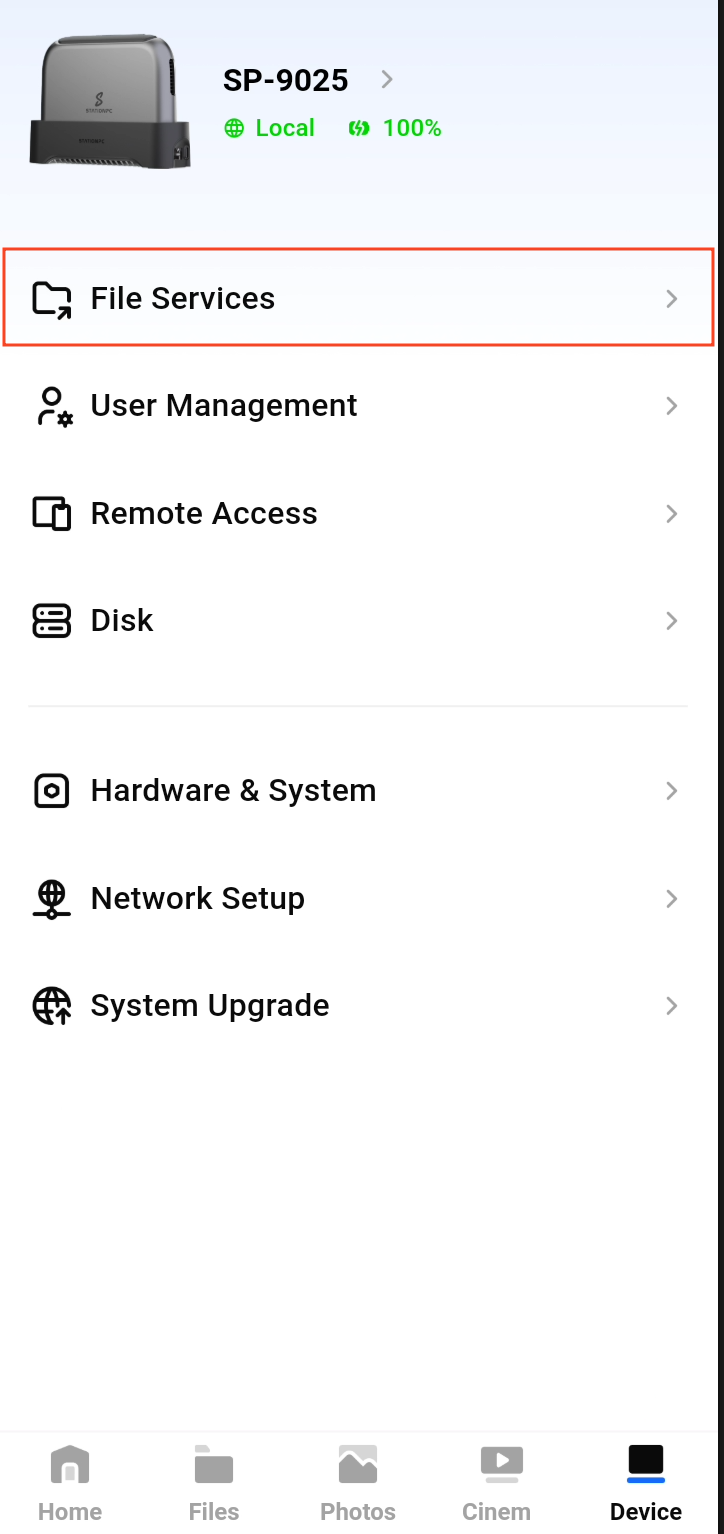
- Open the File Services section in the app.
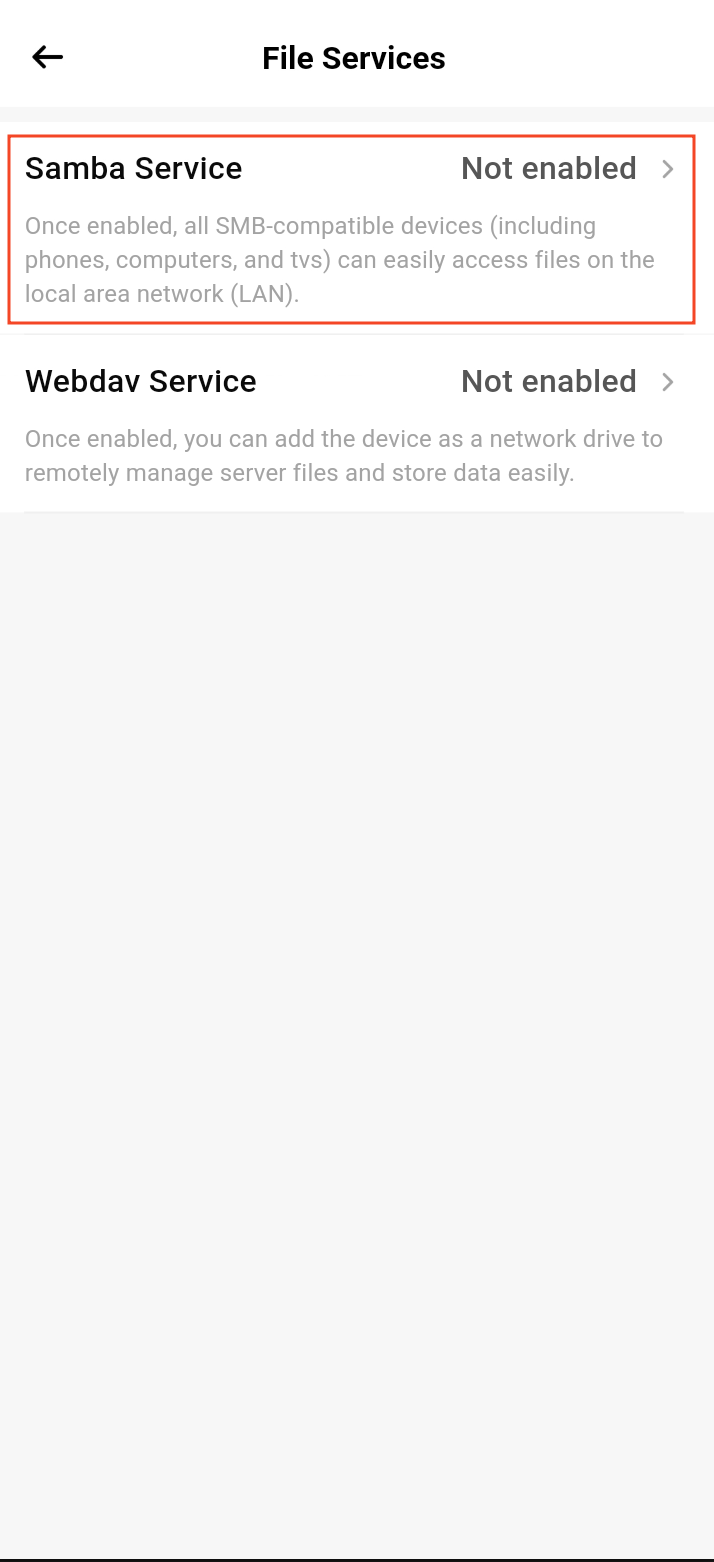
- Tap Samba Service.
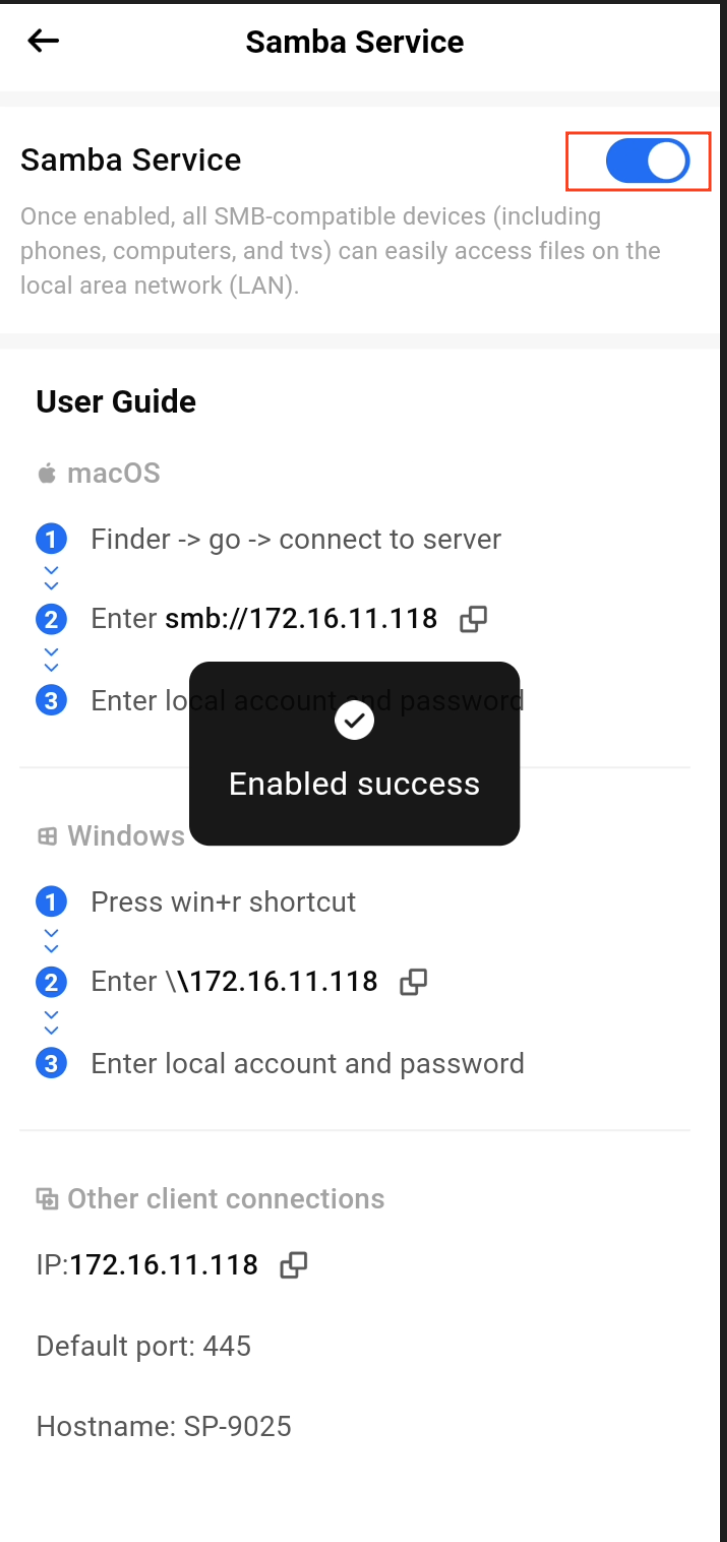
- Toggle the switch to turn on the Samba service.
¶ Accessing on Windows
¶ Method 1
- Press Win + R on your keyboard.
- Type
\\NAS_IP_Addressand click OK.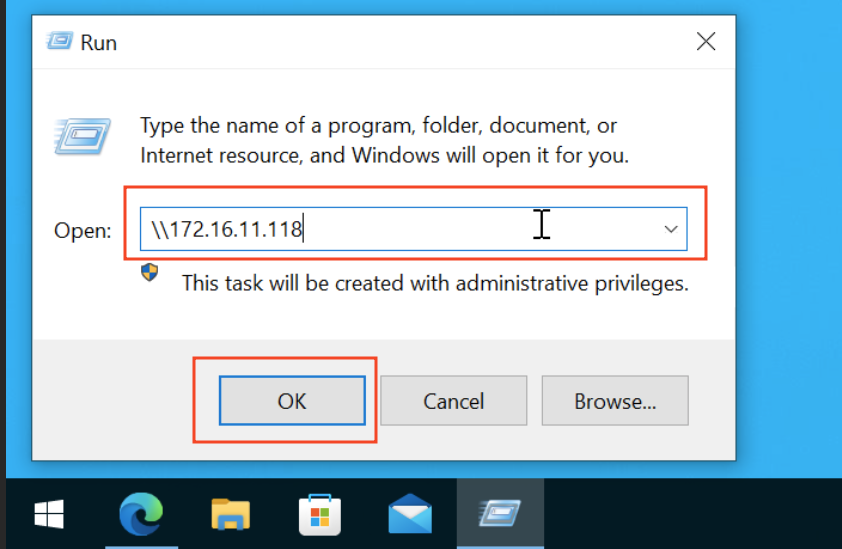
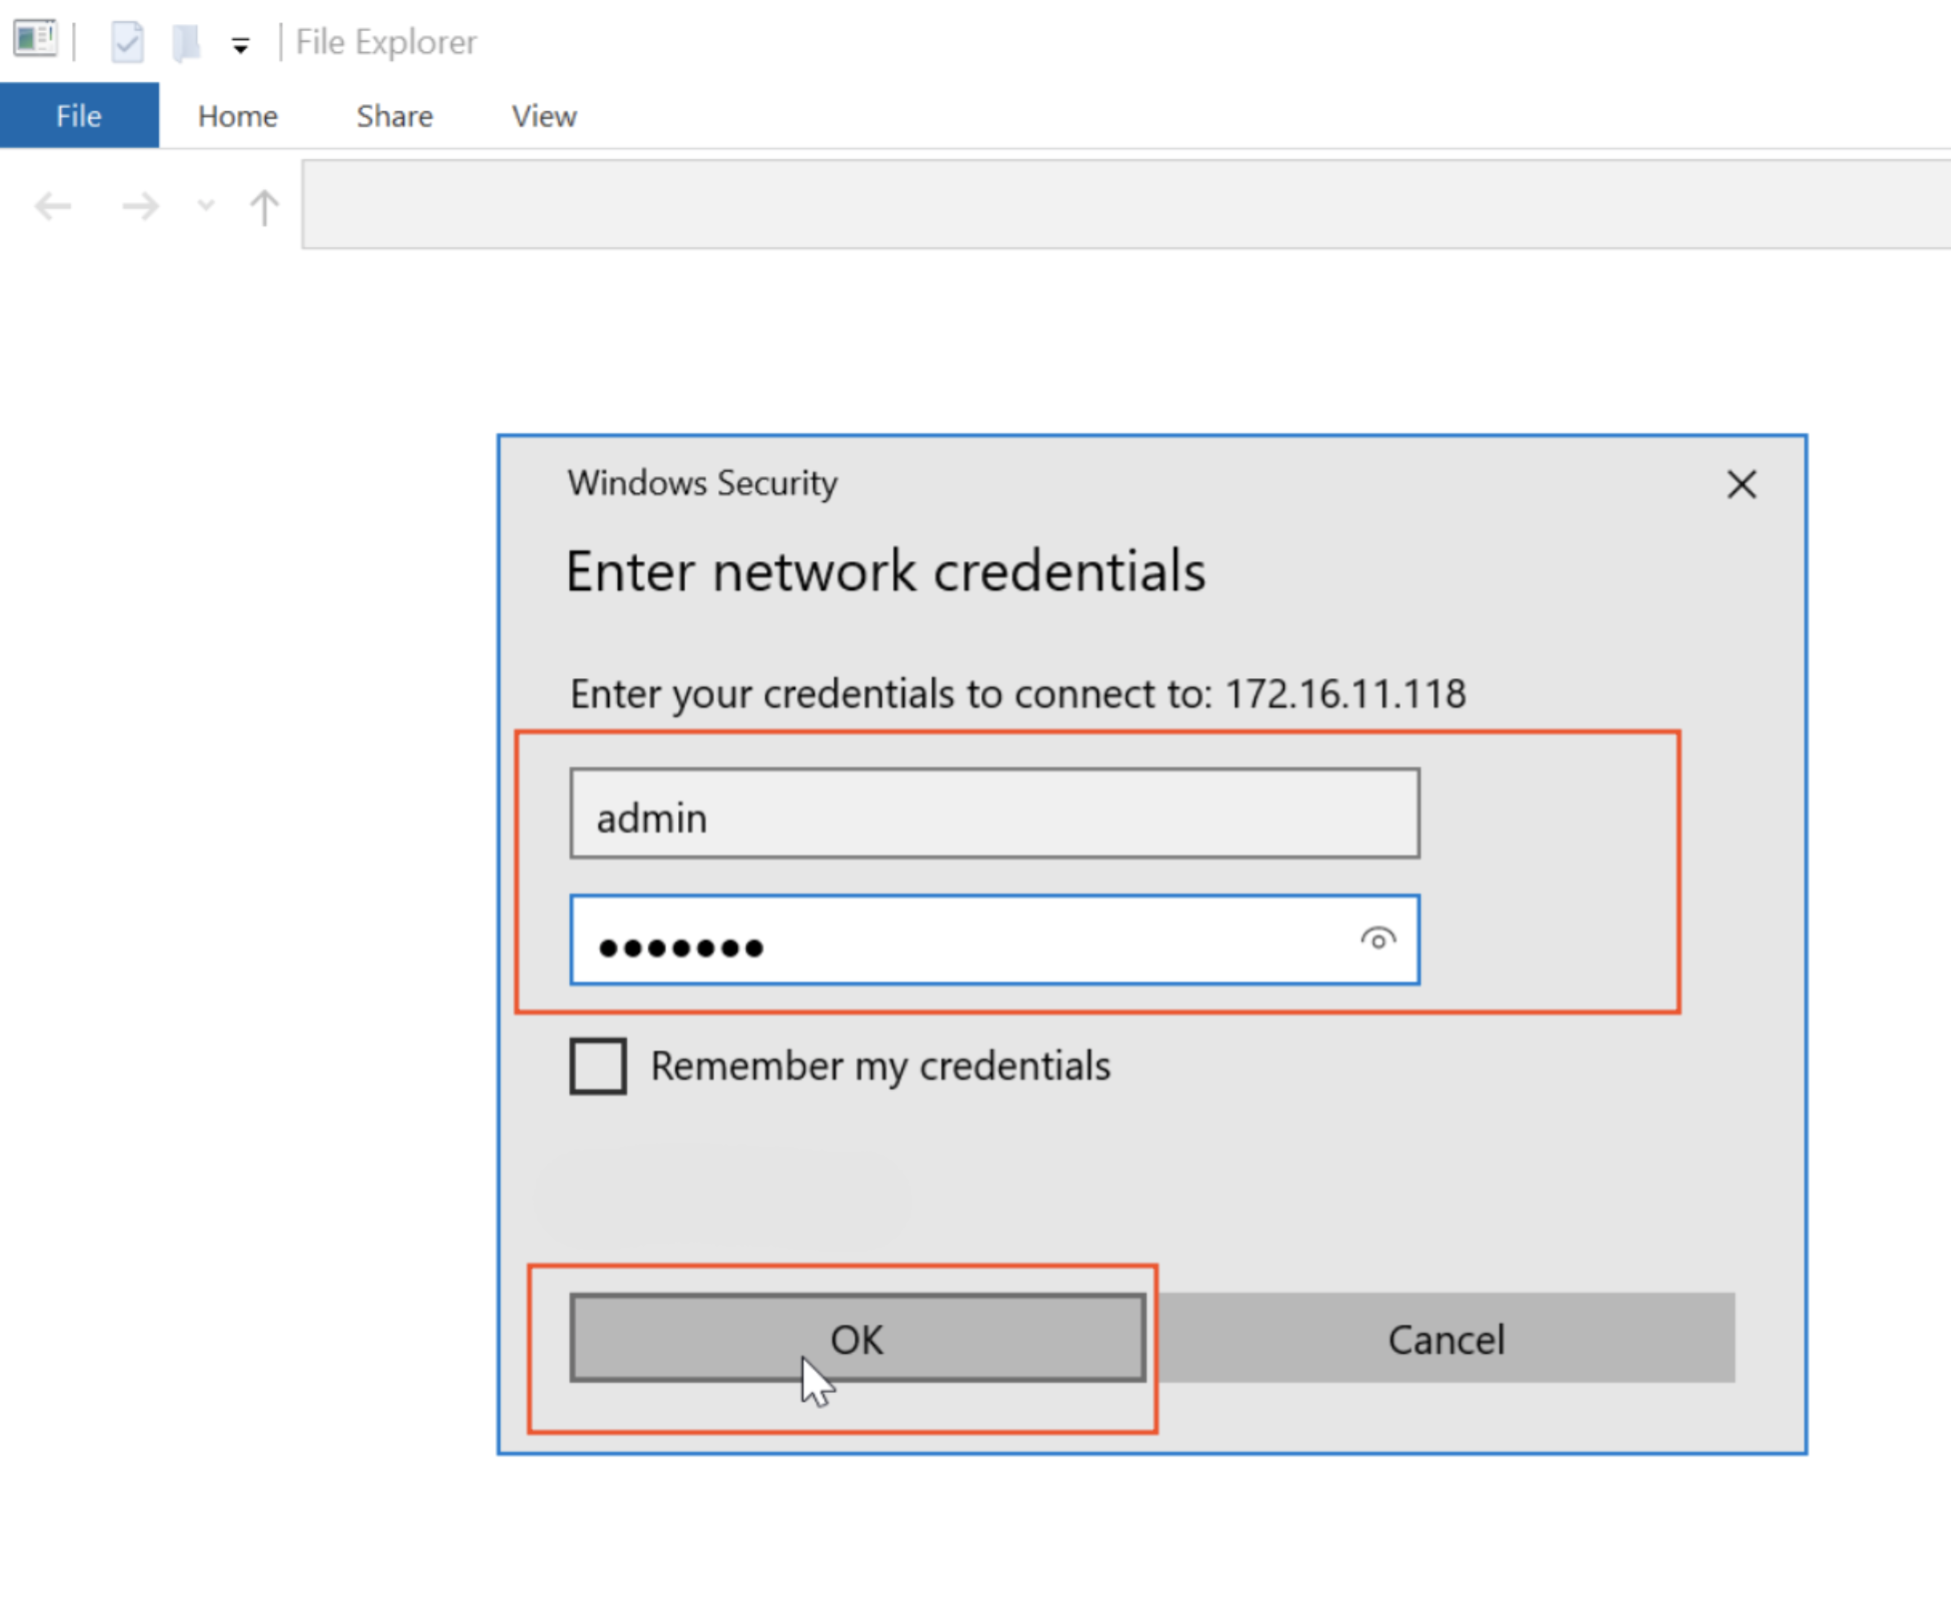
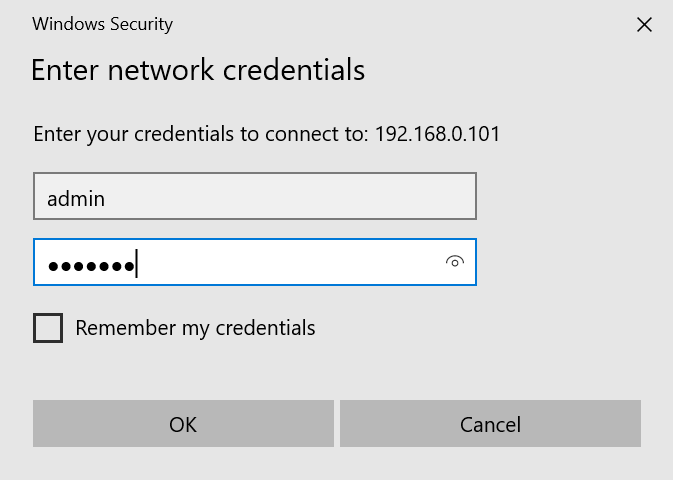
- Enter your username and password, then click OK.
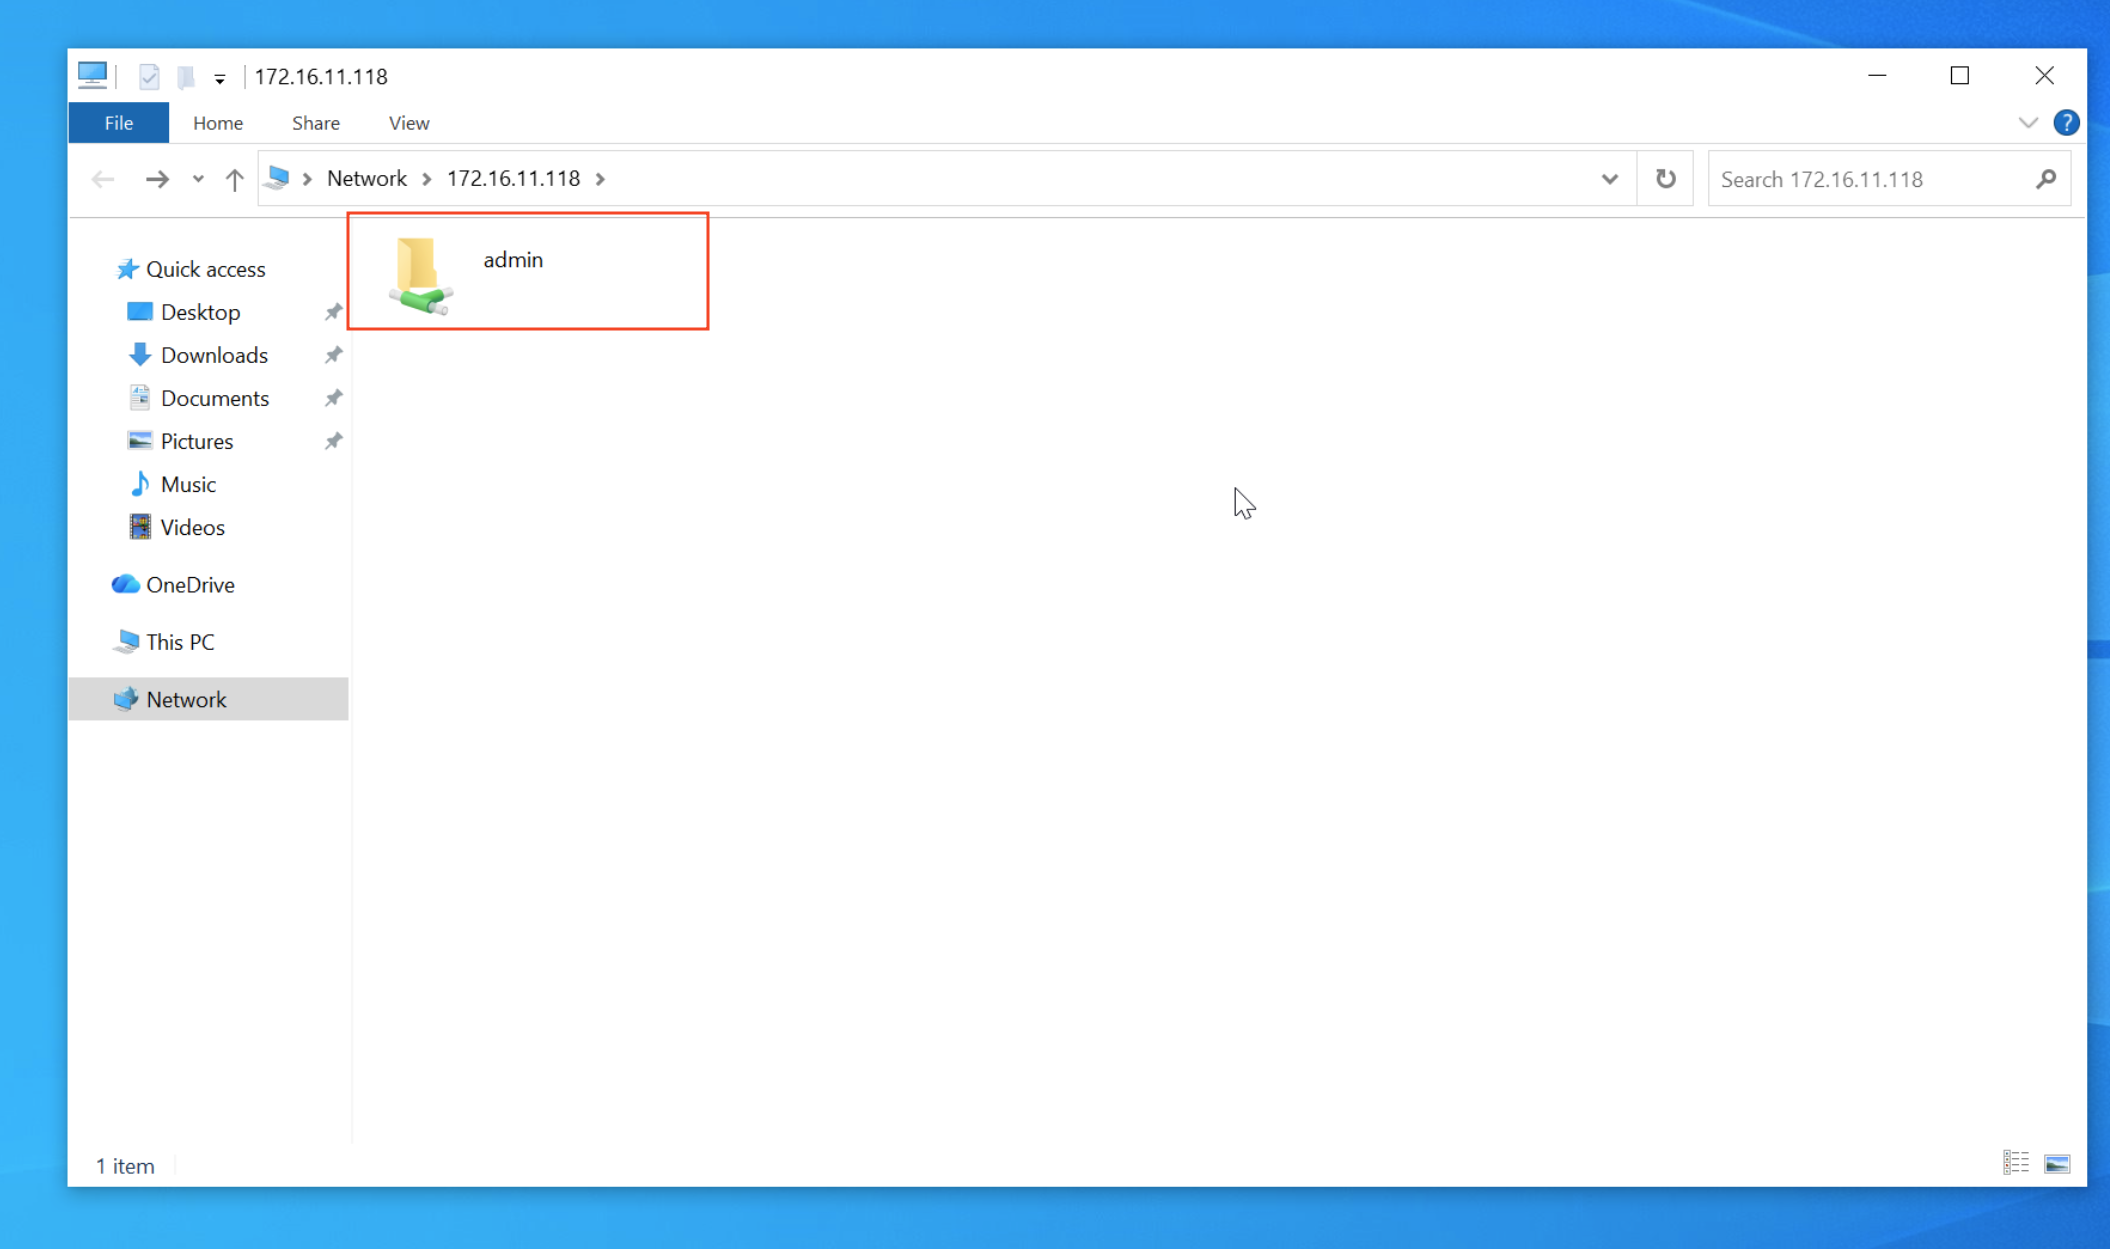
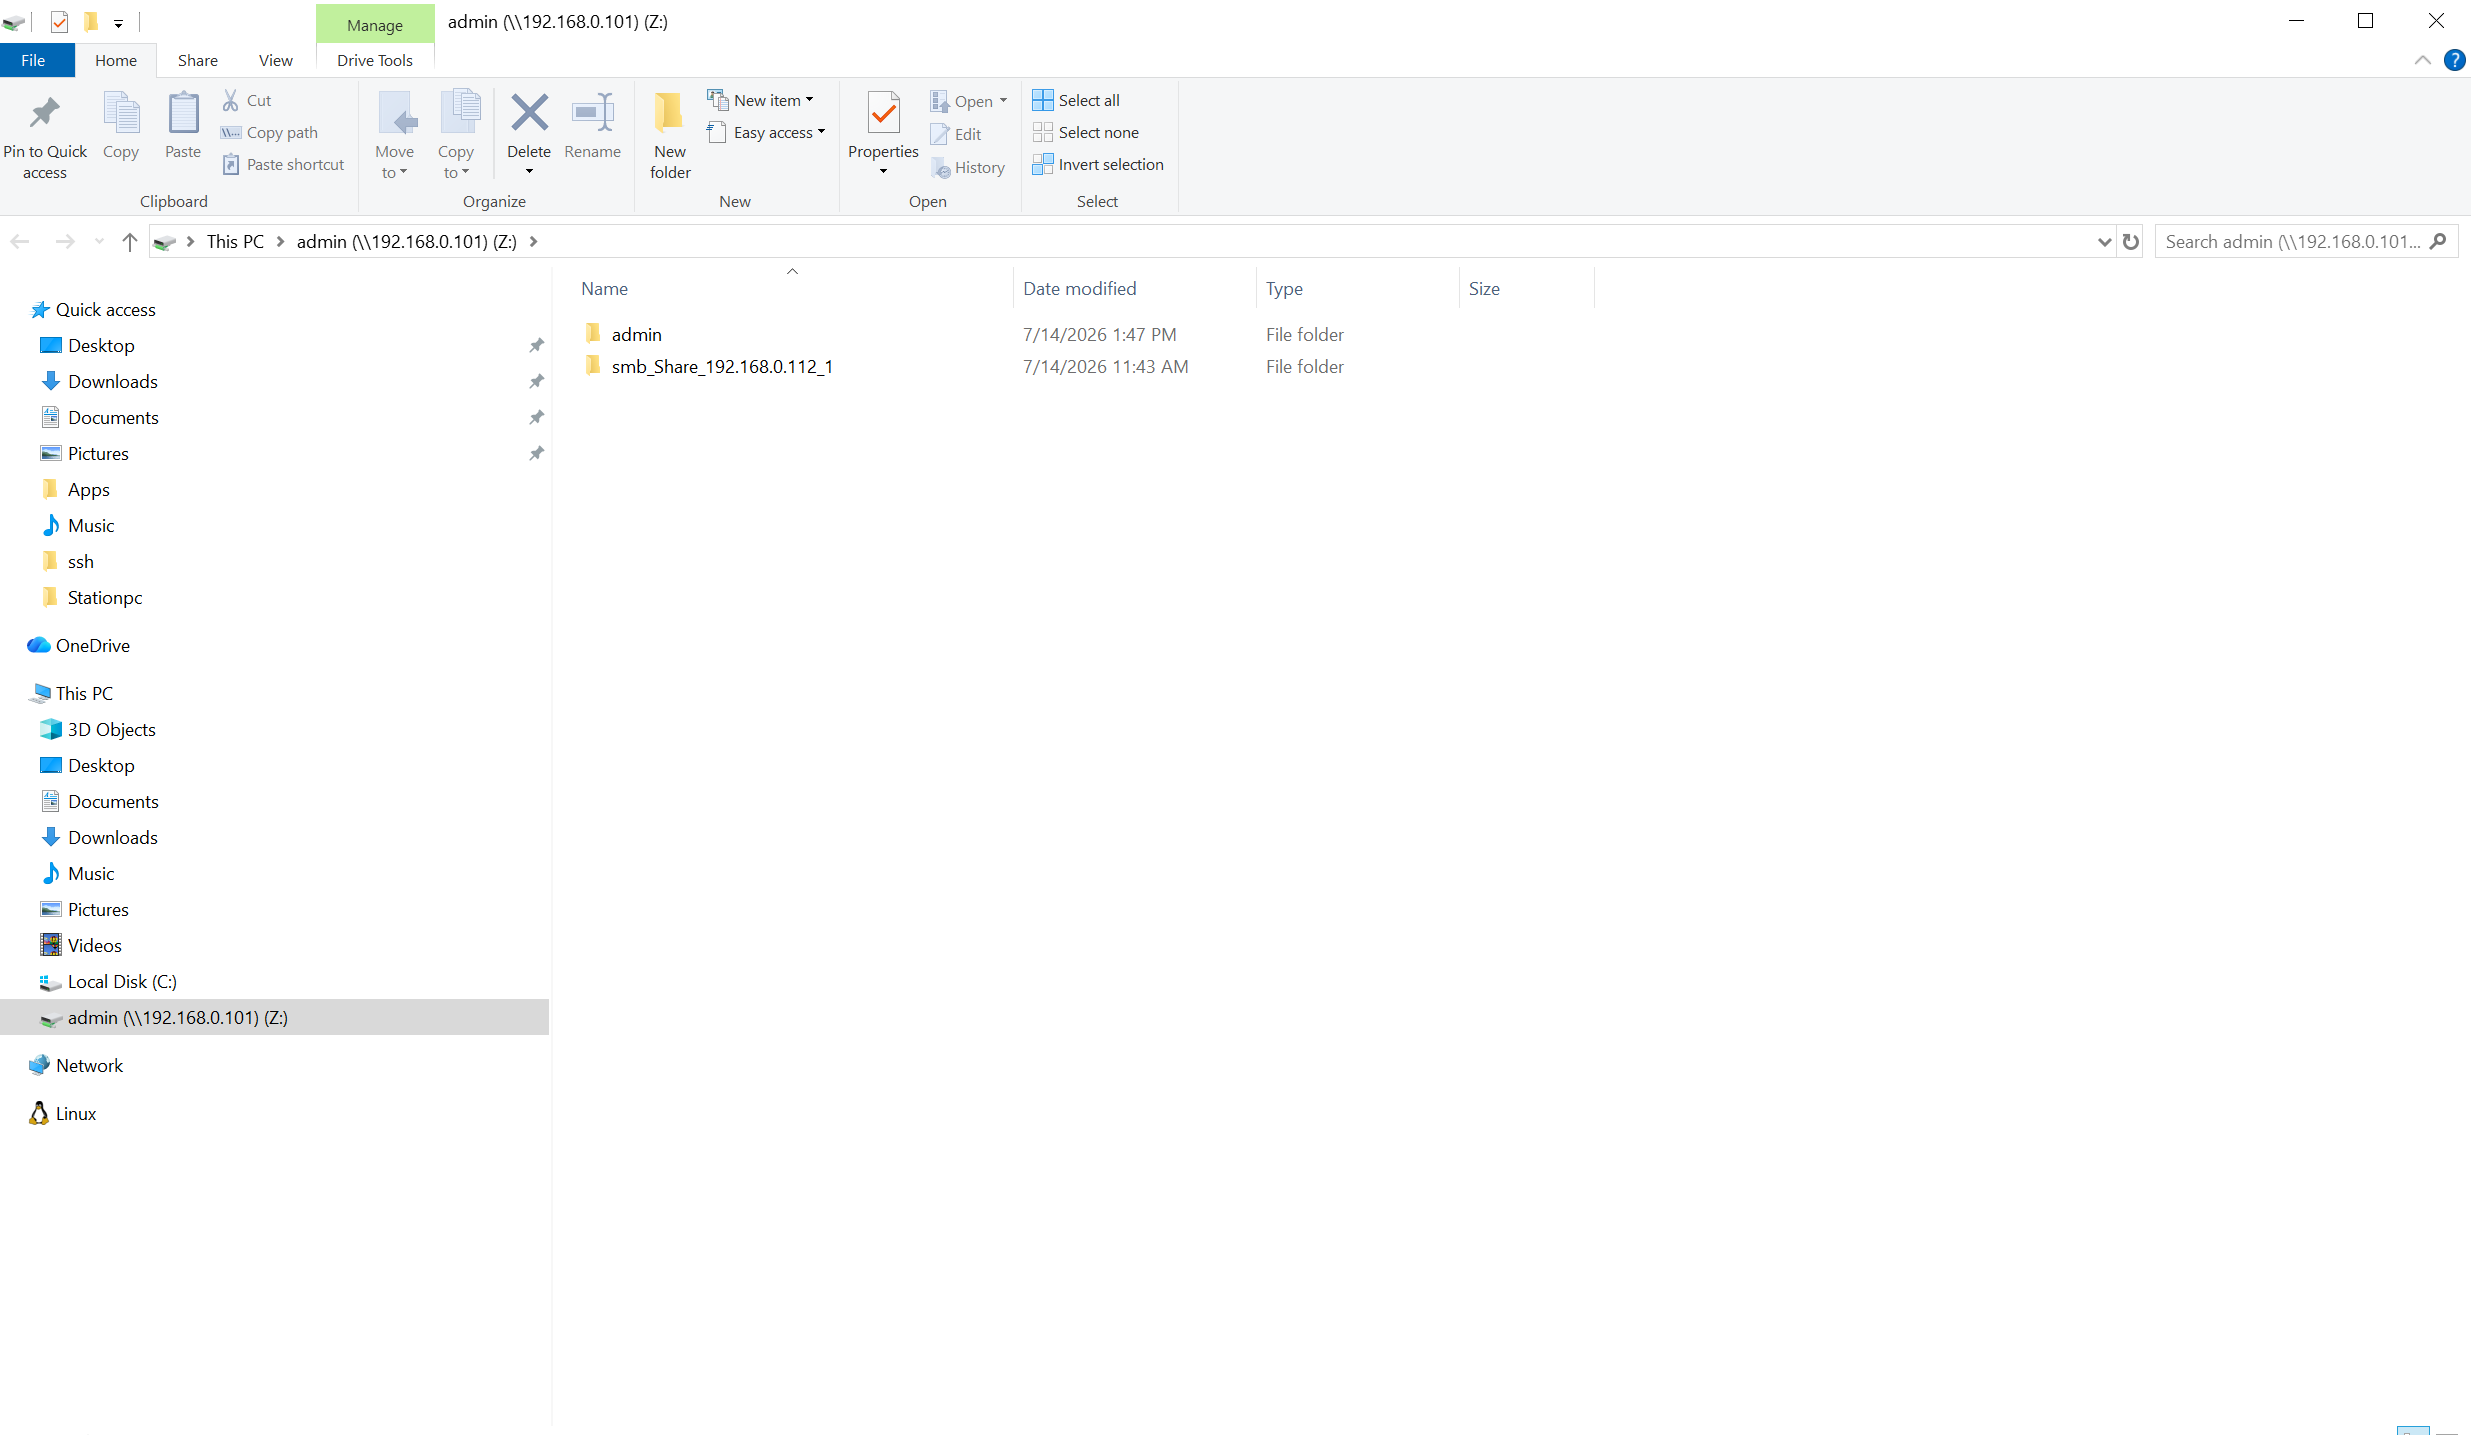
- Now you can browse and manage your NAS files directly in File Explorer, just like a local folder.
¶ Method 2
- Open File Explorer.
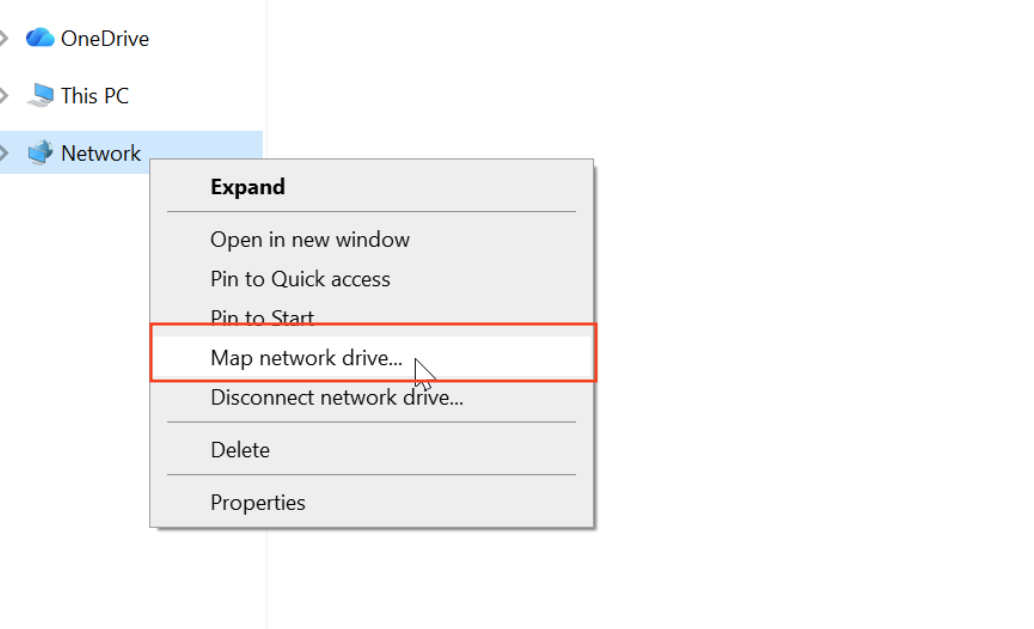
- Right-click Network and select Map network drive.
- Enter
\\NAS_IP_Address\Admin_Name, then click Finish.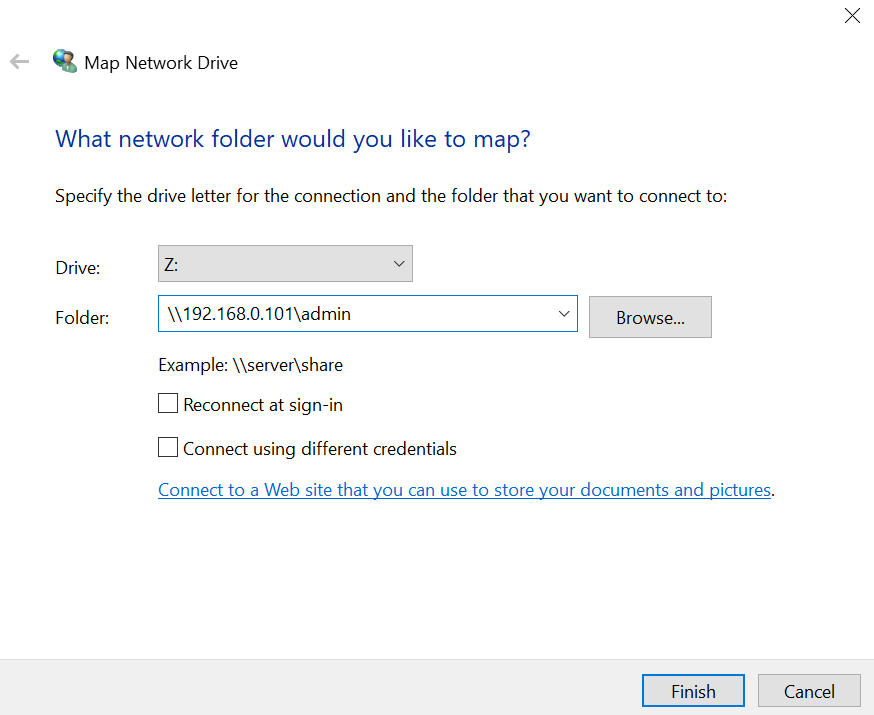
- Enter your username and password, then click OK.
- Now you can browse and manage your NAS files directly in File Explorer, just like a local folder.
¶ Accessing on iOS
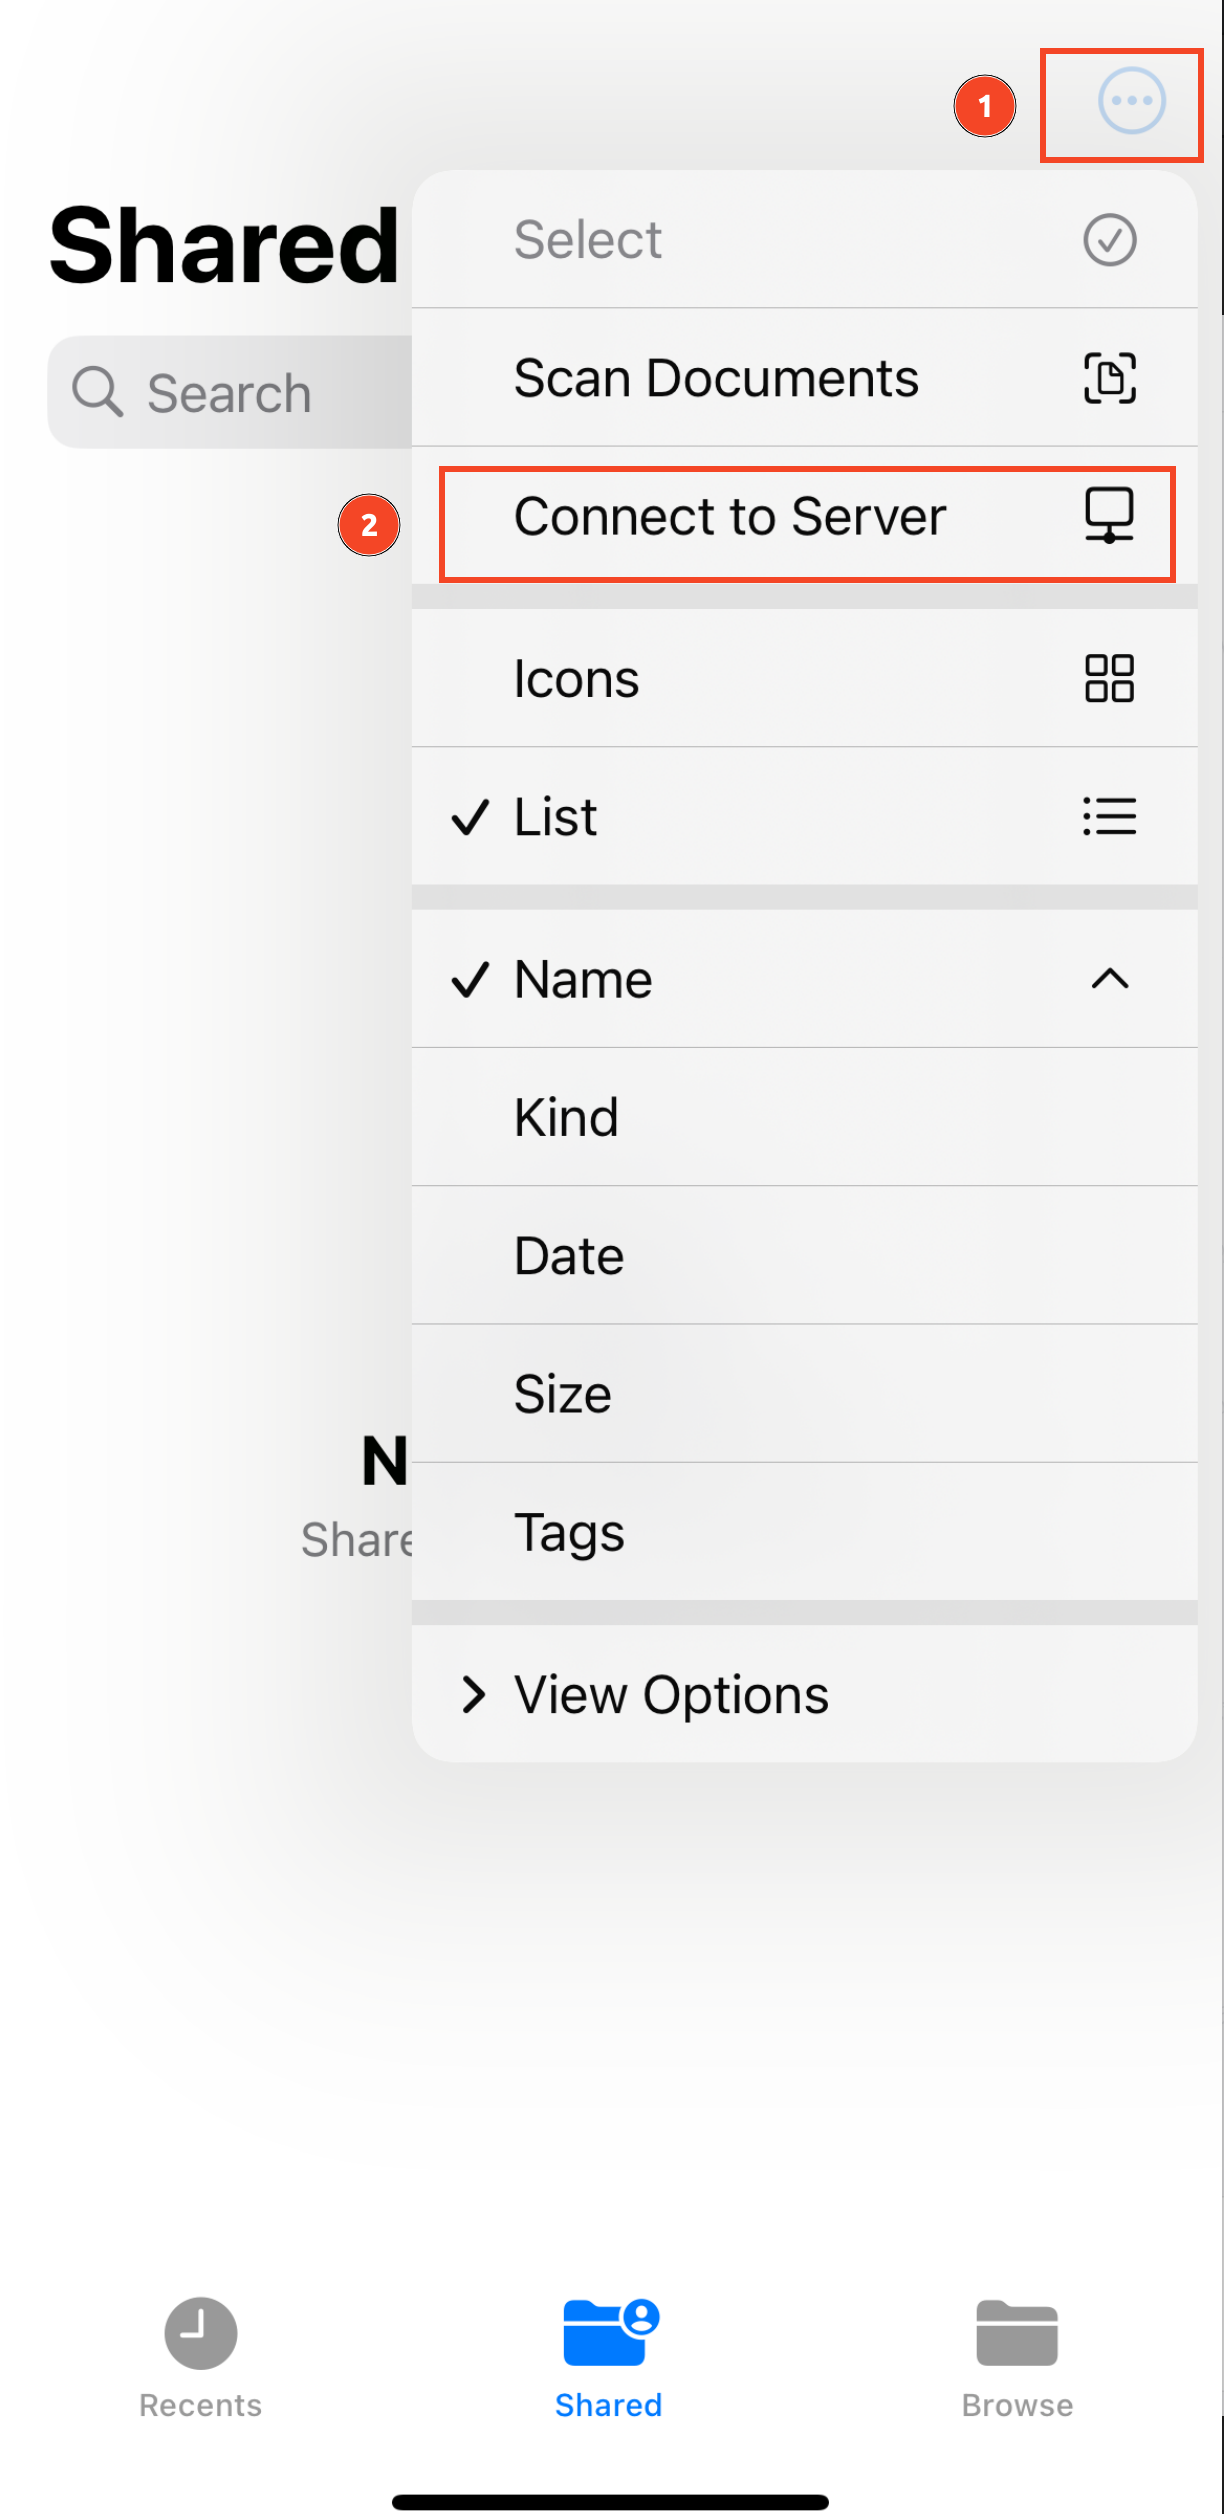
- Open the Files app.
- Tap the “...” icon in the upper right corner and select Connect to Server.
- Enter
smb://NAS_IP_Addressand tap Connect.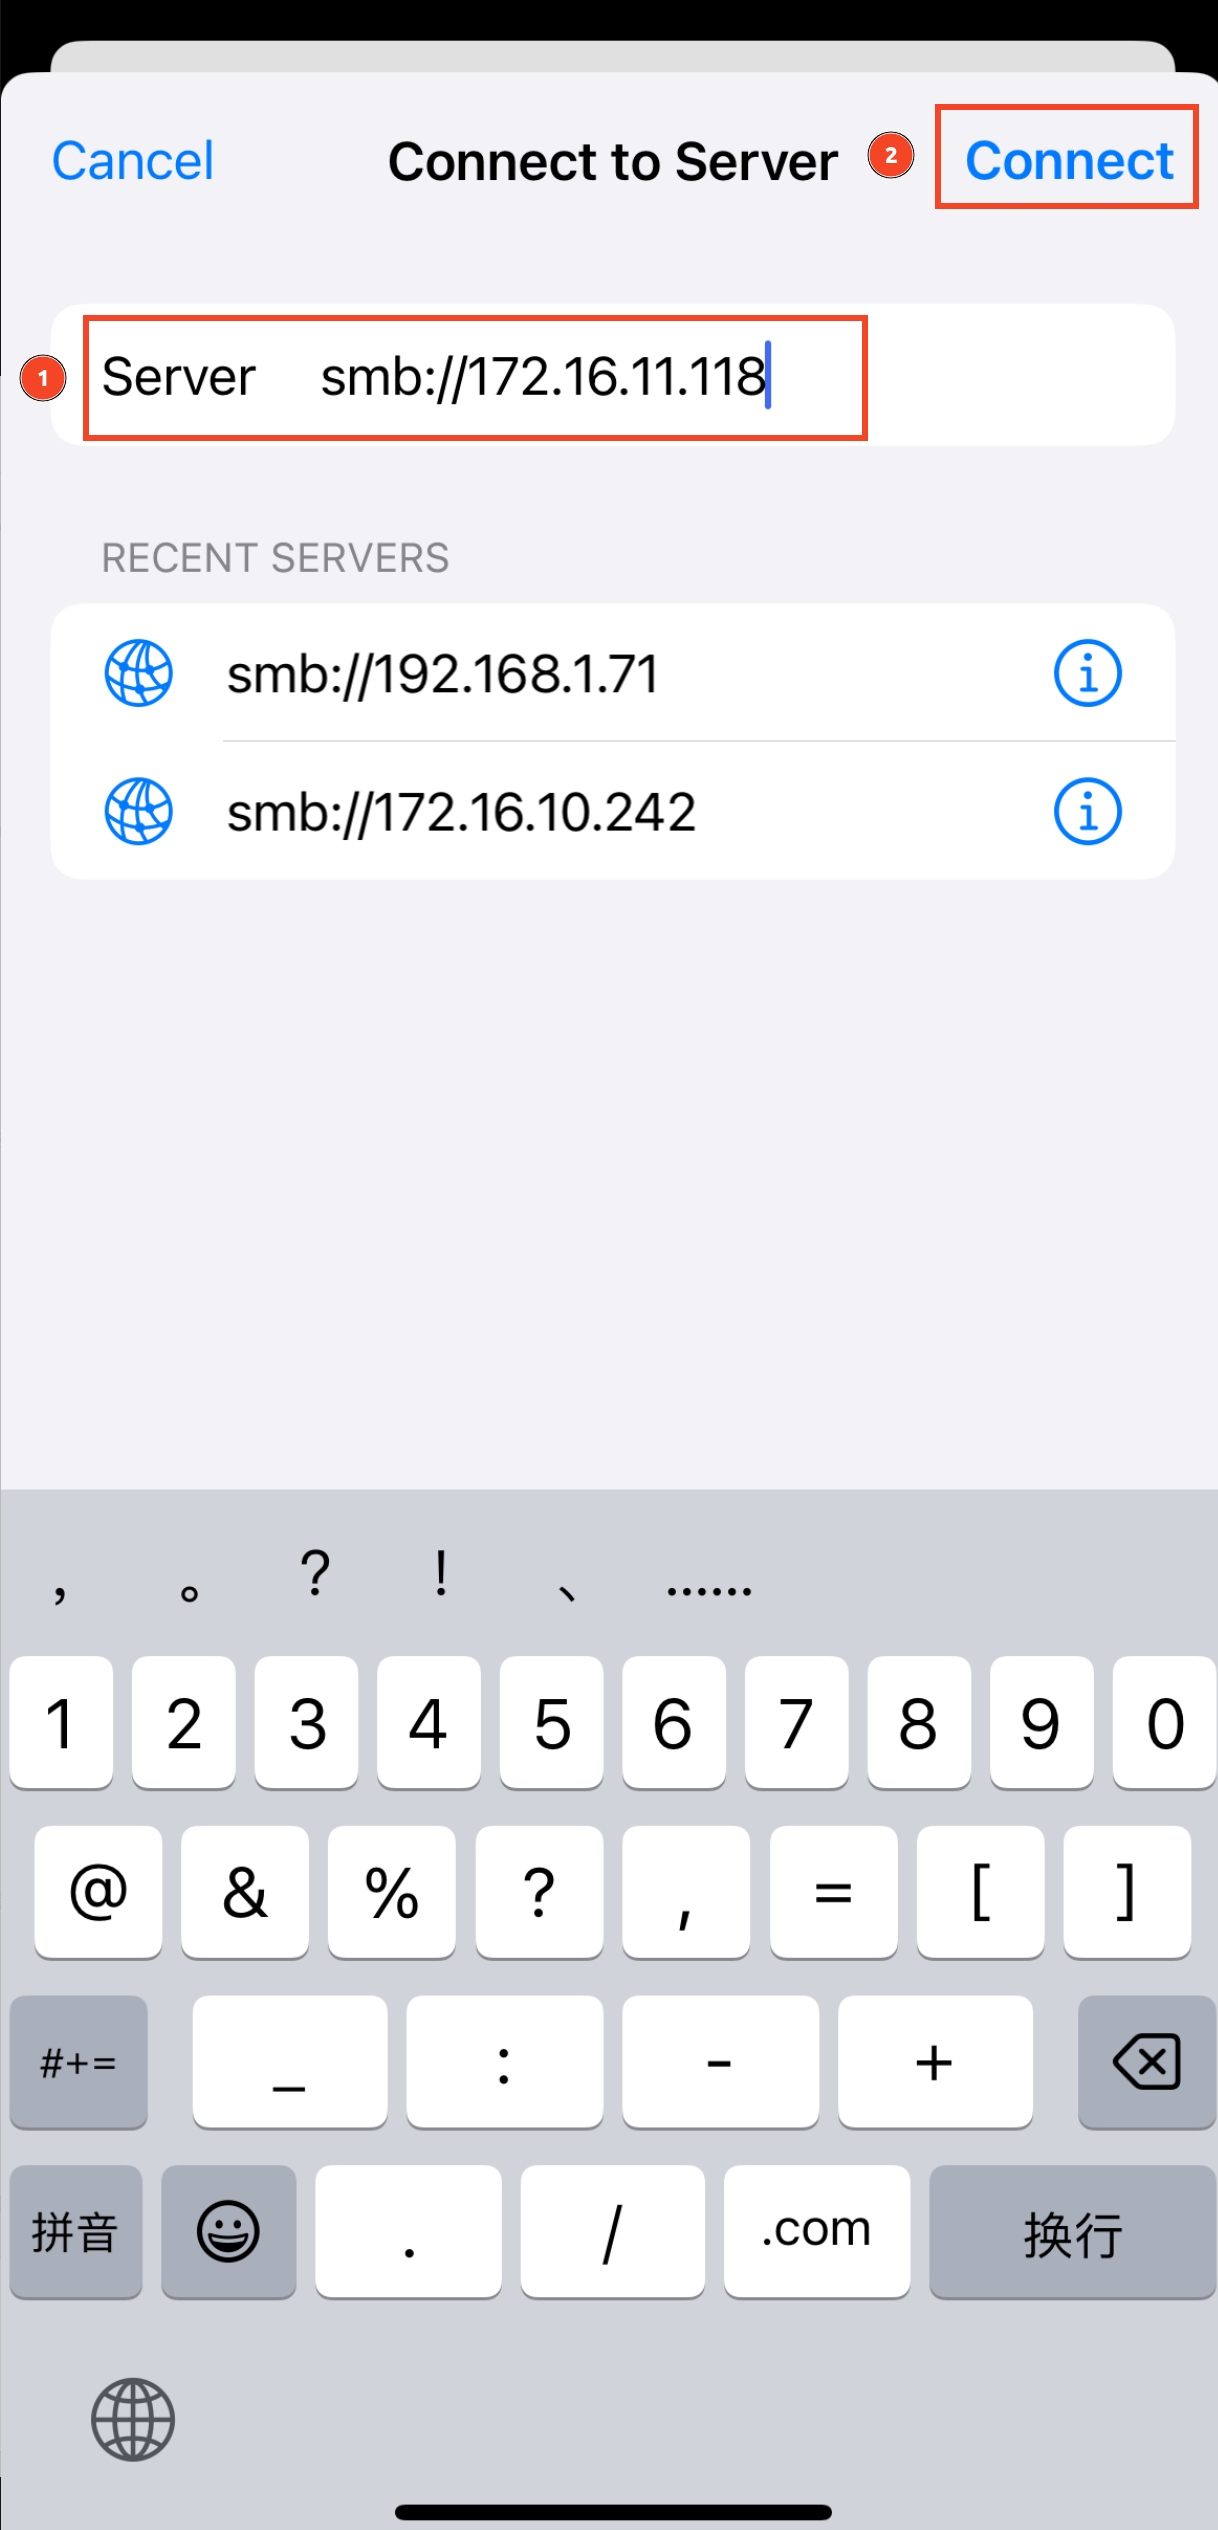
- Enter your username and password, then tap Next.
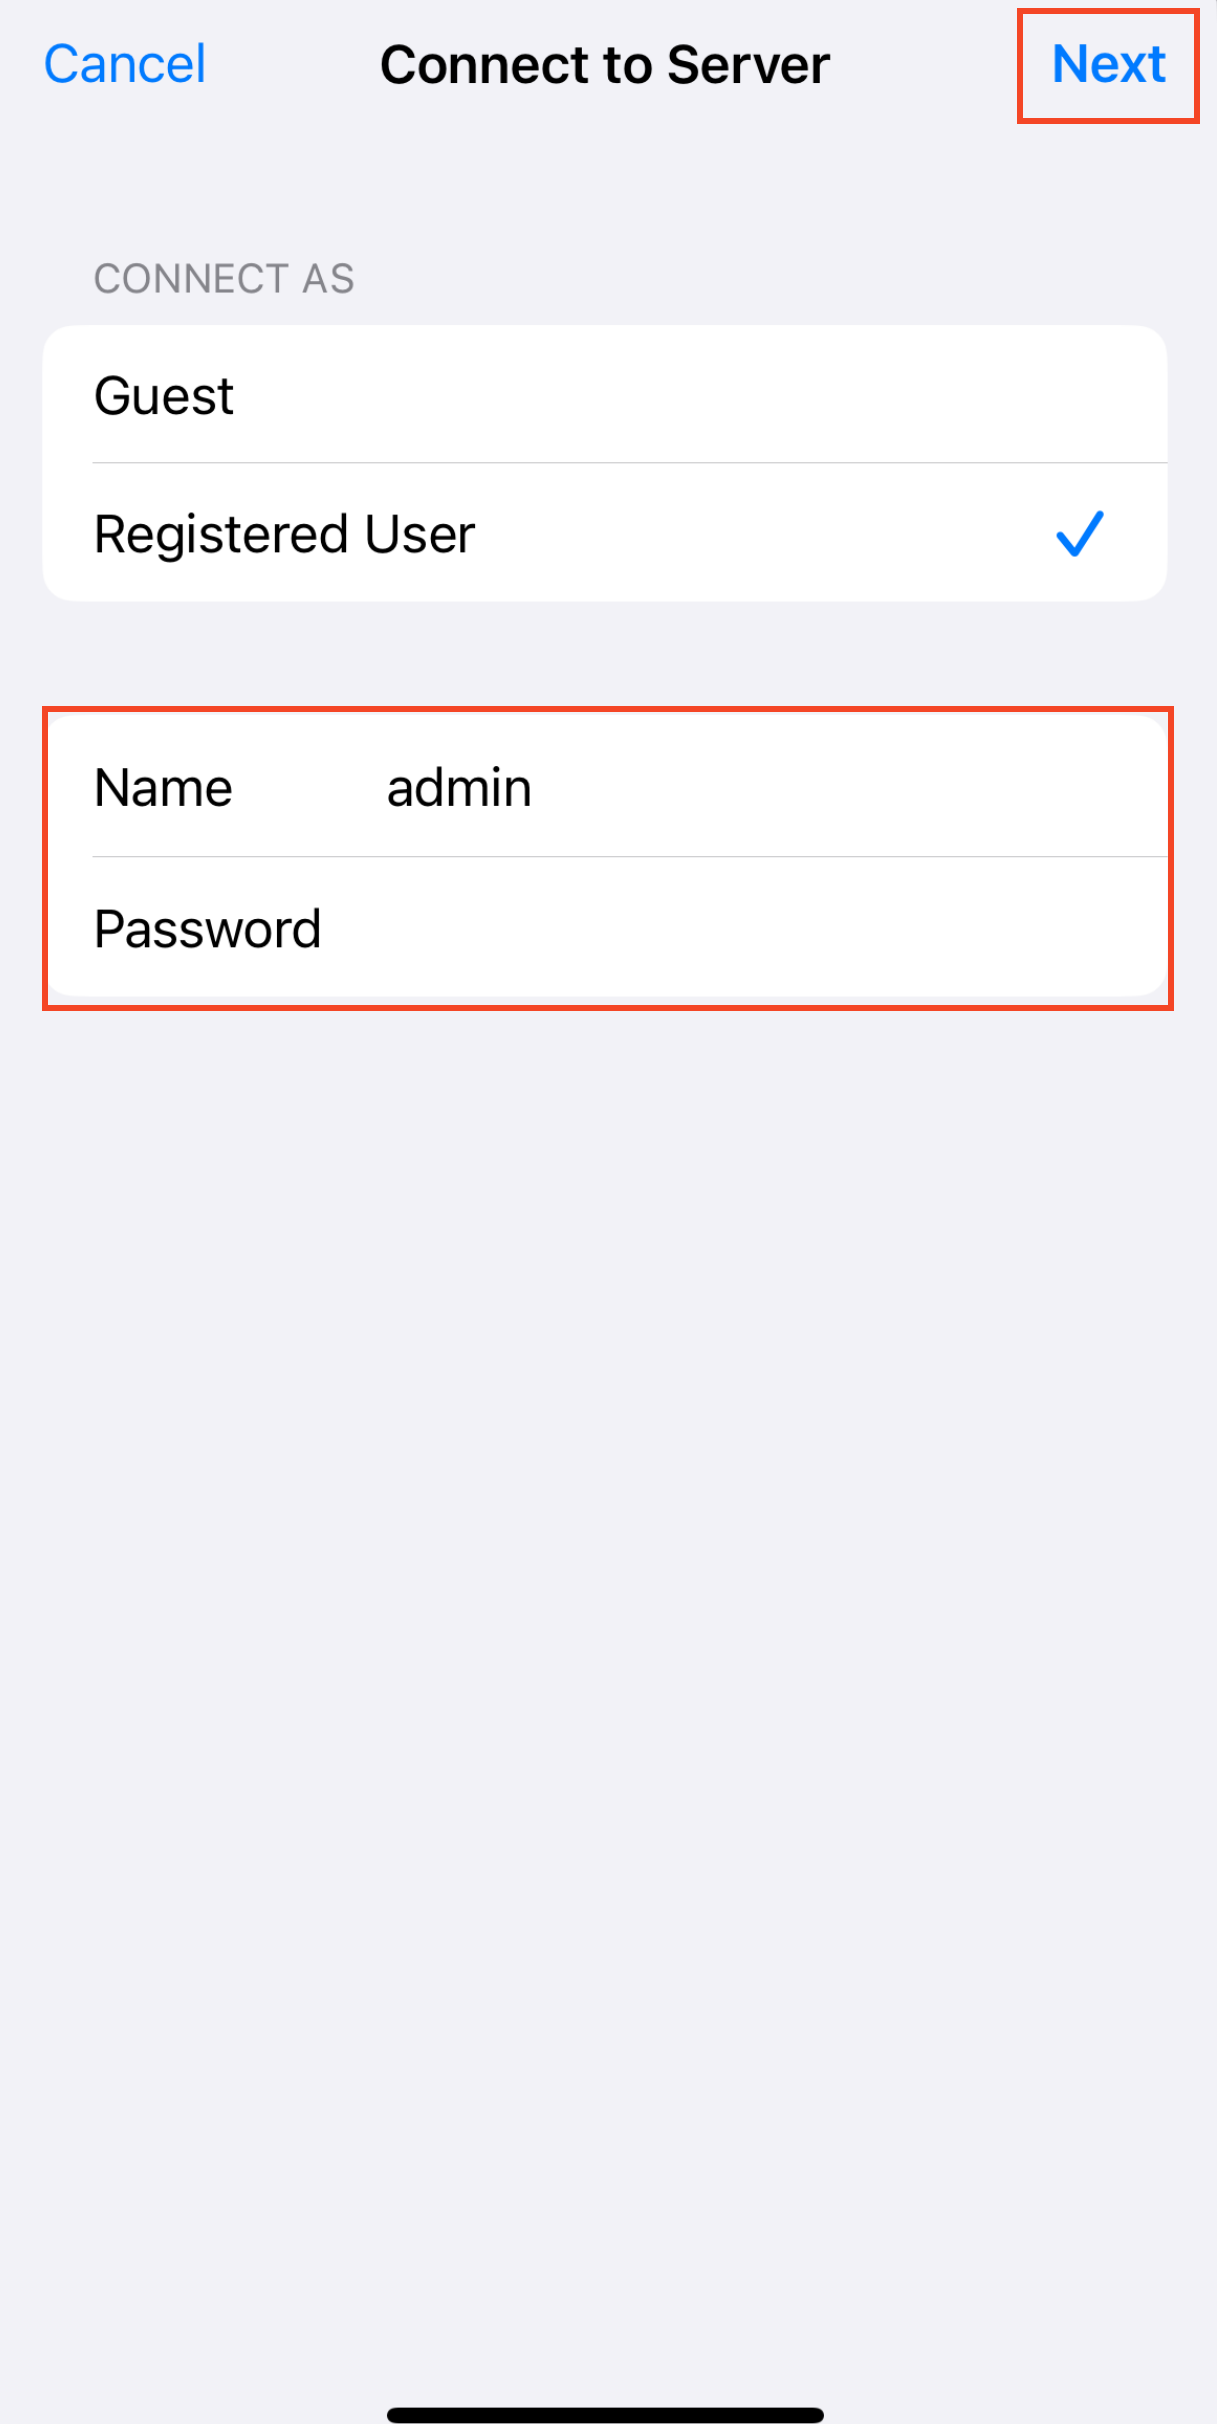
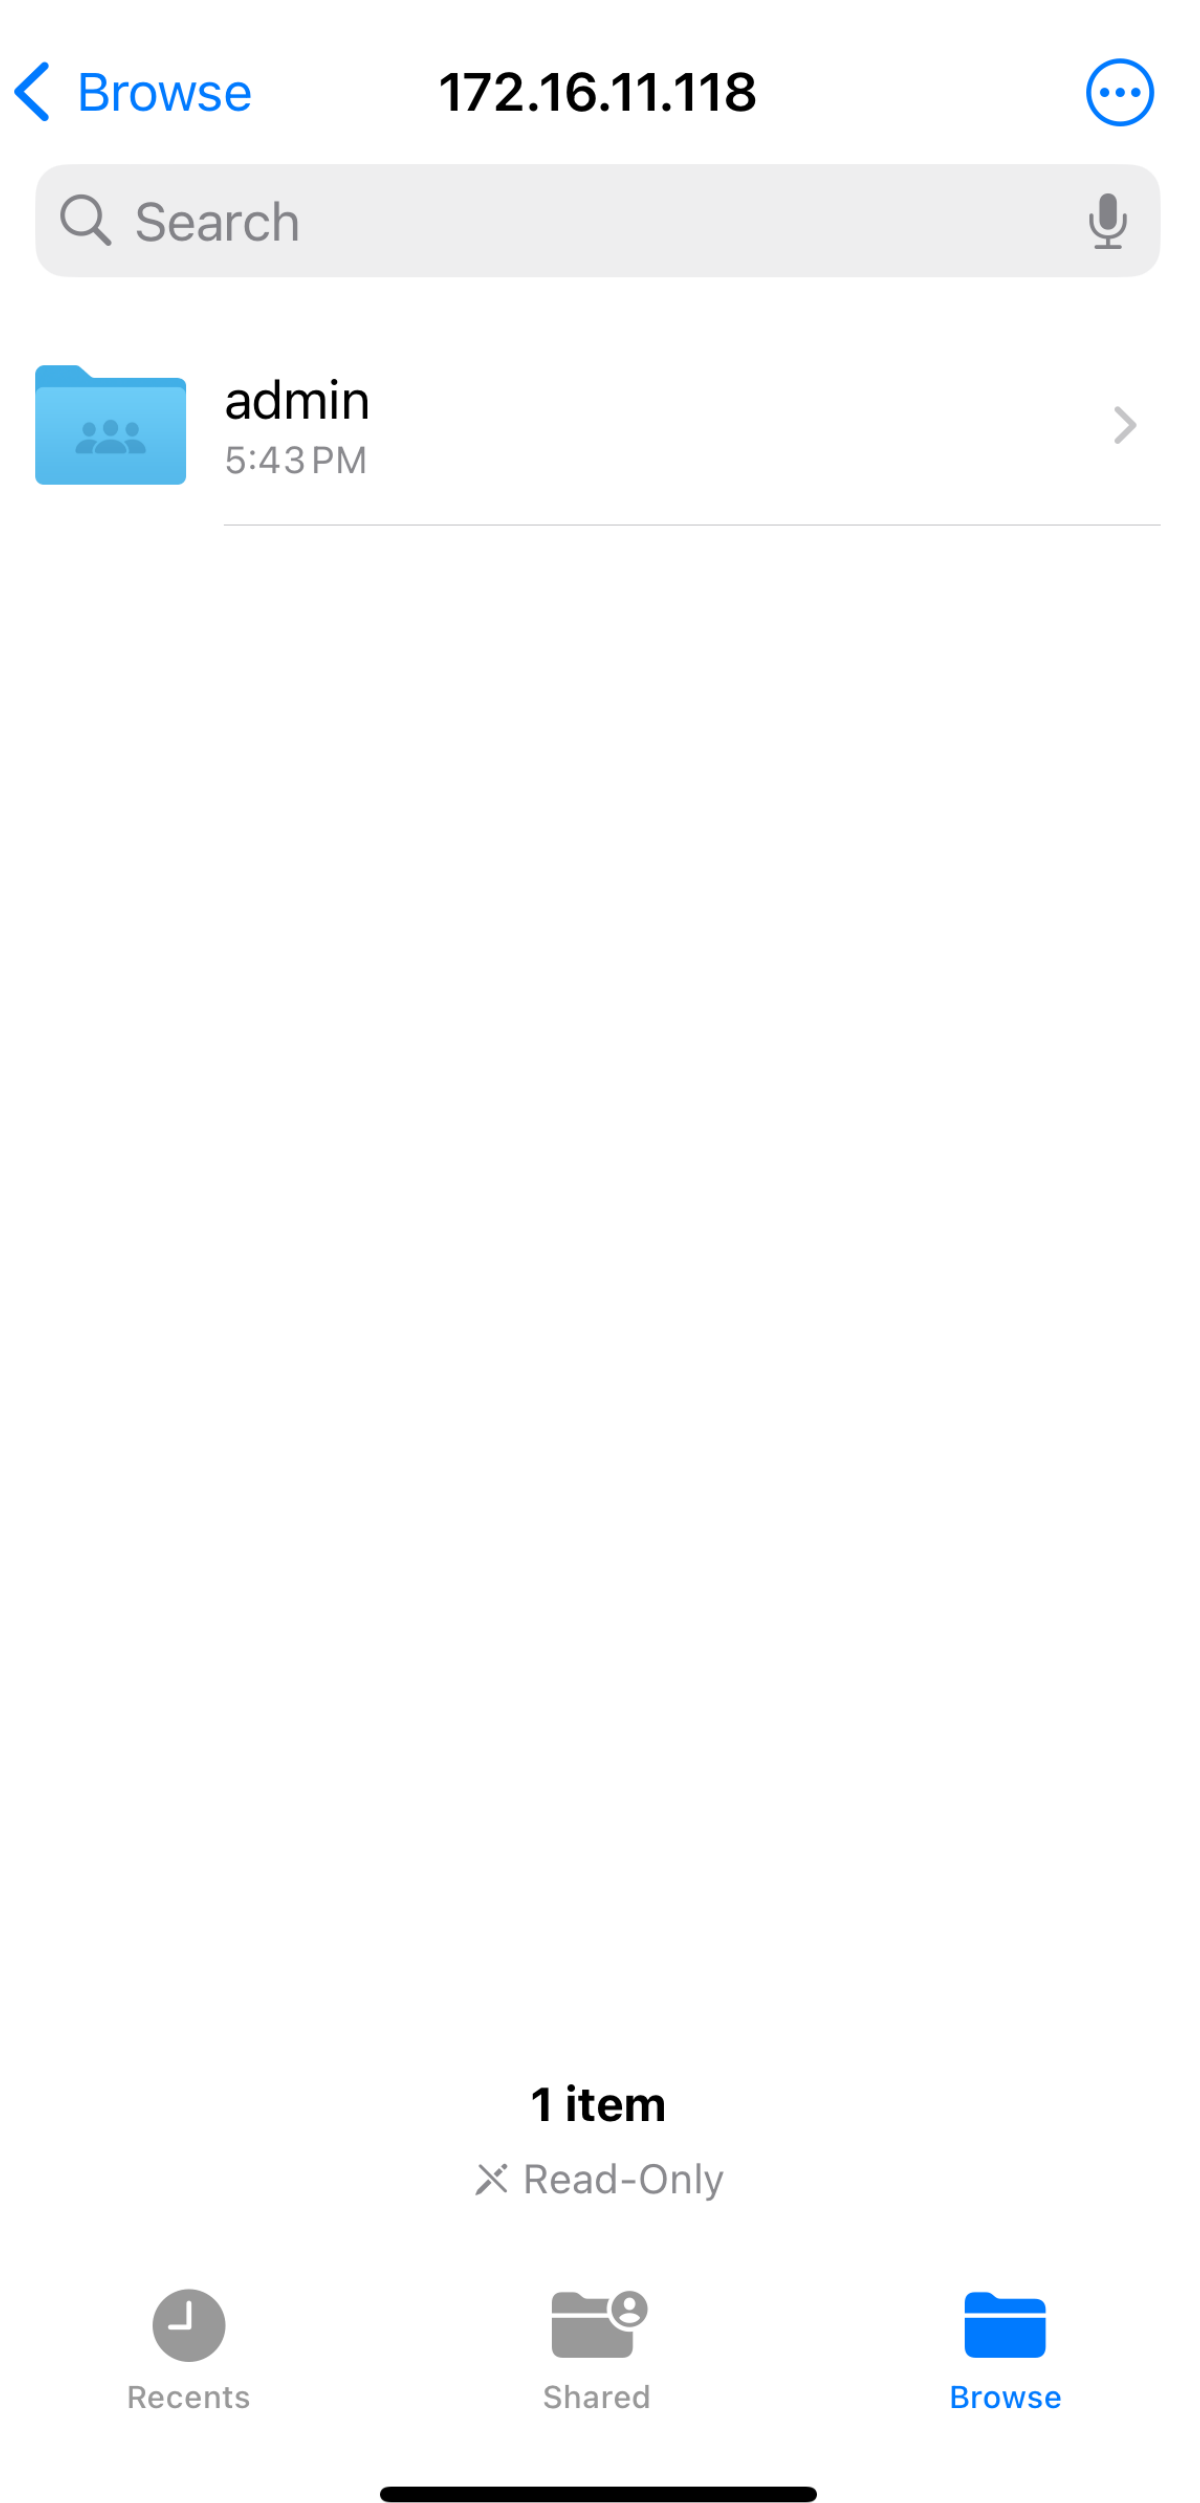
- You can now browse and manage NAS files directly in the Files app, just like local folders.
¶ Accessing on macOS
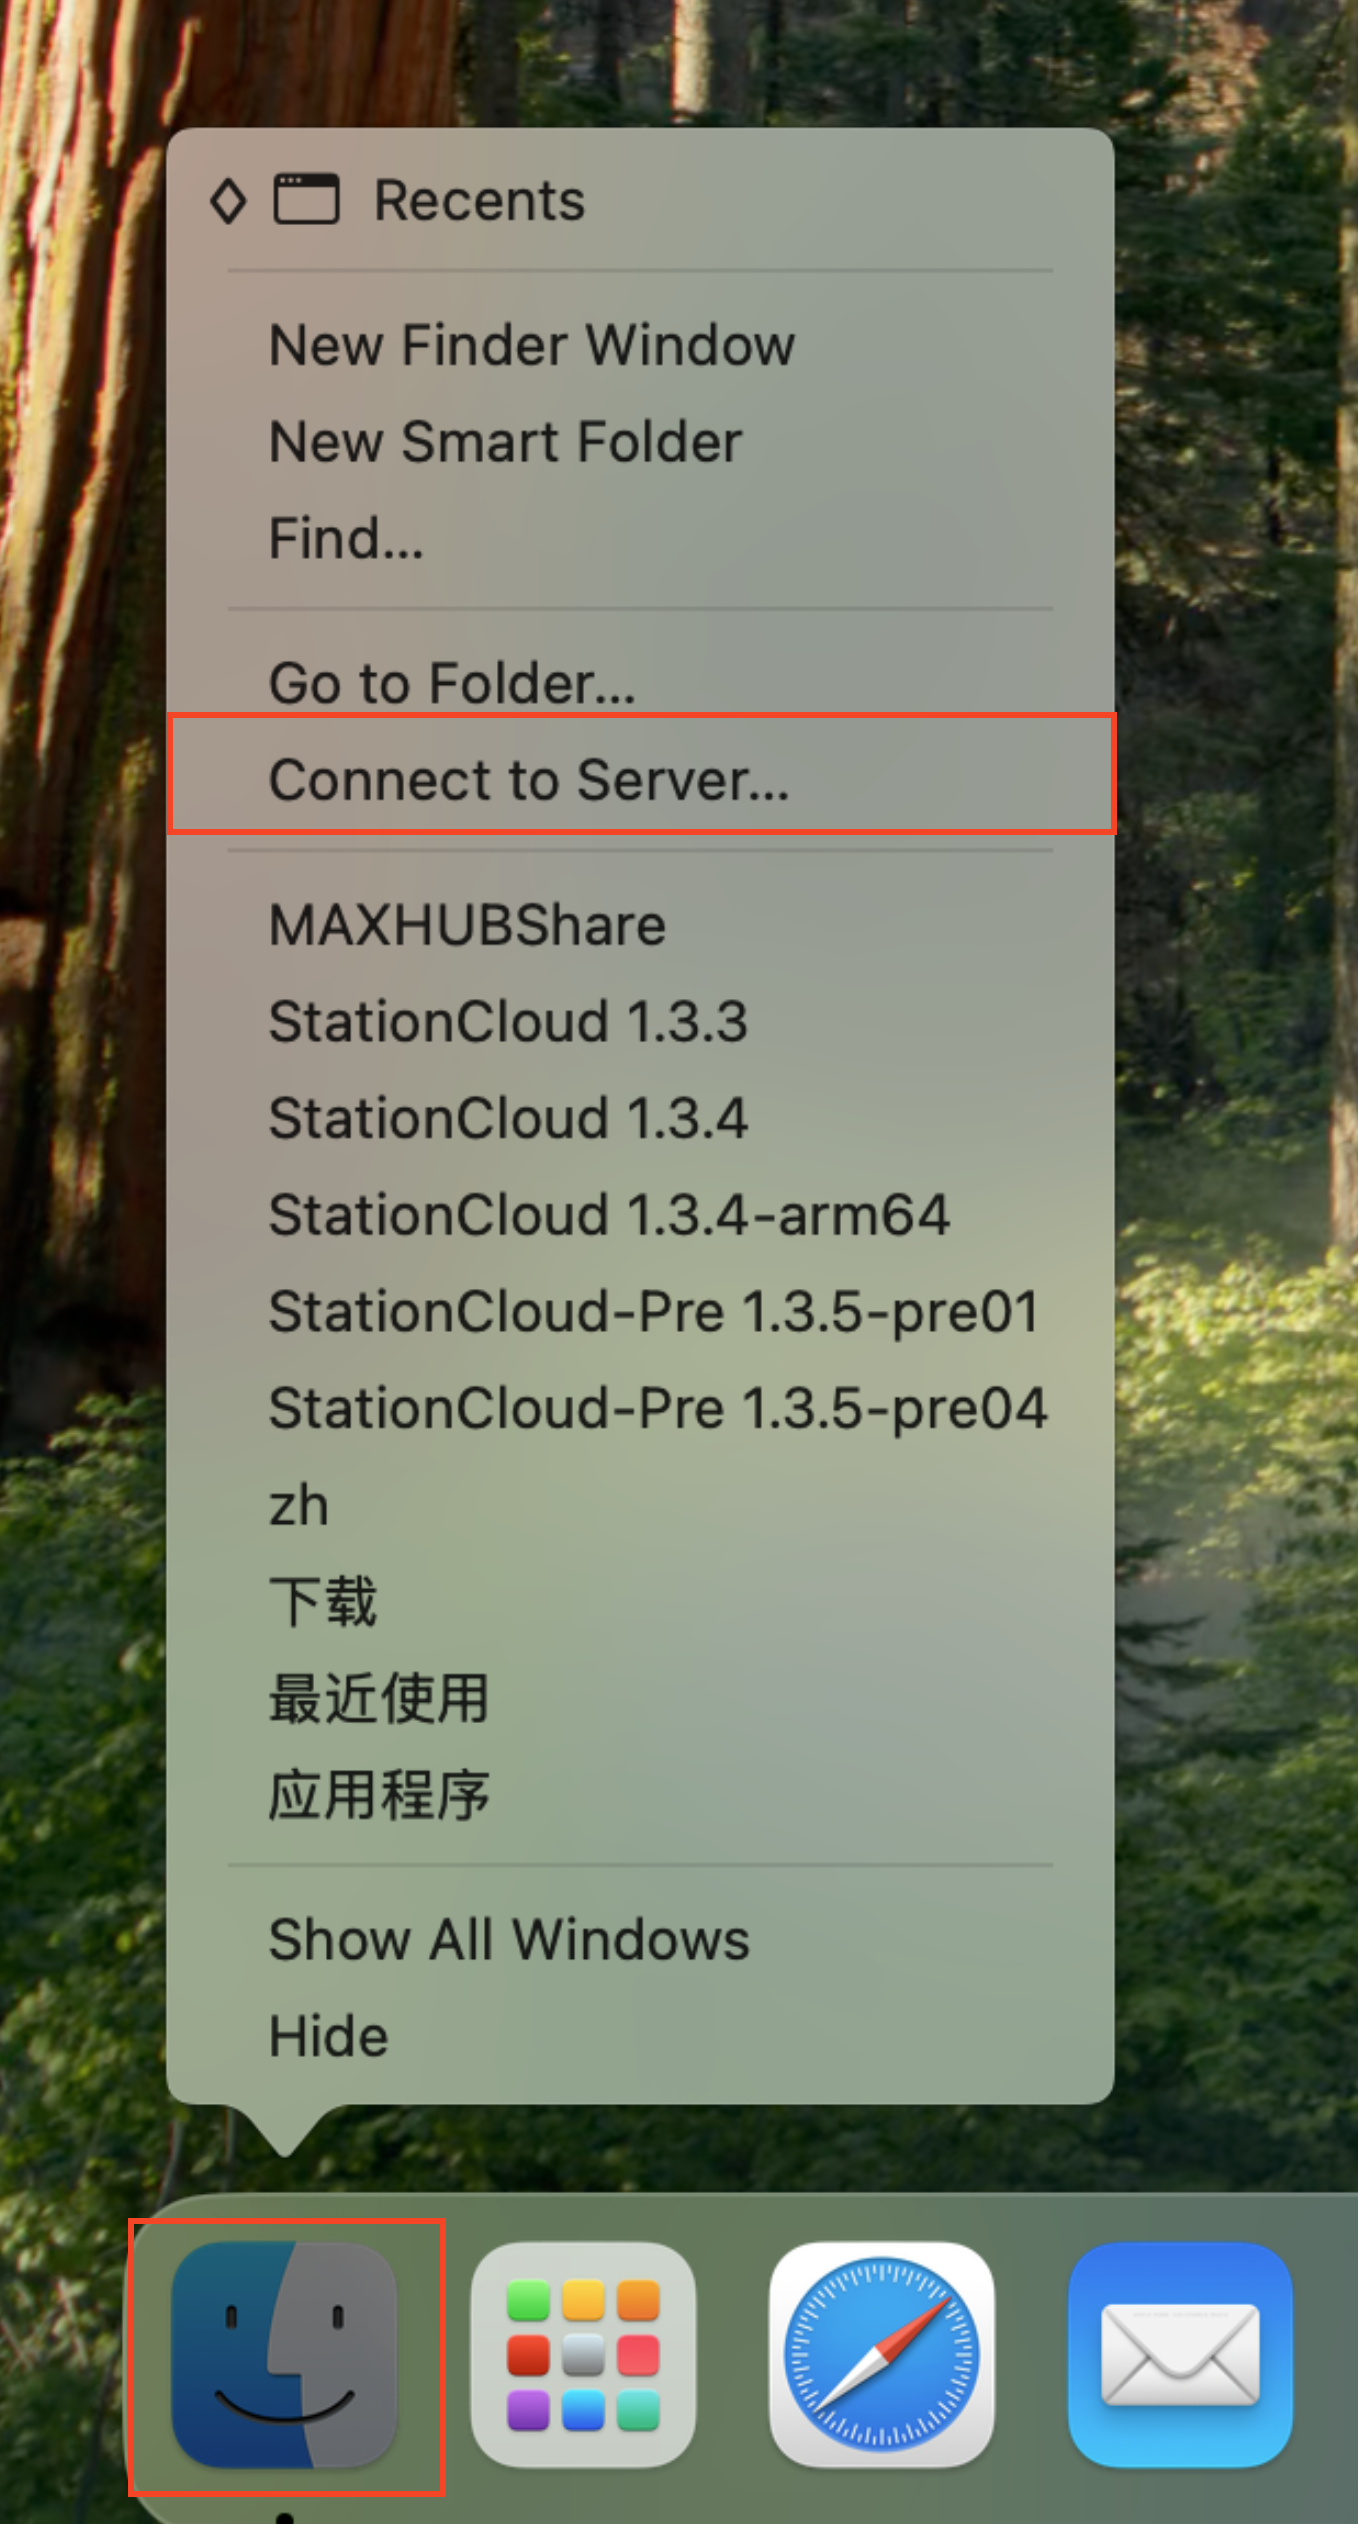
- Open Finder, then go to the menu bar and select Go → Connect to Server.
- In the server address field, enter:
smb://NAS_IP_Address, then click Connect.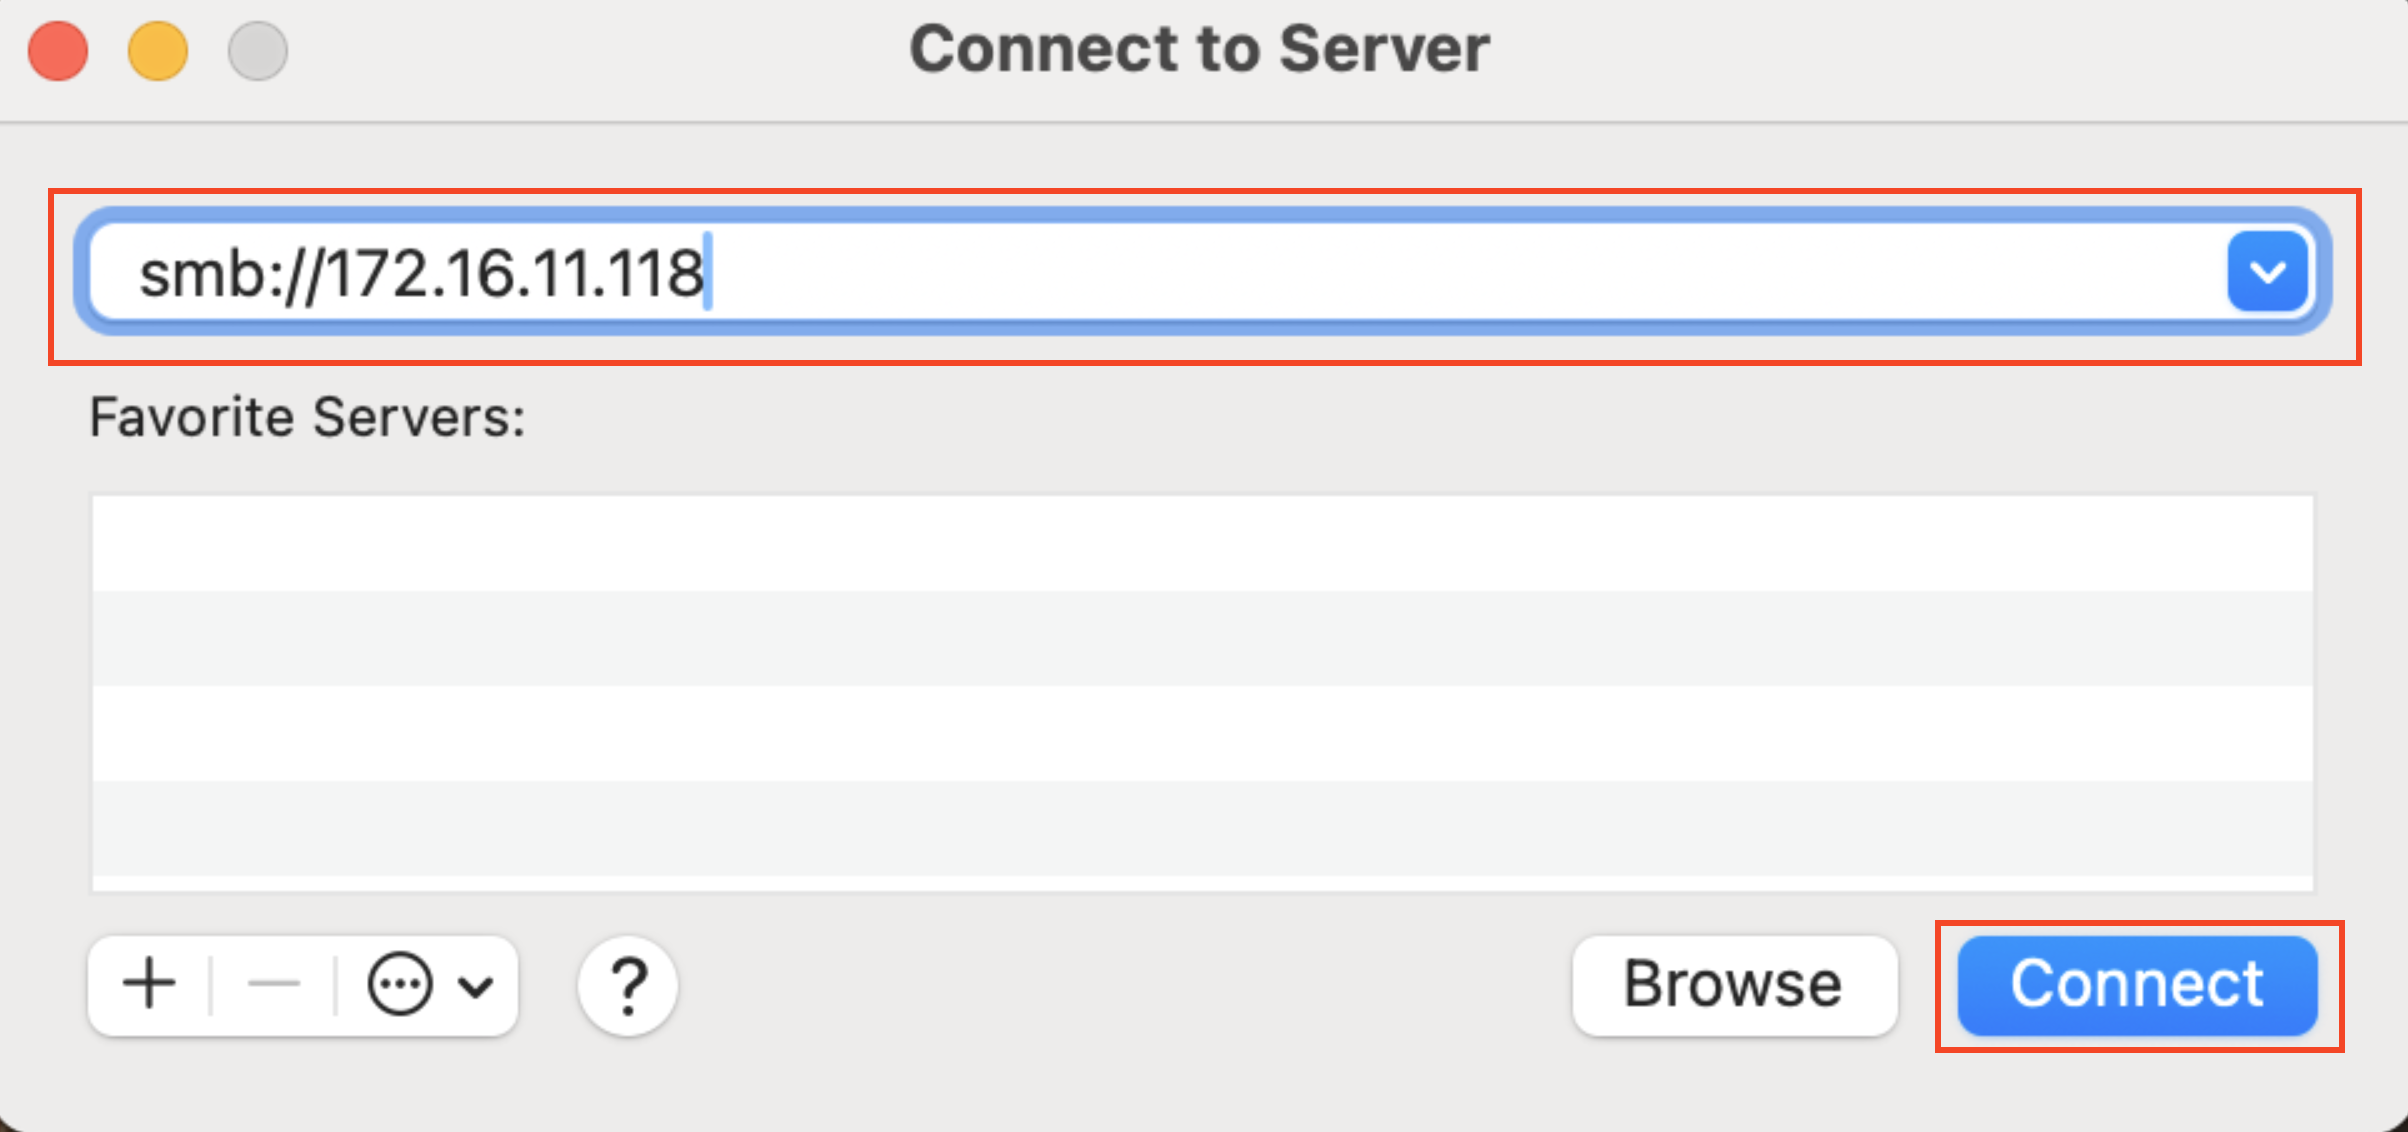
- Enter your username and password, then click Connect.
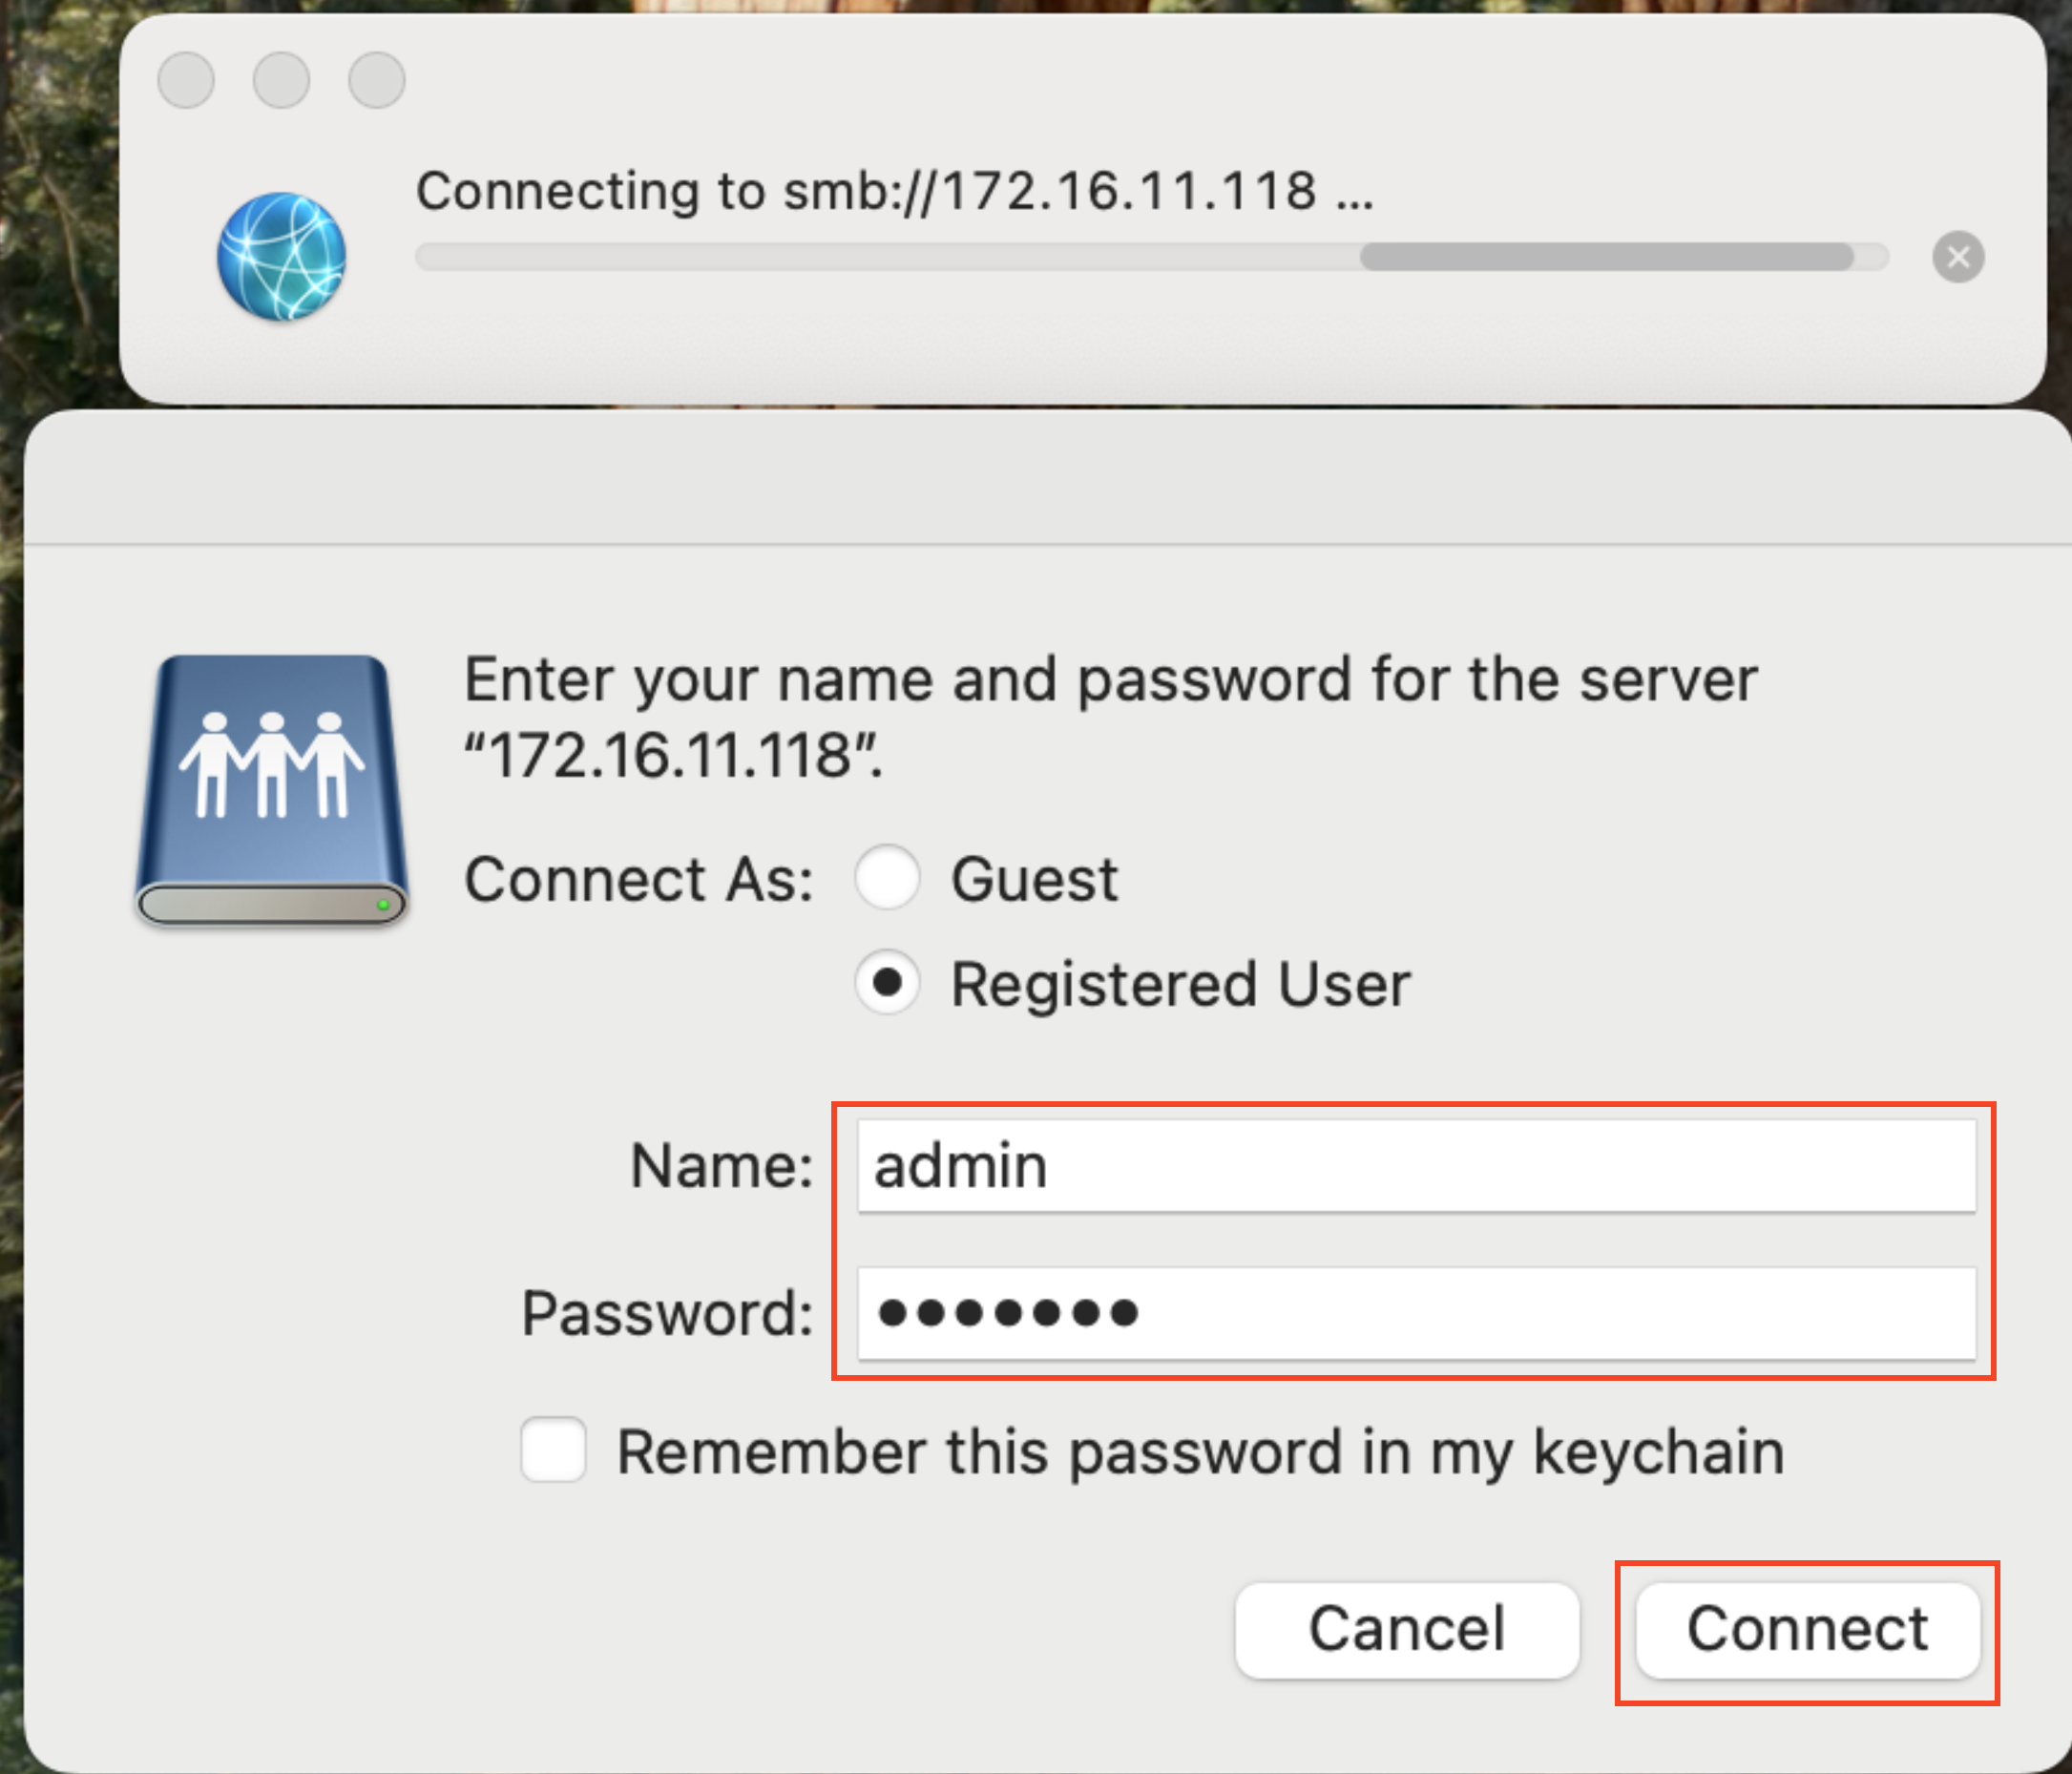
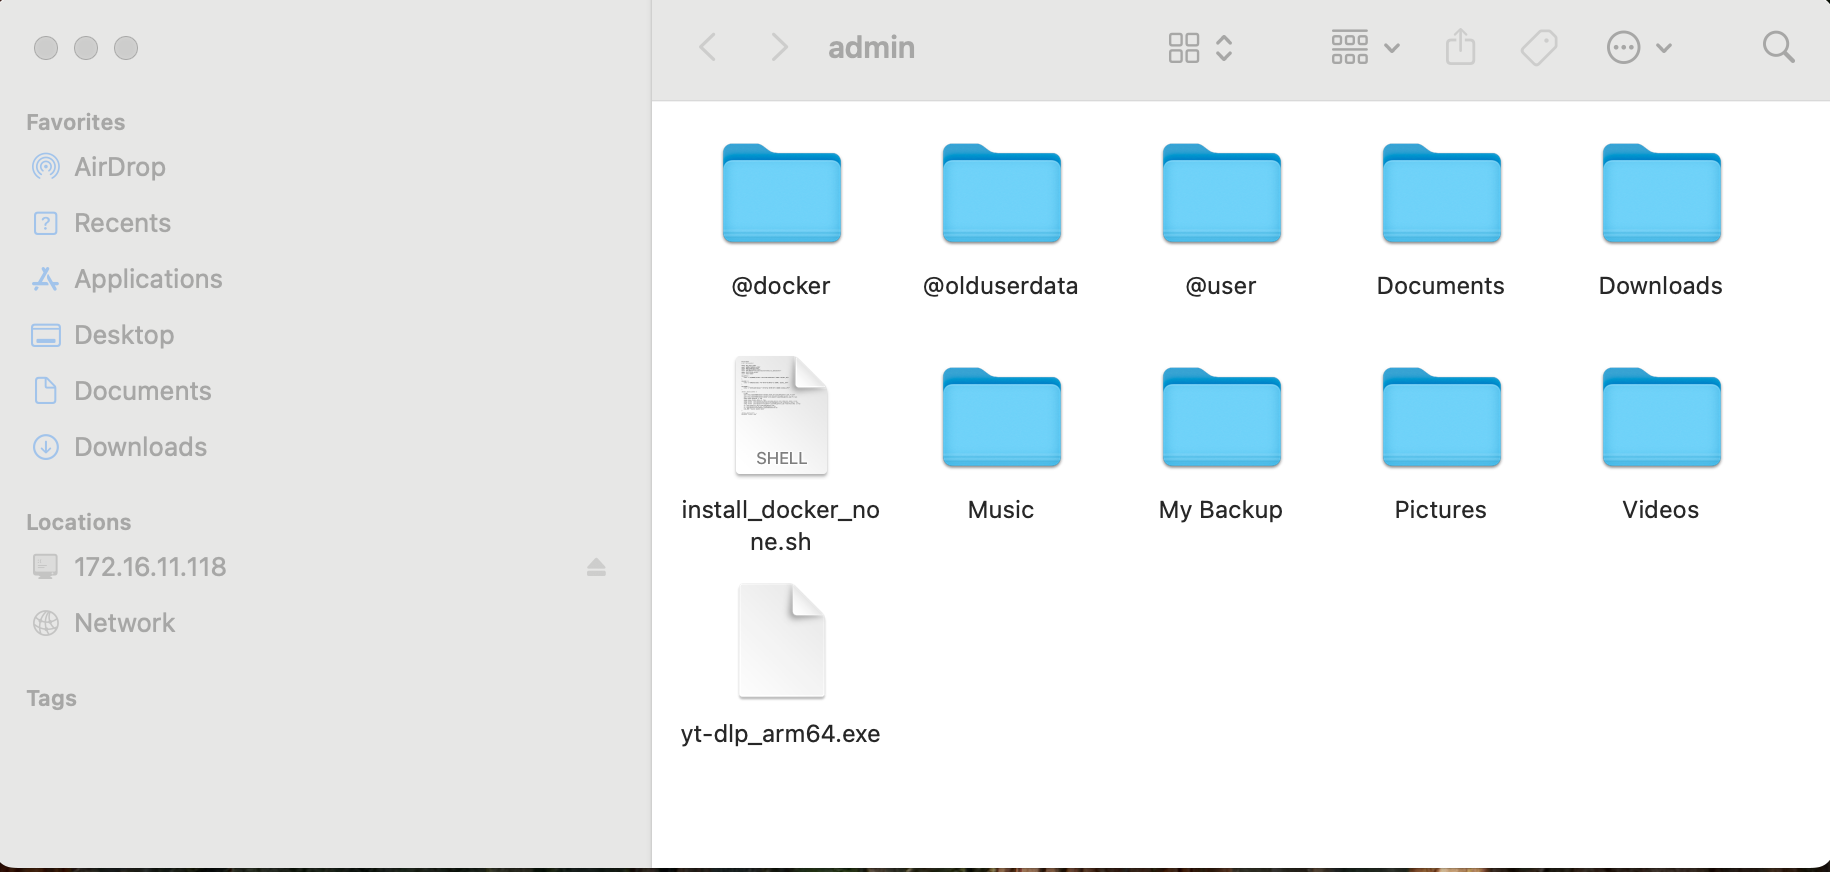
- You can now browse and manage NAS files in Finder just like any local folder.
¶ Accessing on Linux
Use cifs-utils to mount the Samba share:
# Install cifs-utils
sudo apt-get install cifs-utils

# Create a mount point
# Example: using /mnt/samba_share as the mount directory
sudo mkdir -p /mnt/samba_share

# Mount the Samba shared directory
sudo mount -t cifs //NAS_IP_Address/shared_folder /mnt/samba_share -o username=USERNAME,password=PASSWORD

# Once mounted, you can access and manage NAS files under /mnt/samba_share
¶ Accessing on Other Clients
- Connection information
- IP: NAS_IP_Address
- Port: 445 by default
- Account: NAS device login username
- Password: NAS device login password
- Mount directory description
- Main SSD:
/login_username- Example 1: All directories. If the current user is test, the mount directory is
/test - Example 2: A specified directory. If the current user is test, the mount directory is
/test/Pictures - Other: Multiple users are supported, and each user corresponds to one mount directory
- Example 1: All directories. If the current user is test, the mount directory is
- External storage:
/external_storage_name- Example 1: All directories. If the external SD card name is SD 60GB BA26, the mount directory is
/SD_60GB_BA26 - Example 2: A specified directory. If the external SD card name is SD 60GB BA26, the mount directory is
/SD_60GB_BA26/Pictures
- Example 1: All directories. If the external SD card name is SD 60GB BA26, the mount directory is
- ⚠️ Note:
- Some clients cannot use only the root directory
/; specify the corresponding mount directory above - After upgrading from firmware <= 3.1.0.16 to the latest firmware, the mount directory is adjusted. Use the mount method for the new version
- Some clients cannot use only the root directory
- Main SSD: