¶ How to Access PocketCloud Files via NFS?
NFS (Network File System) is a high-efficiency network file-sharing protocol widely used for file sharing, data backup and recovery, and multimedia storage and access. PocketCloud provides convenient, secure, and high-performance NFS services, supporting flexible configuration to meet different user needs.
Key features include:
File Sharing: NFS allows users to share files and directories over a network, enabling multiple users and systems to access the same file system.
Multimedia Storage: NFS can be used to store and access multimedia files such as audio, video, and images.
Cross-Platform Compatibility: NFS supports multiple operating systems, such as Linux, Windows, and macOS, enabling cross-platform file sharing.
High Performance: NFS provides excellent performance for medium or small files, especially in sequential read scenarios.
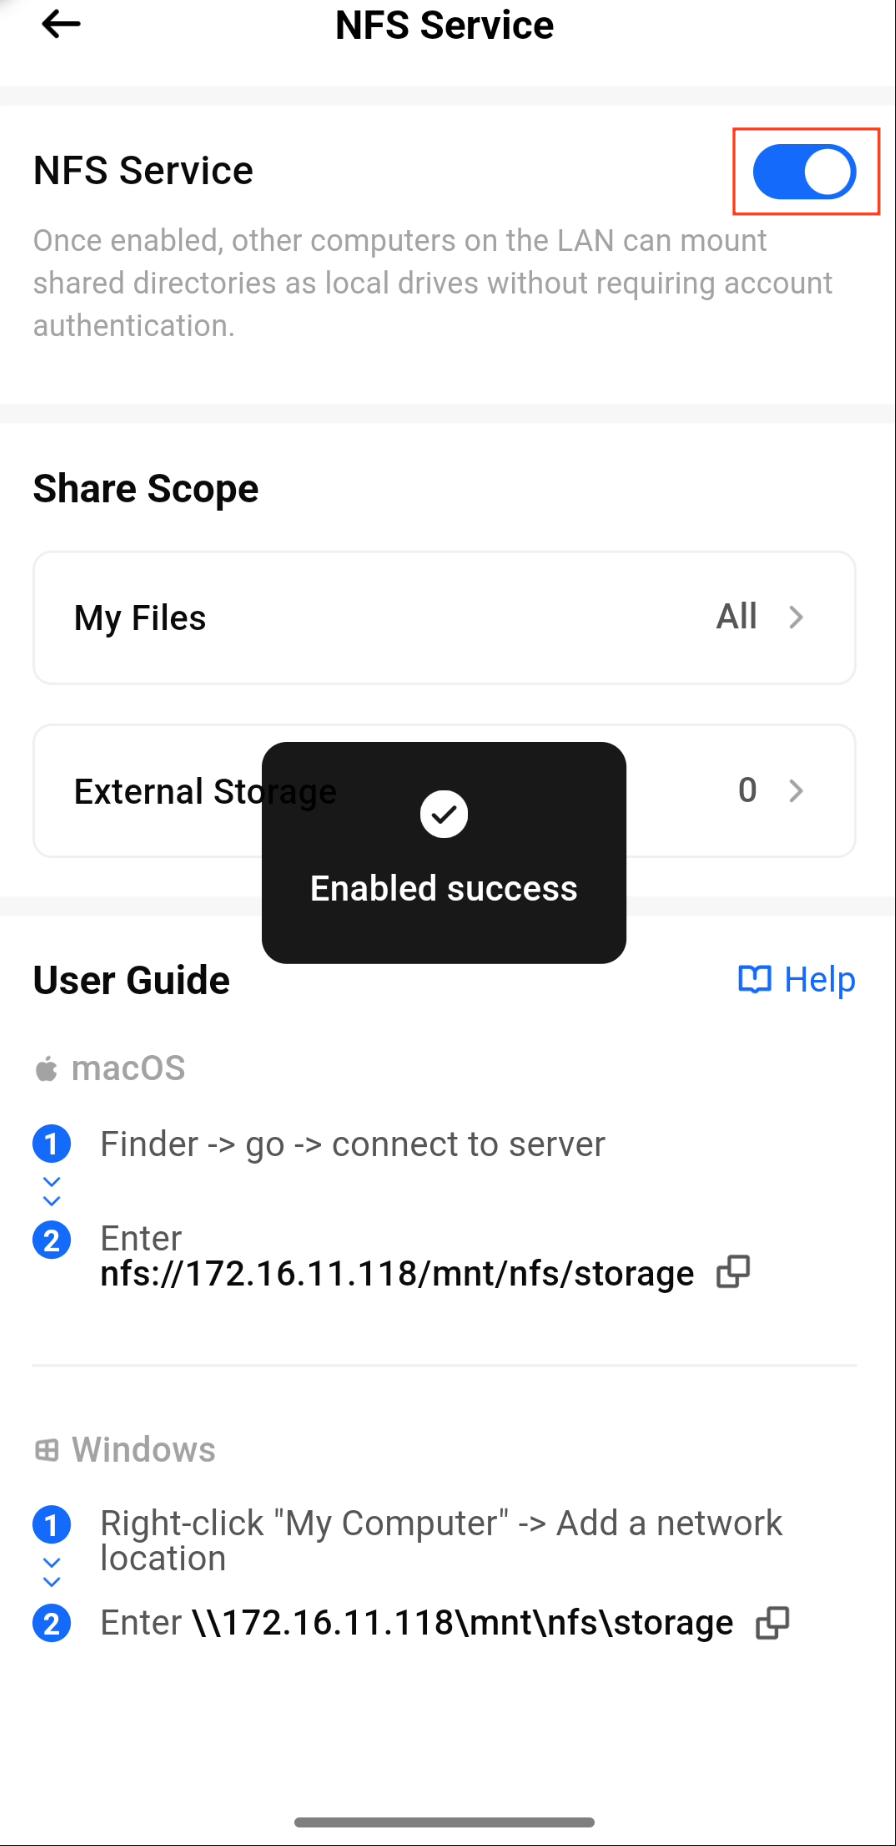
¶ Enable NFS
NFS is disabled by default and needs to be manually enabled. Please follow these steps:
- Open the File Services section in the app.
- Tap NFS Service.
- Toggle the switch to turn on the NFS service.


¶ Accessing on Windows
⚠️ The Windows Home edition does not support the NFS feature by default. Please upgrade to the Windows Professional or Windows Enterprise edition before proceeding.
Accessing NFS services on Windows requires some configuration. Please follow these steps:
Open Control Panel
Click Programs
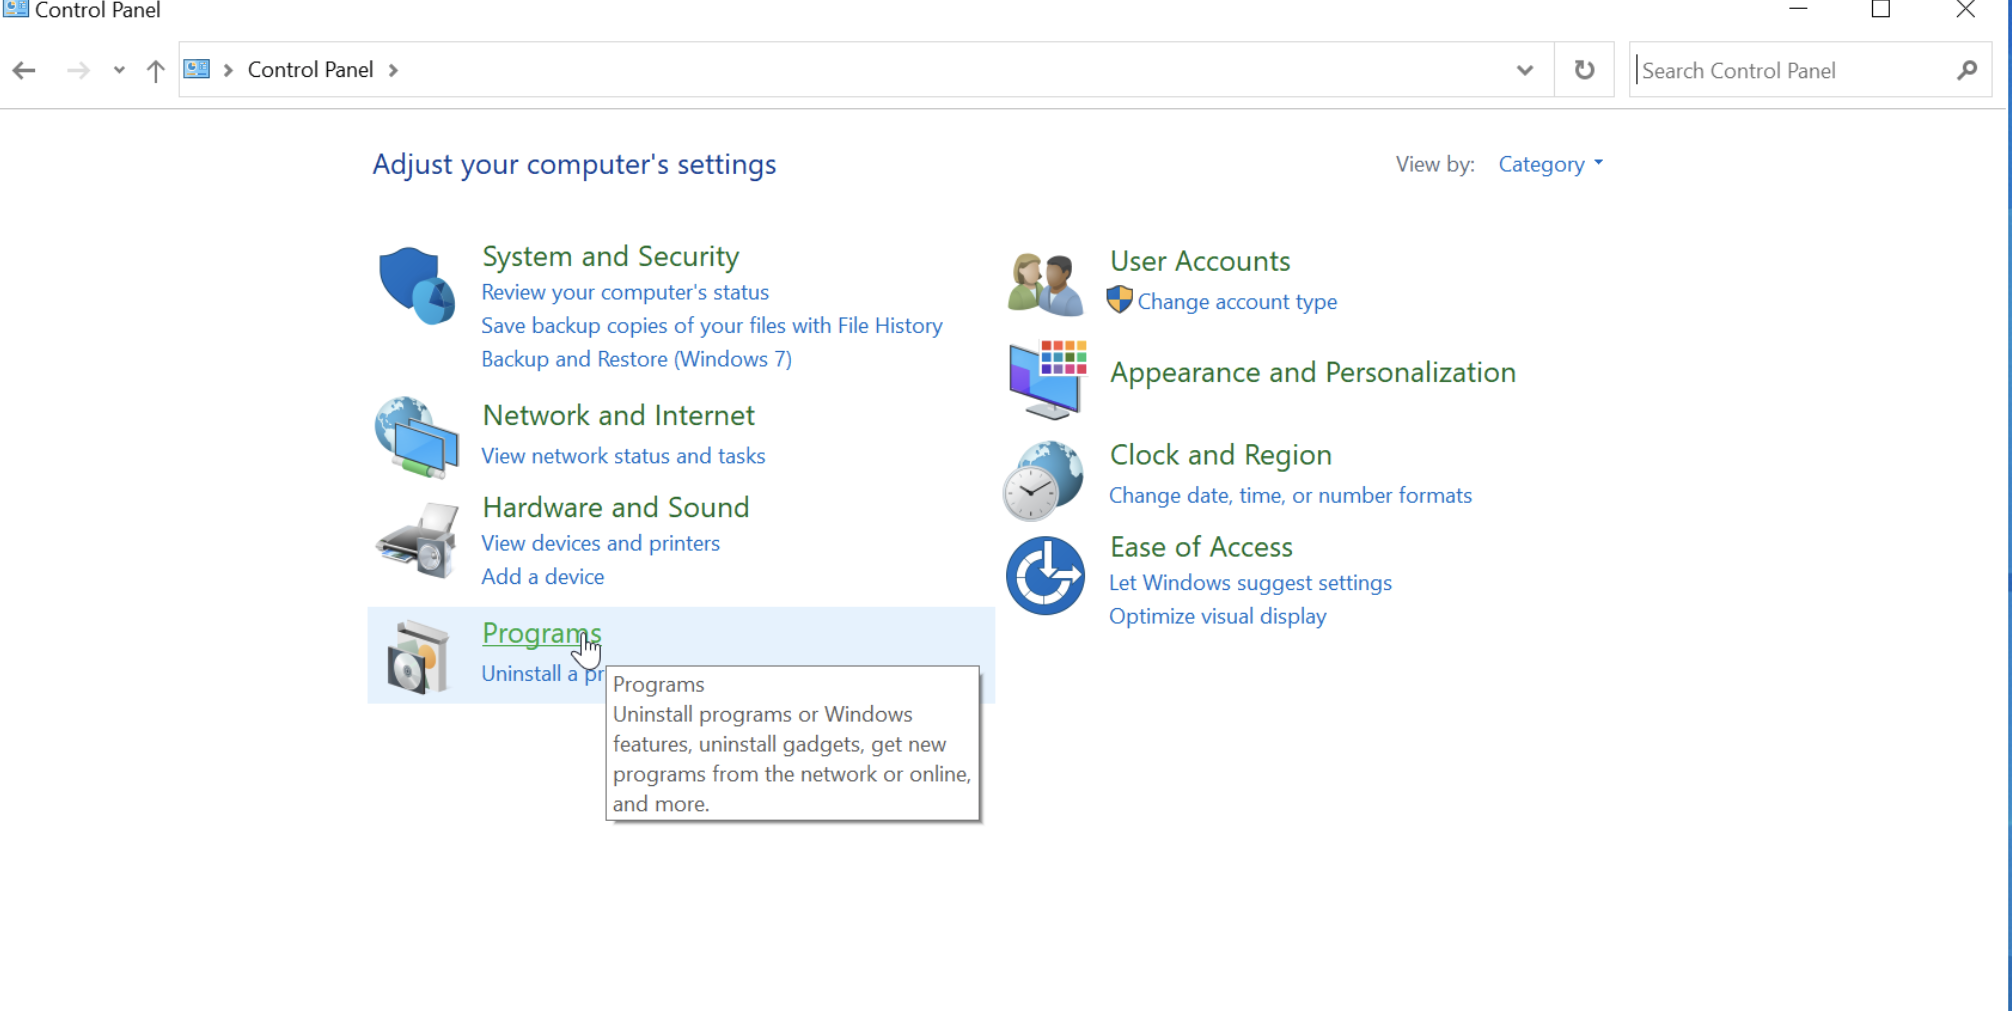
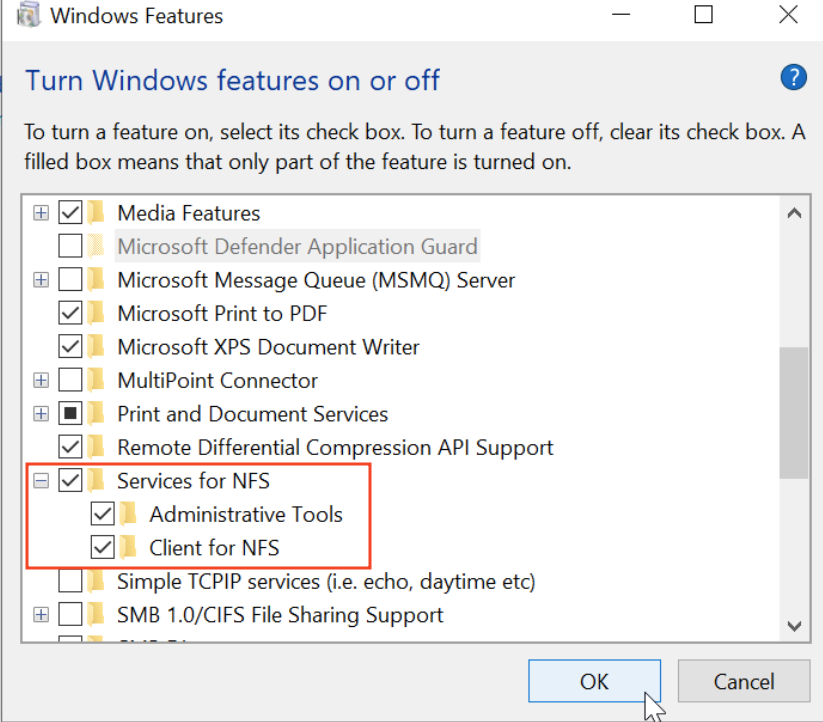
Click Turn Windows features on or off
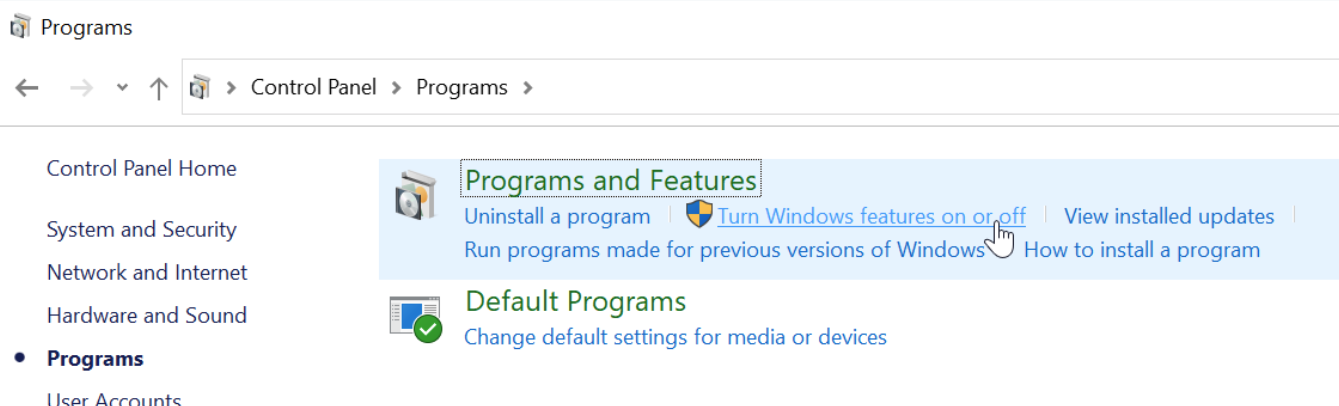
Select all options for Services for NFS and click OK.
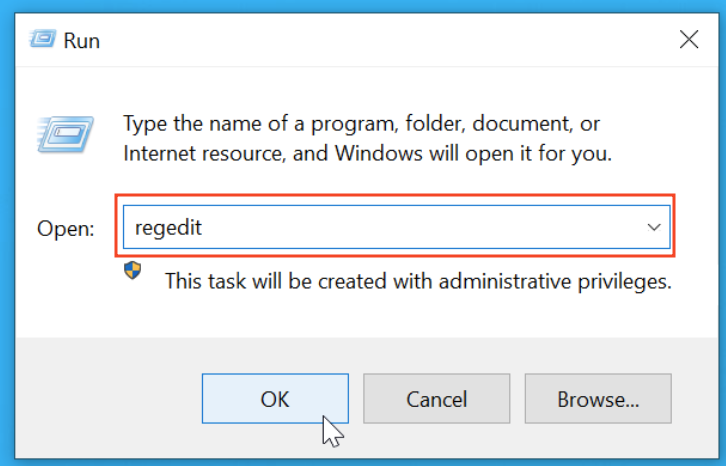
Return to the desktop and press the Win + R key combination.
Type regedit and click OK.
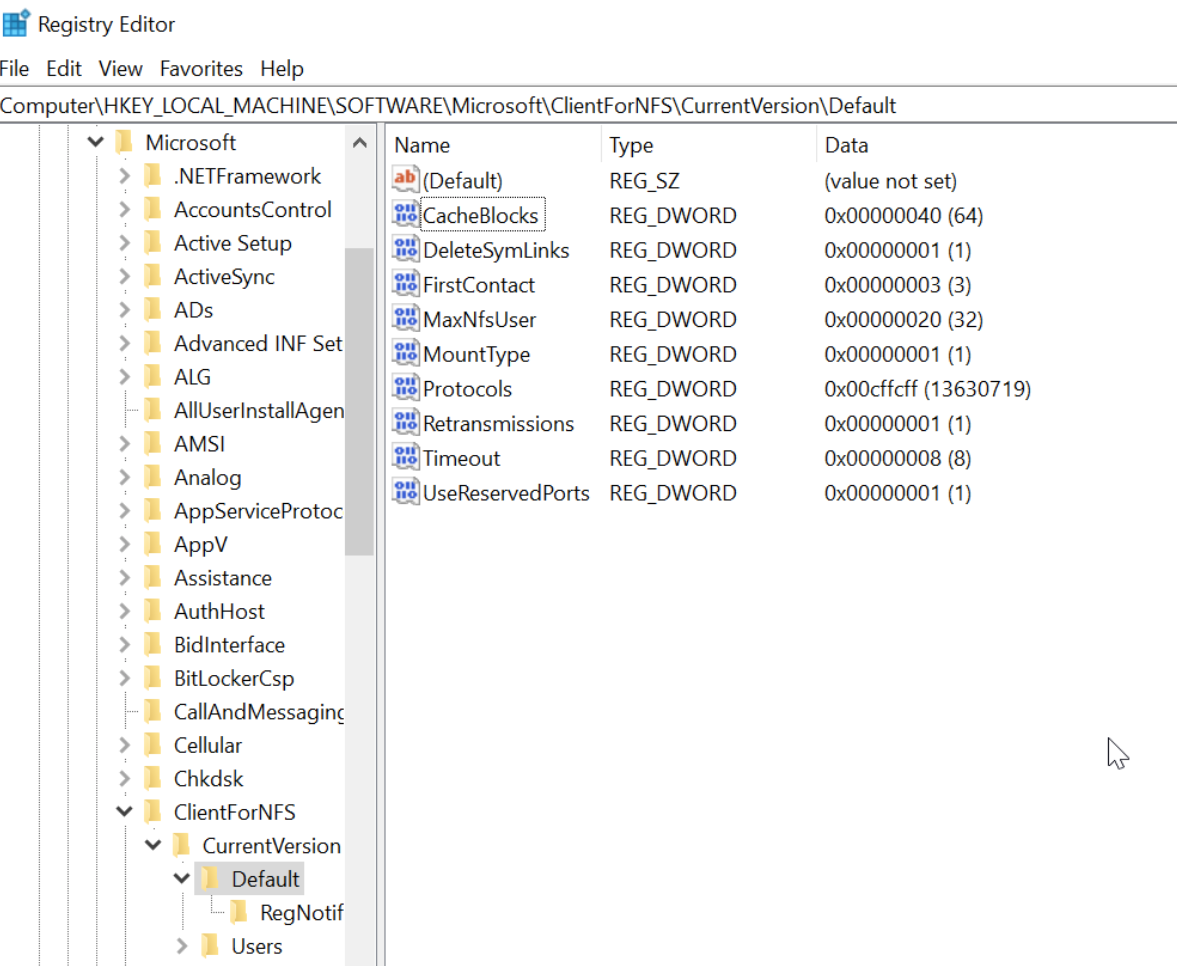
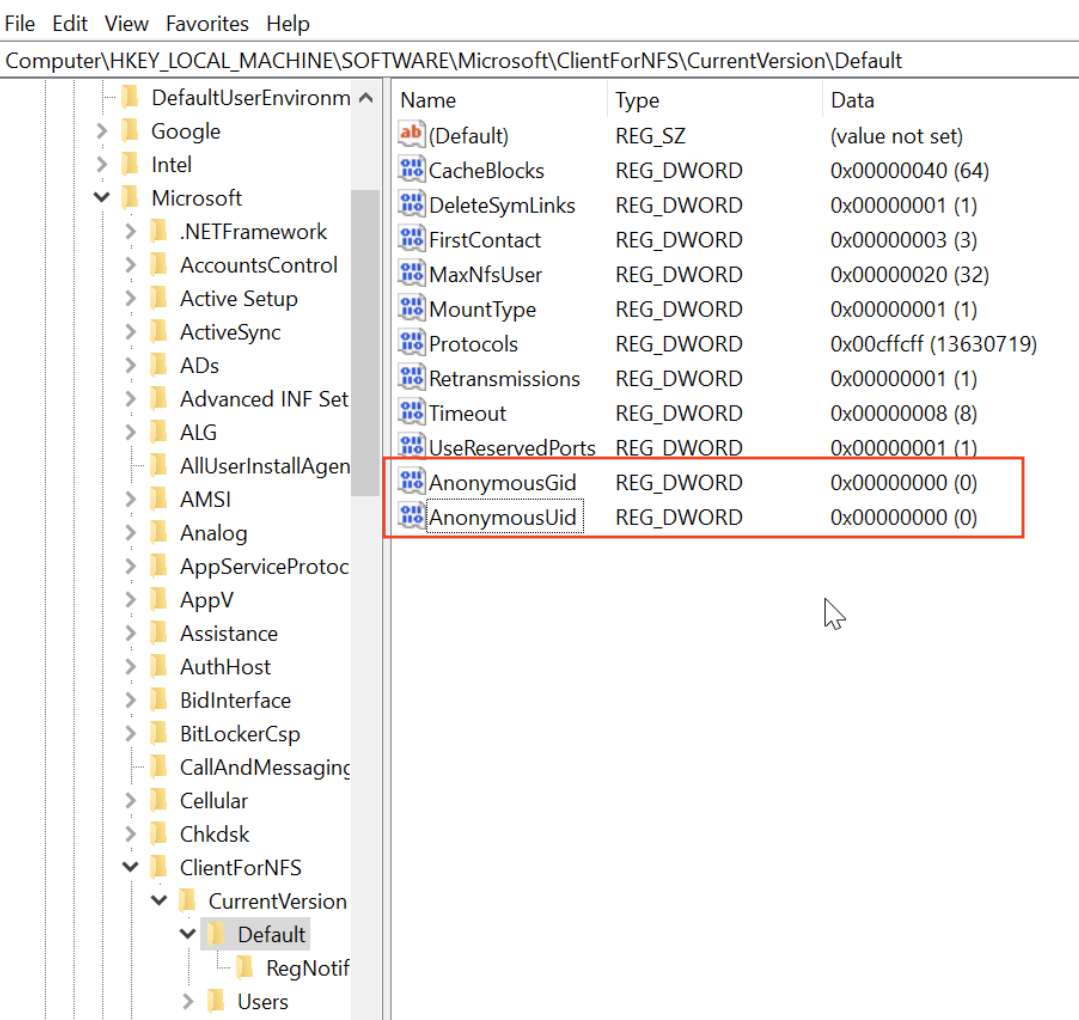
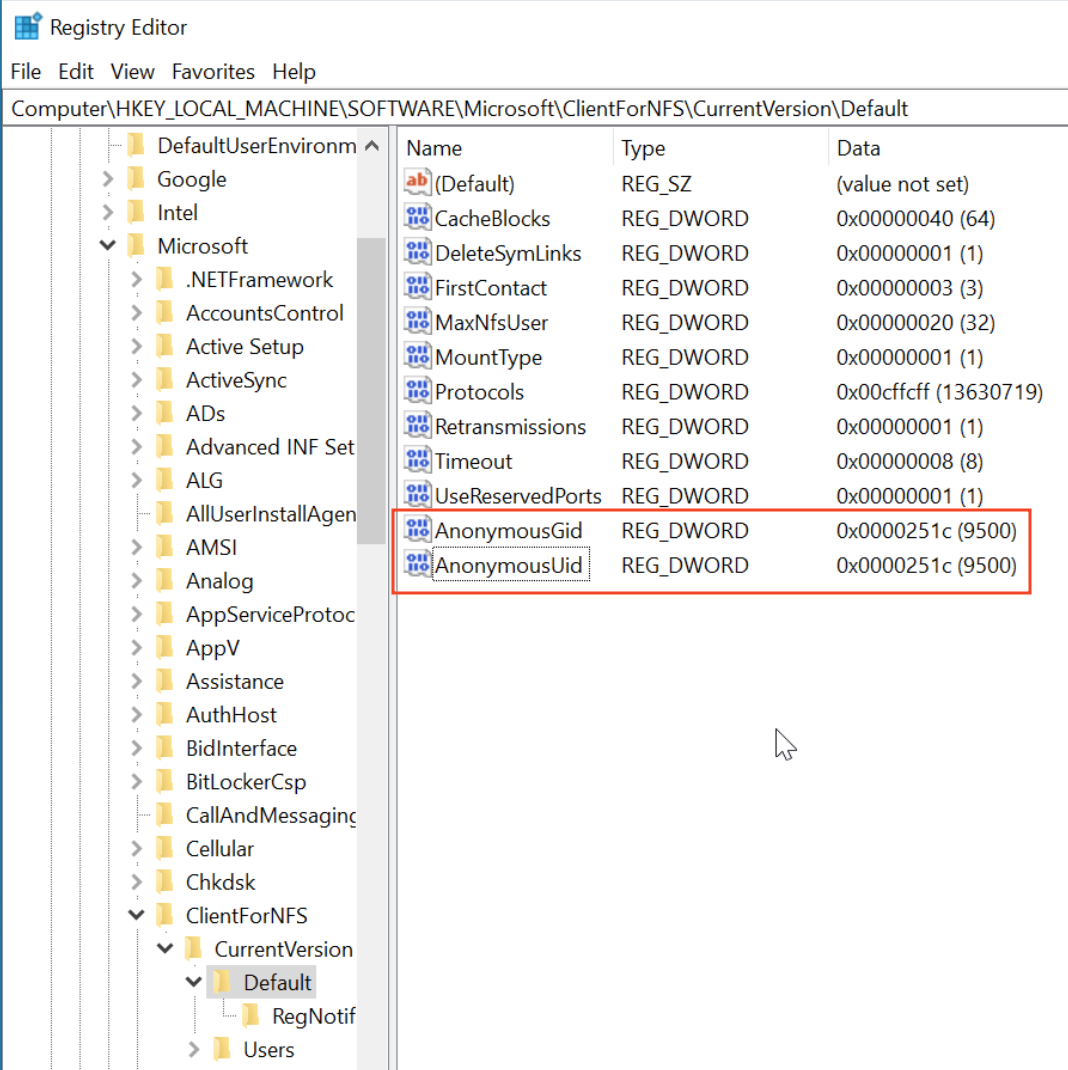
Navigate to HKEY_LOCAL_MACHINE\SOFTWARE\Microsoft\ClientForNFS\CurrentVersion\Default.
Right-click on an empty area, click New, and select DWORD (32-bit) Value.
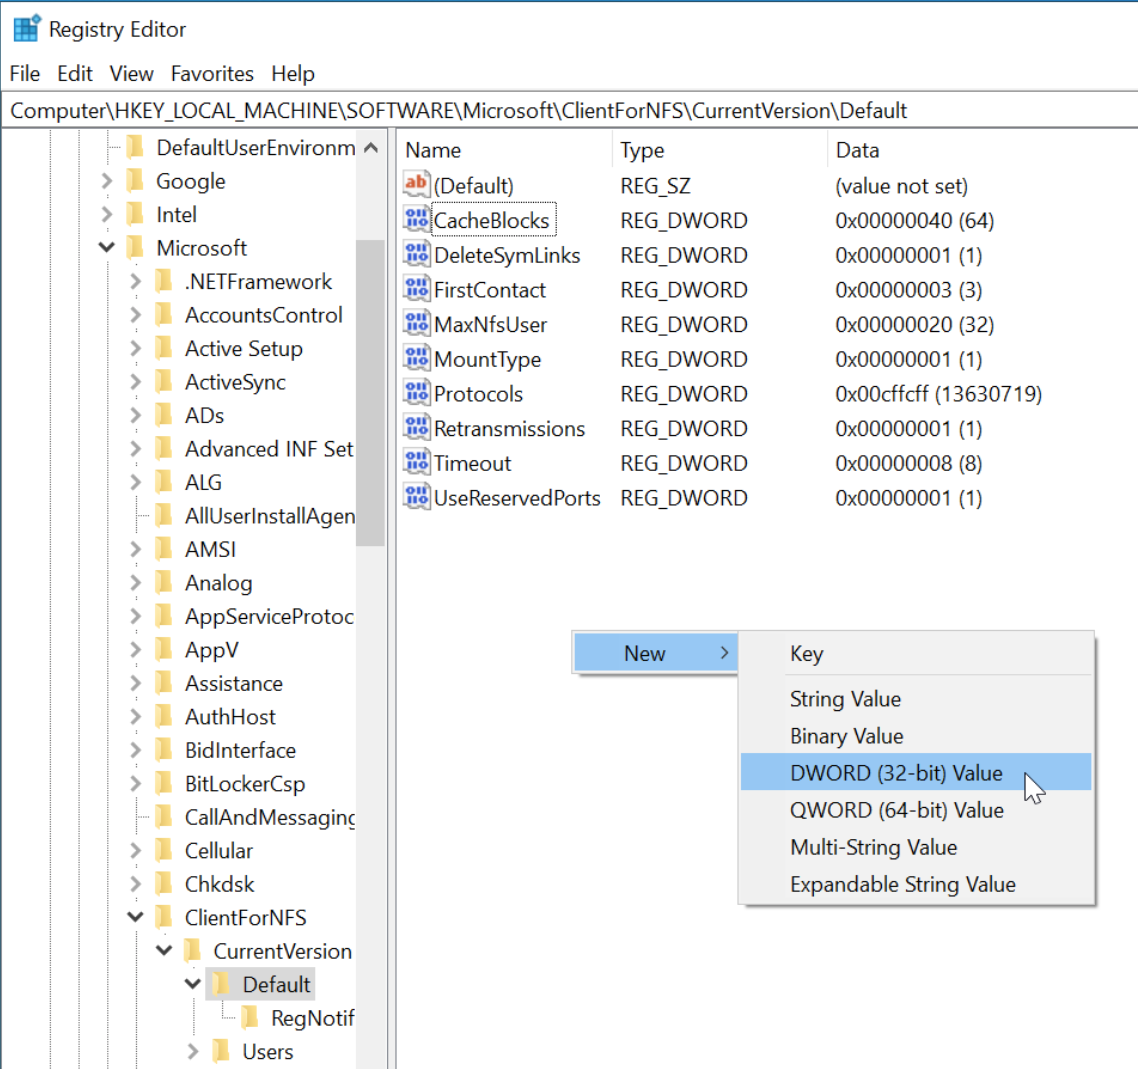
Create AnonymousGid and AnonymousUid
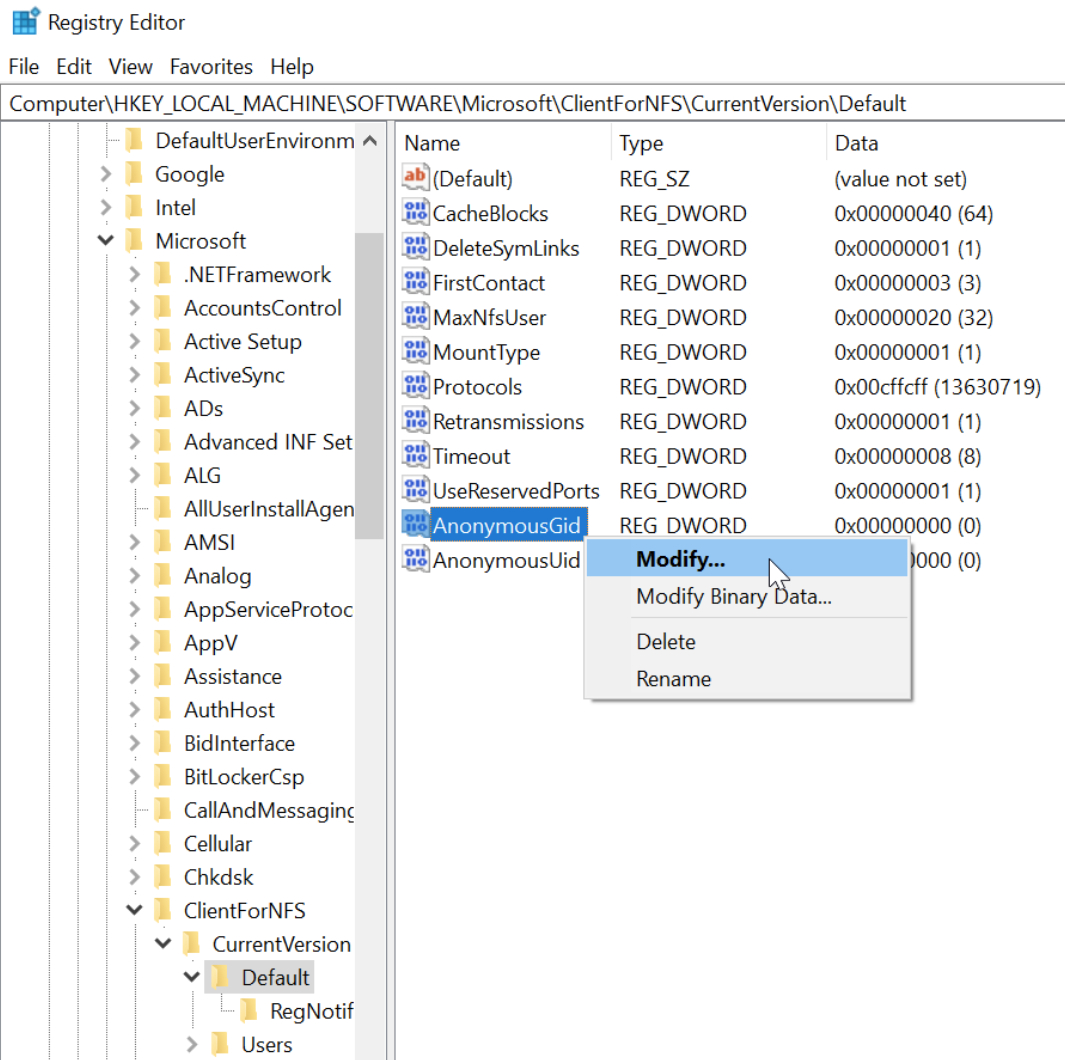
Then right-click them and click Modify...
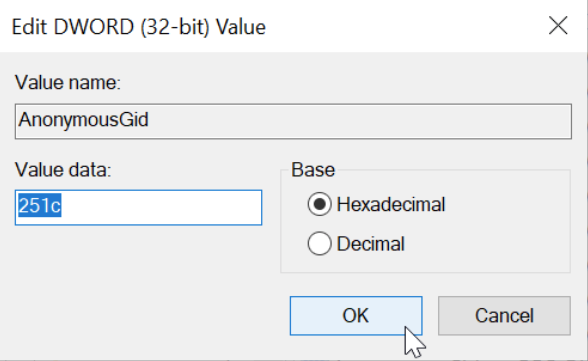
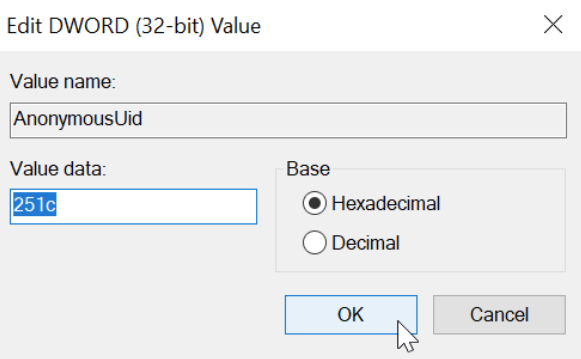
Change the Value data to 251c, and click OK
After the following page is displayed, restart your computer.
After completing the above steps, Windows You can now access the NFS service. Here are the steps:
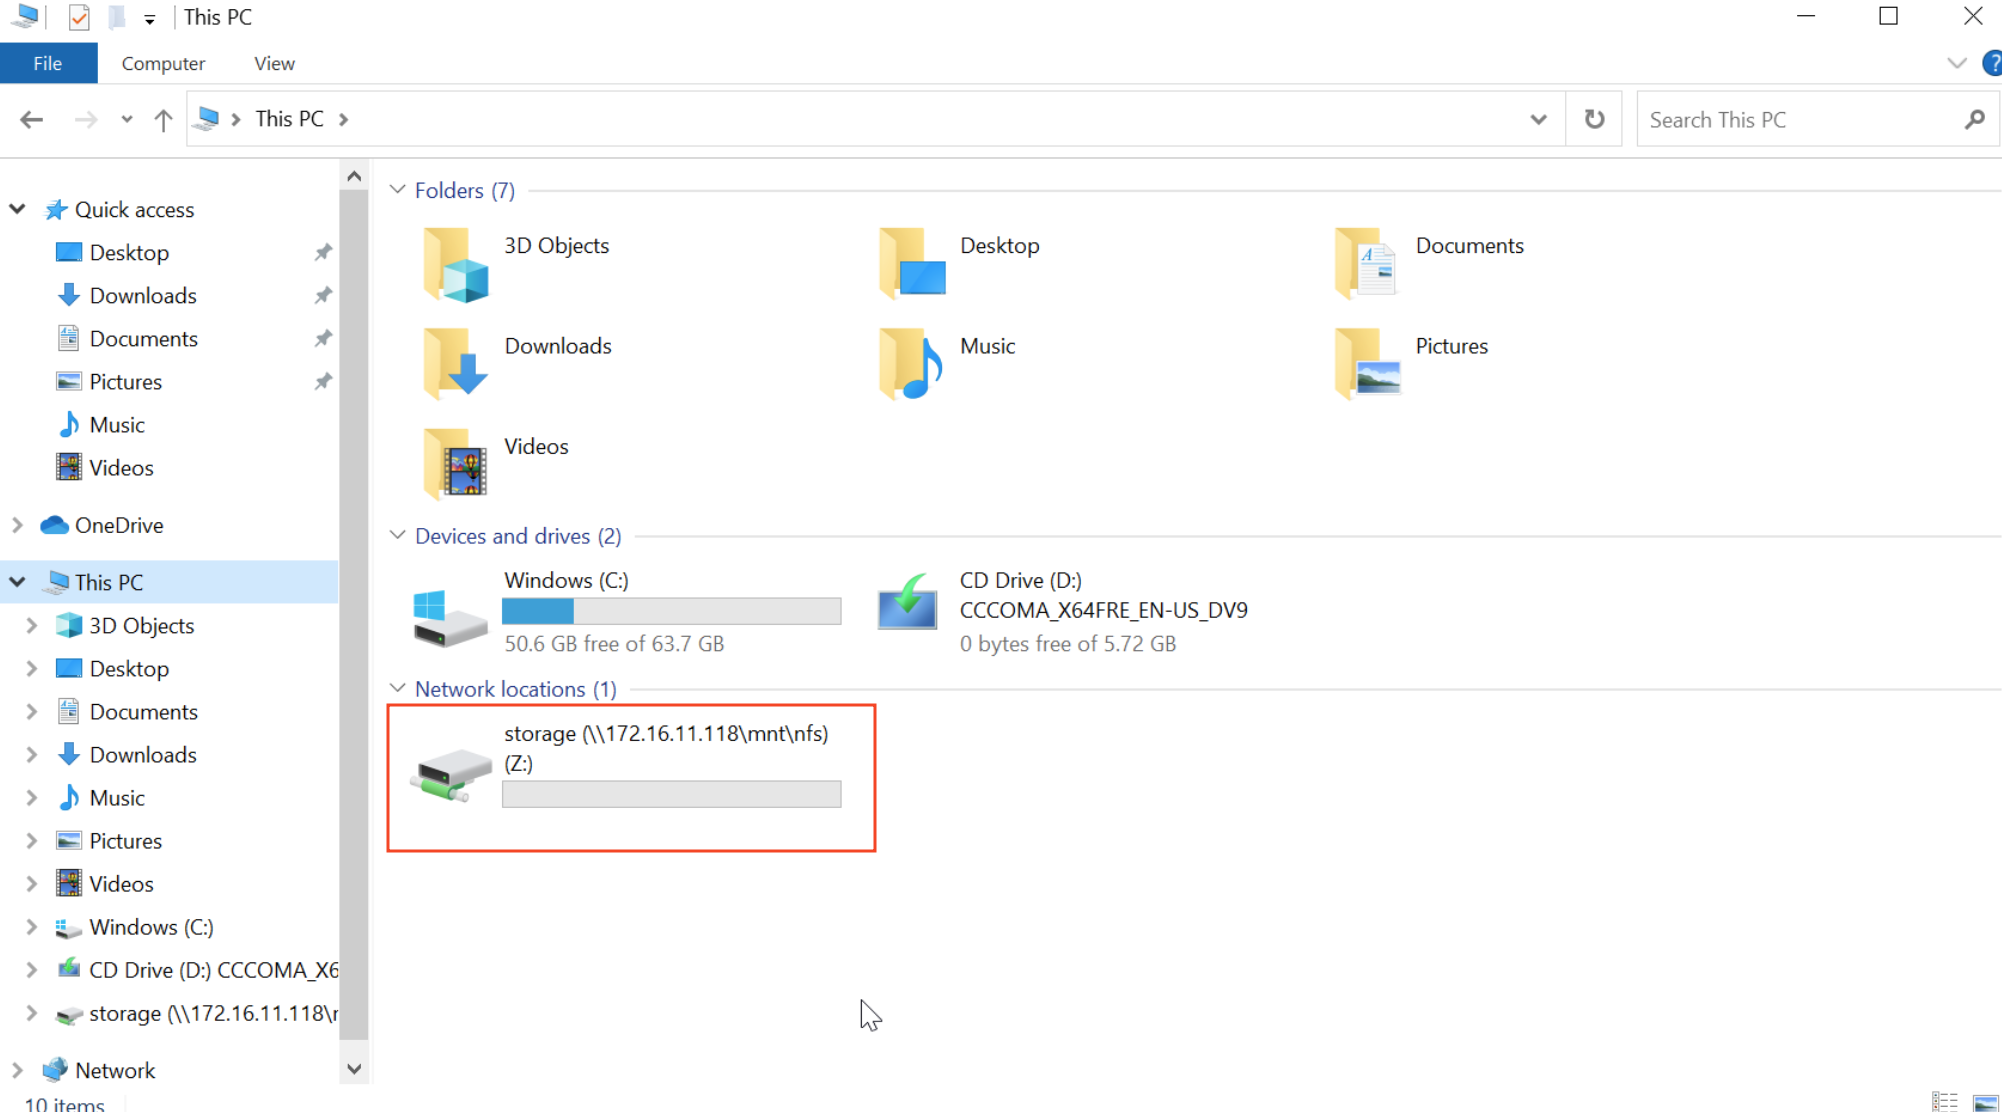
Open File Explorer
Right-click Network and select Map network drive

In the pop-up window, enter the NFS service address: \\NAS device IP\mnt\nfs\storage, and click Finish.

Enter the username and password, and click OK.

Now you can browse and manage files on your NAS just like you would a local folder.
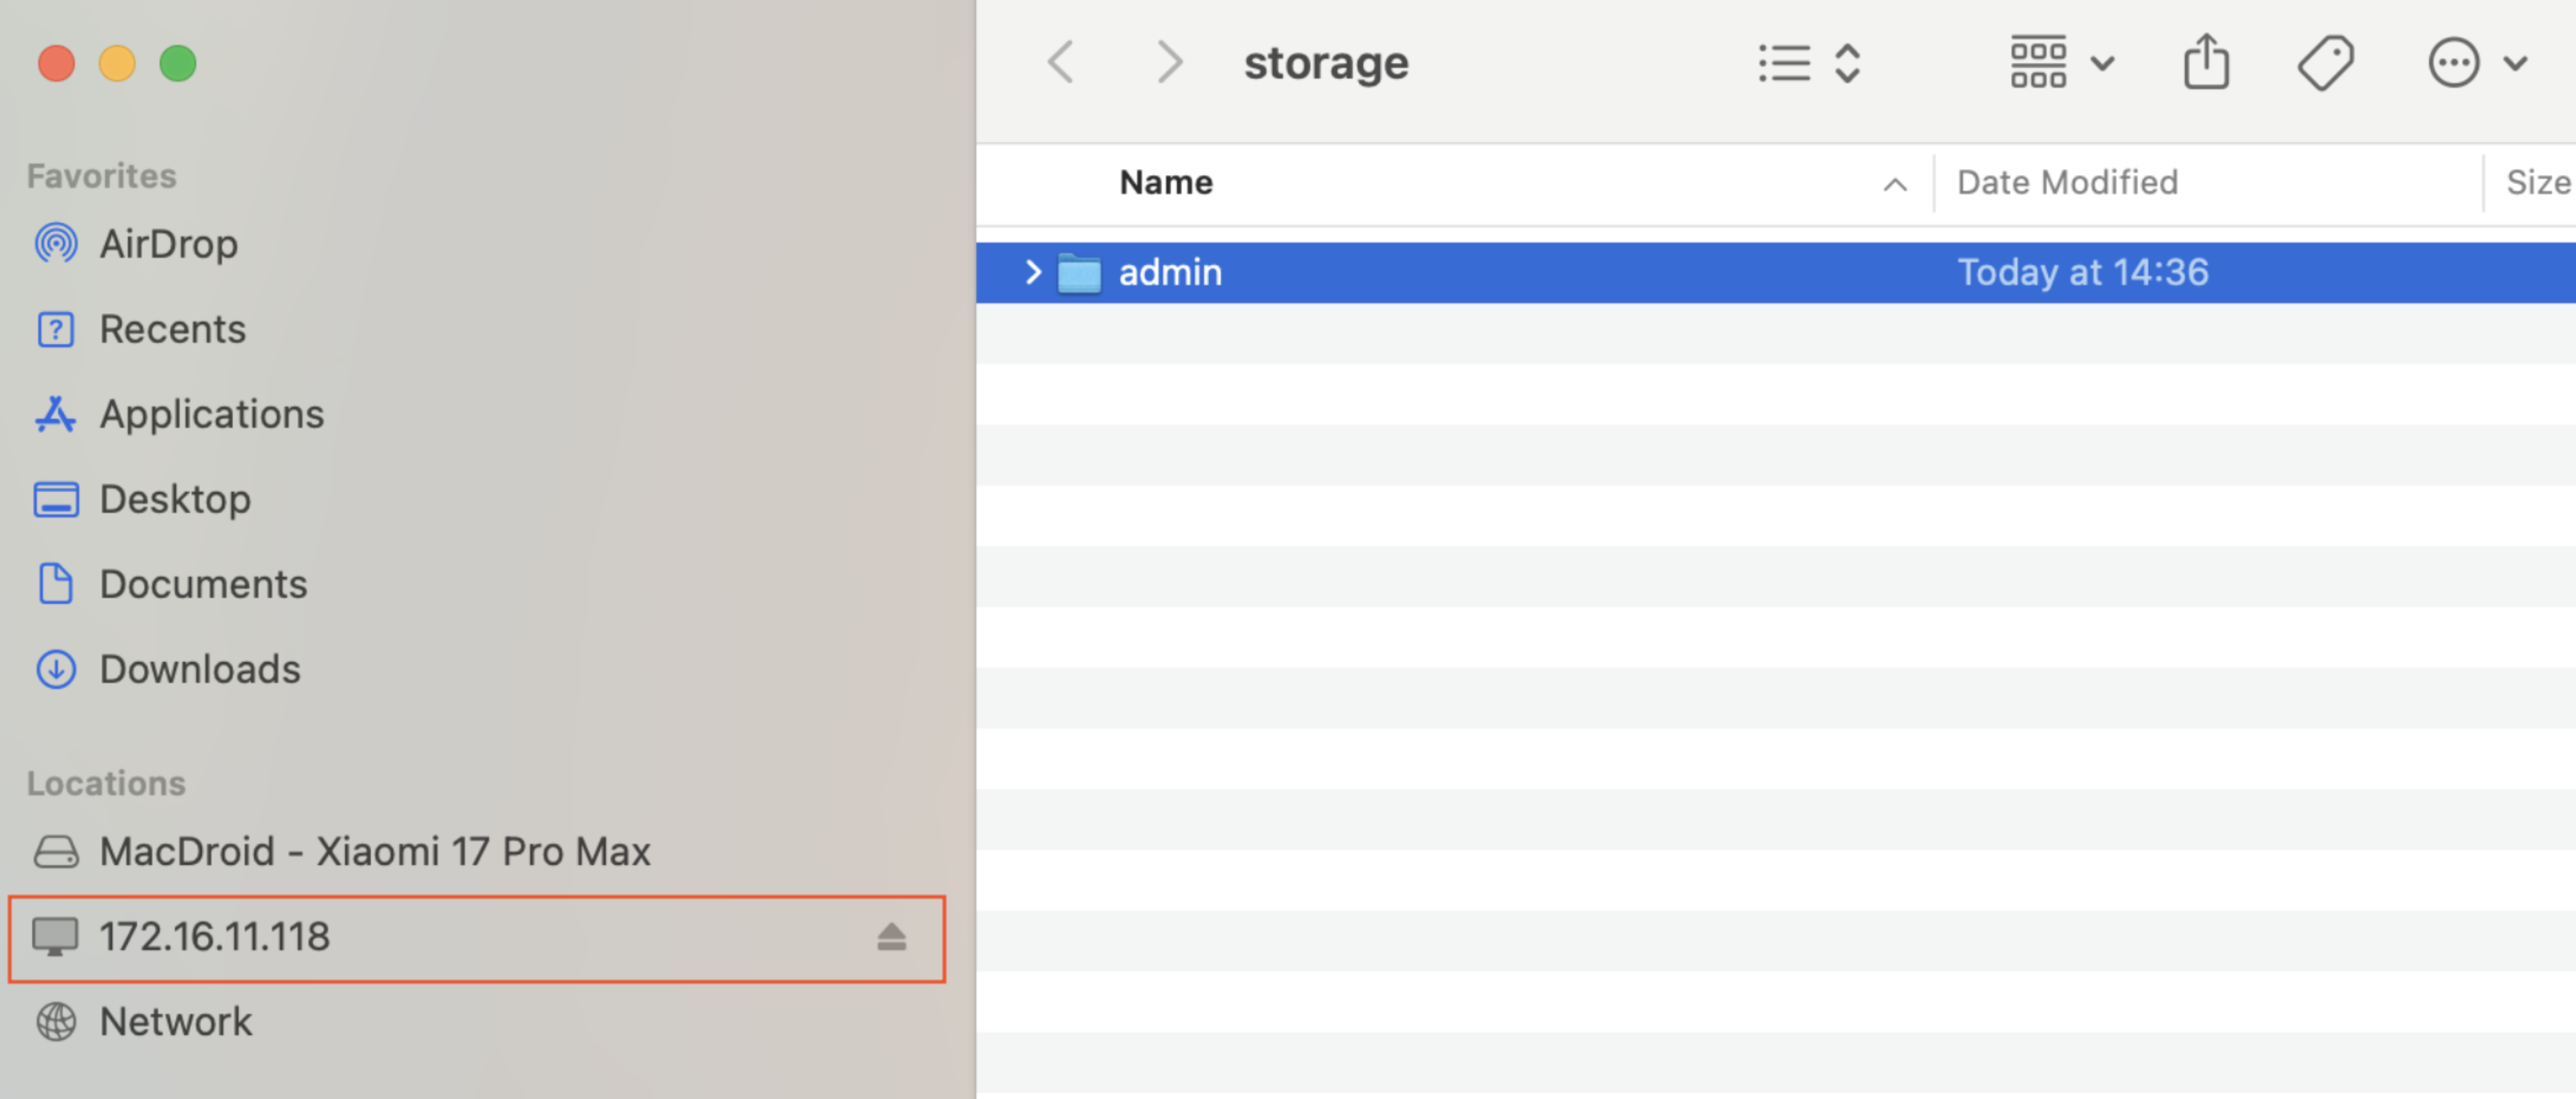
¶ Accessing on macOS
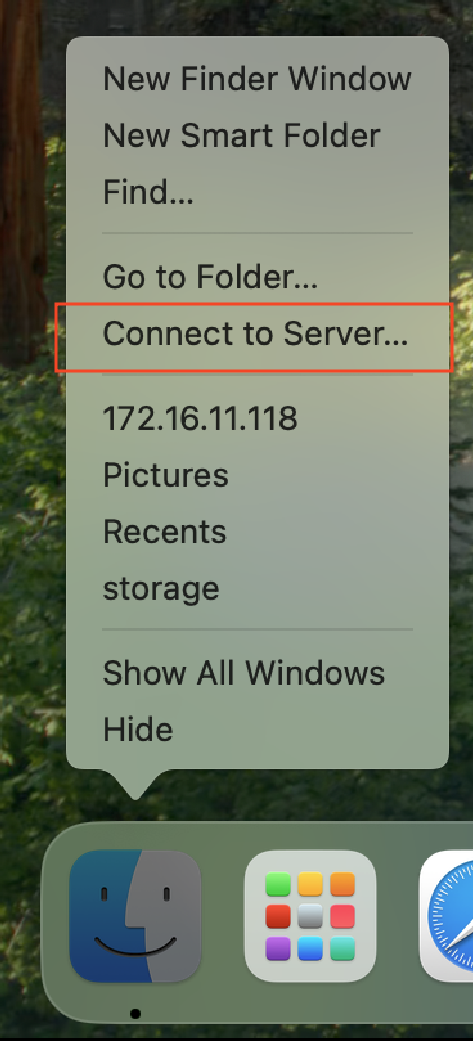
Right-click Finder, then in the menu bar select Connect to Server...
In the server address field, enter: nfs://NAS设备IP/mnt/nfs/storage, Then click Connect.
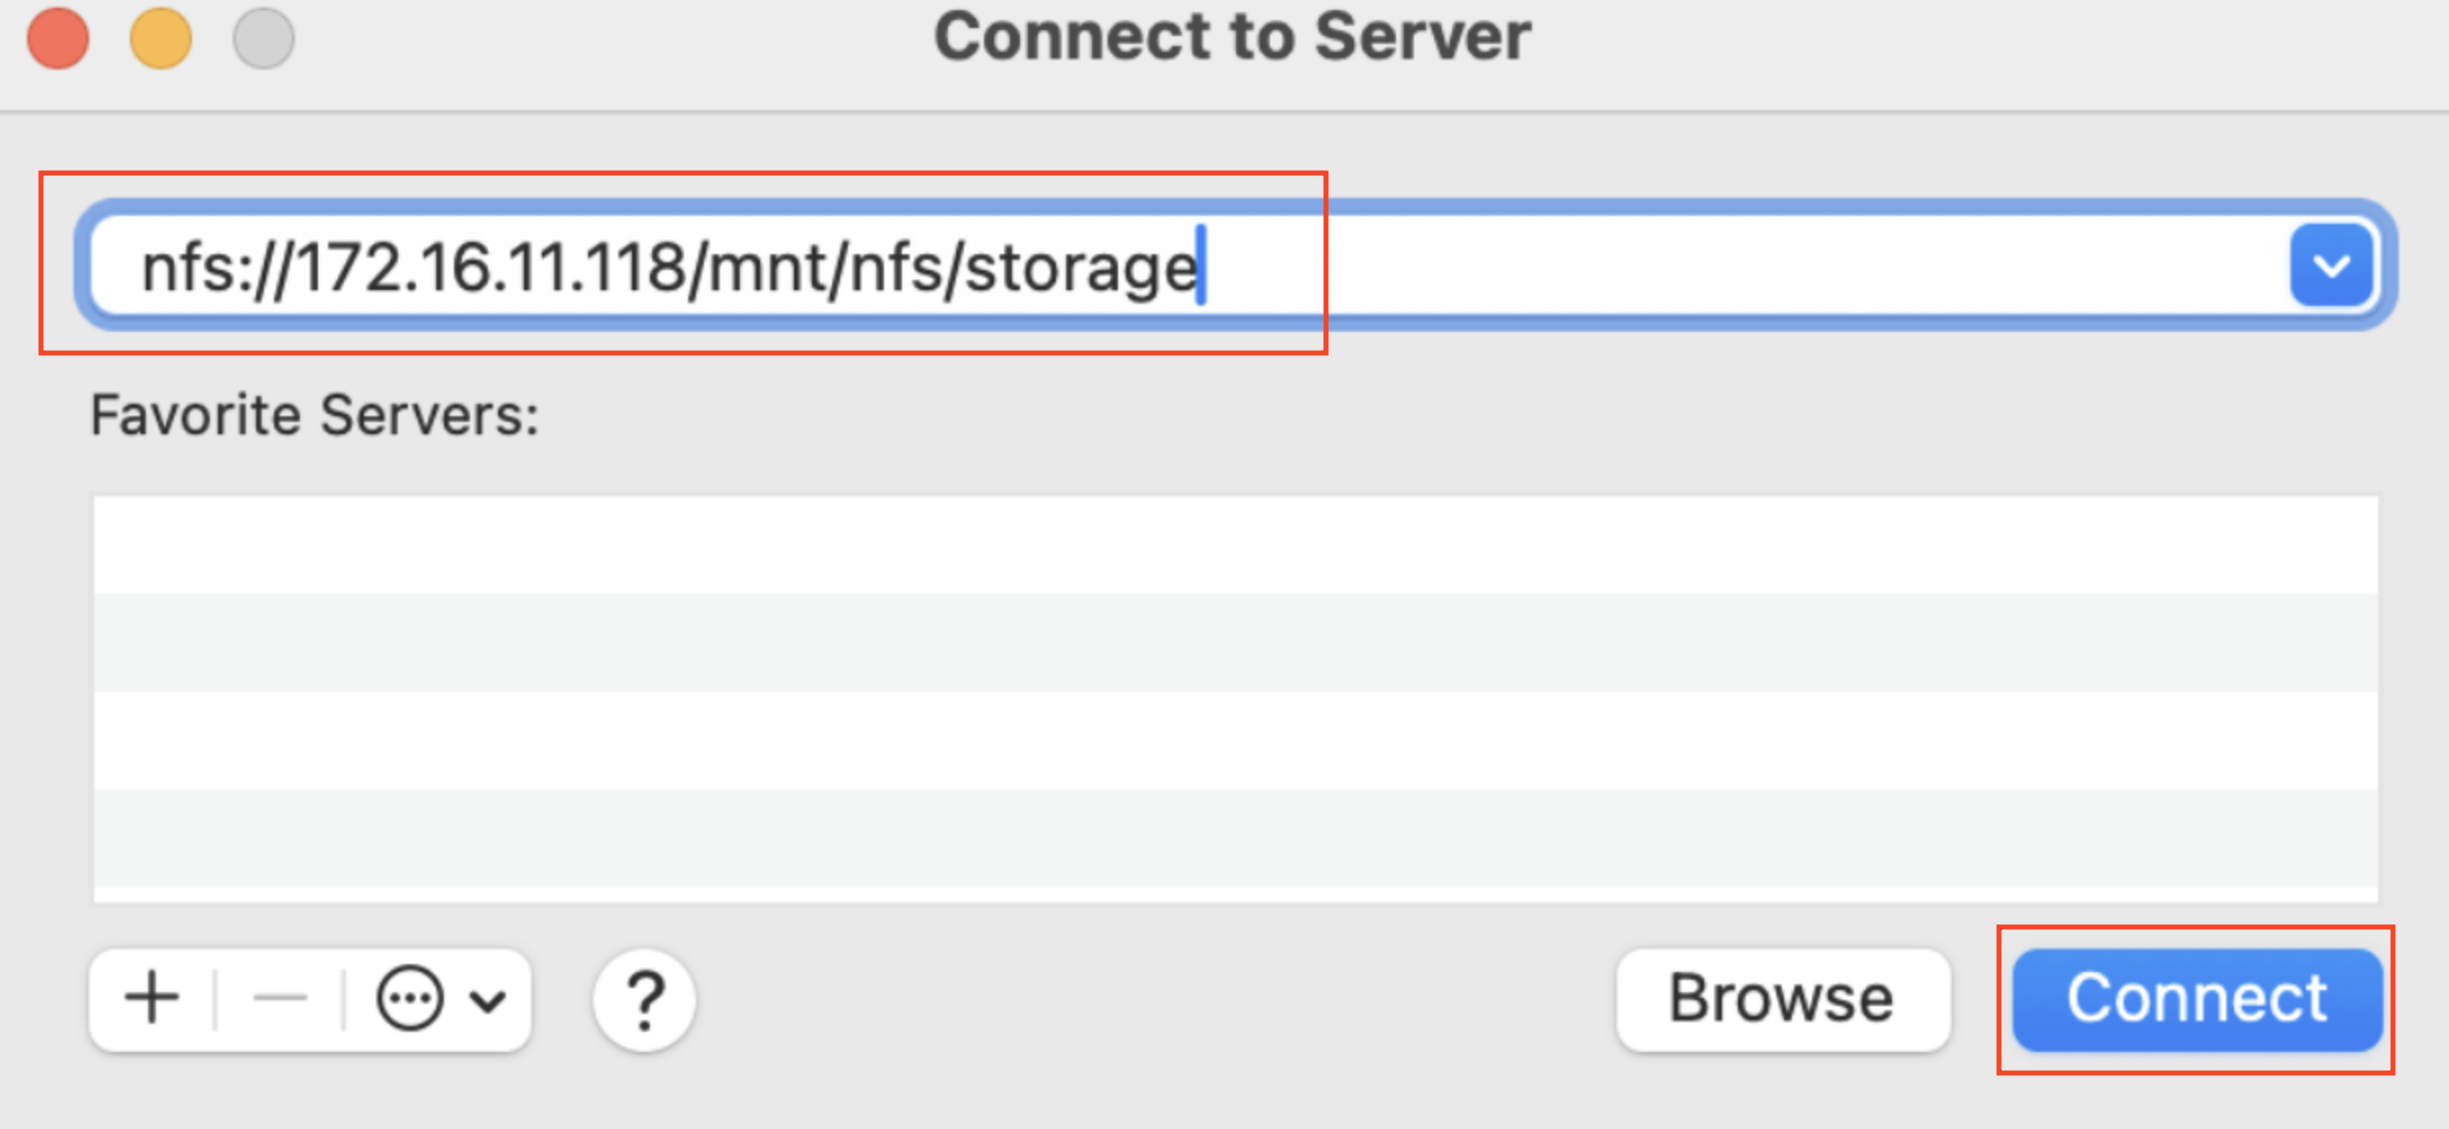
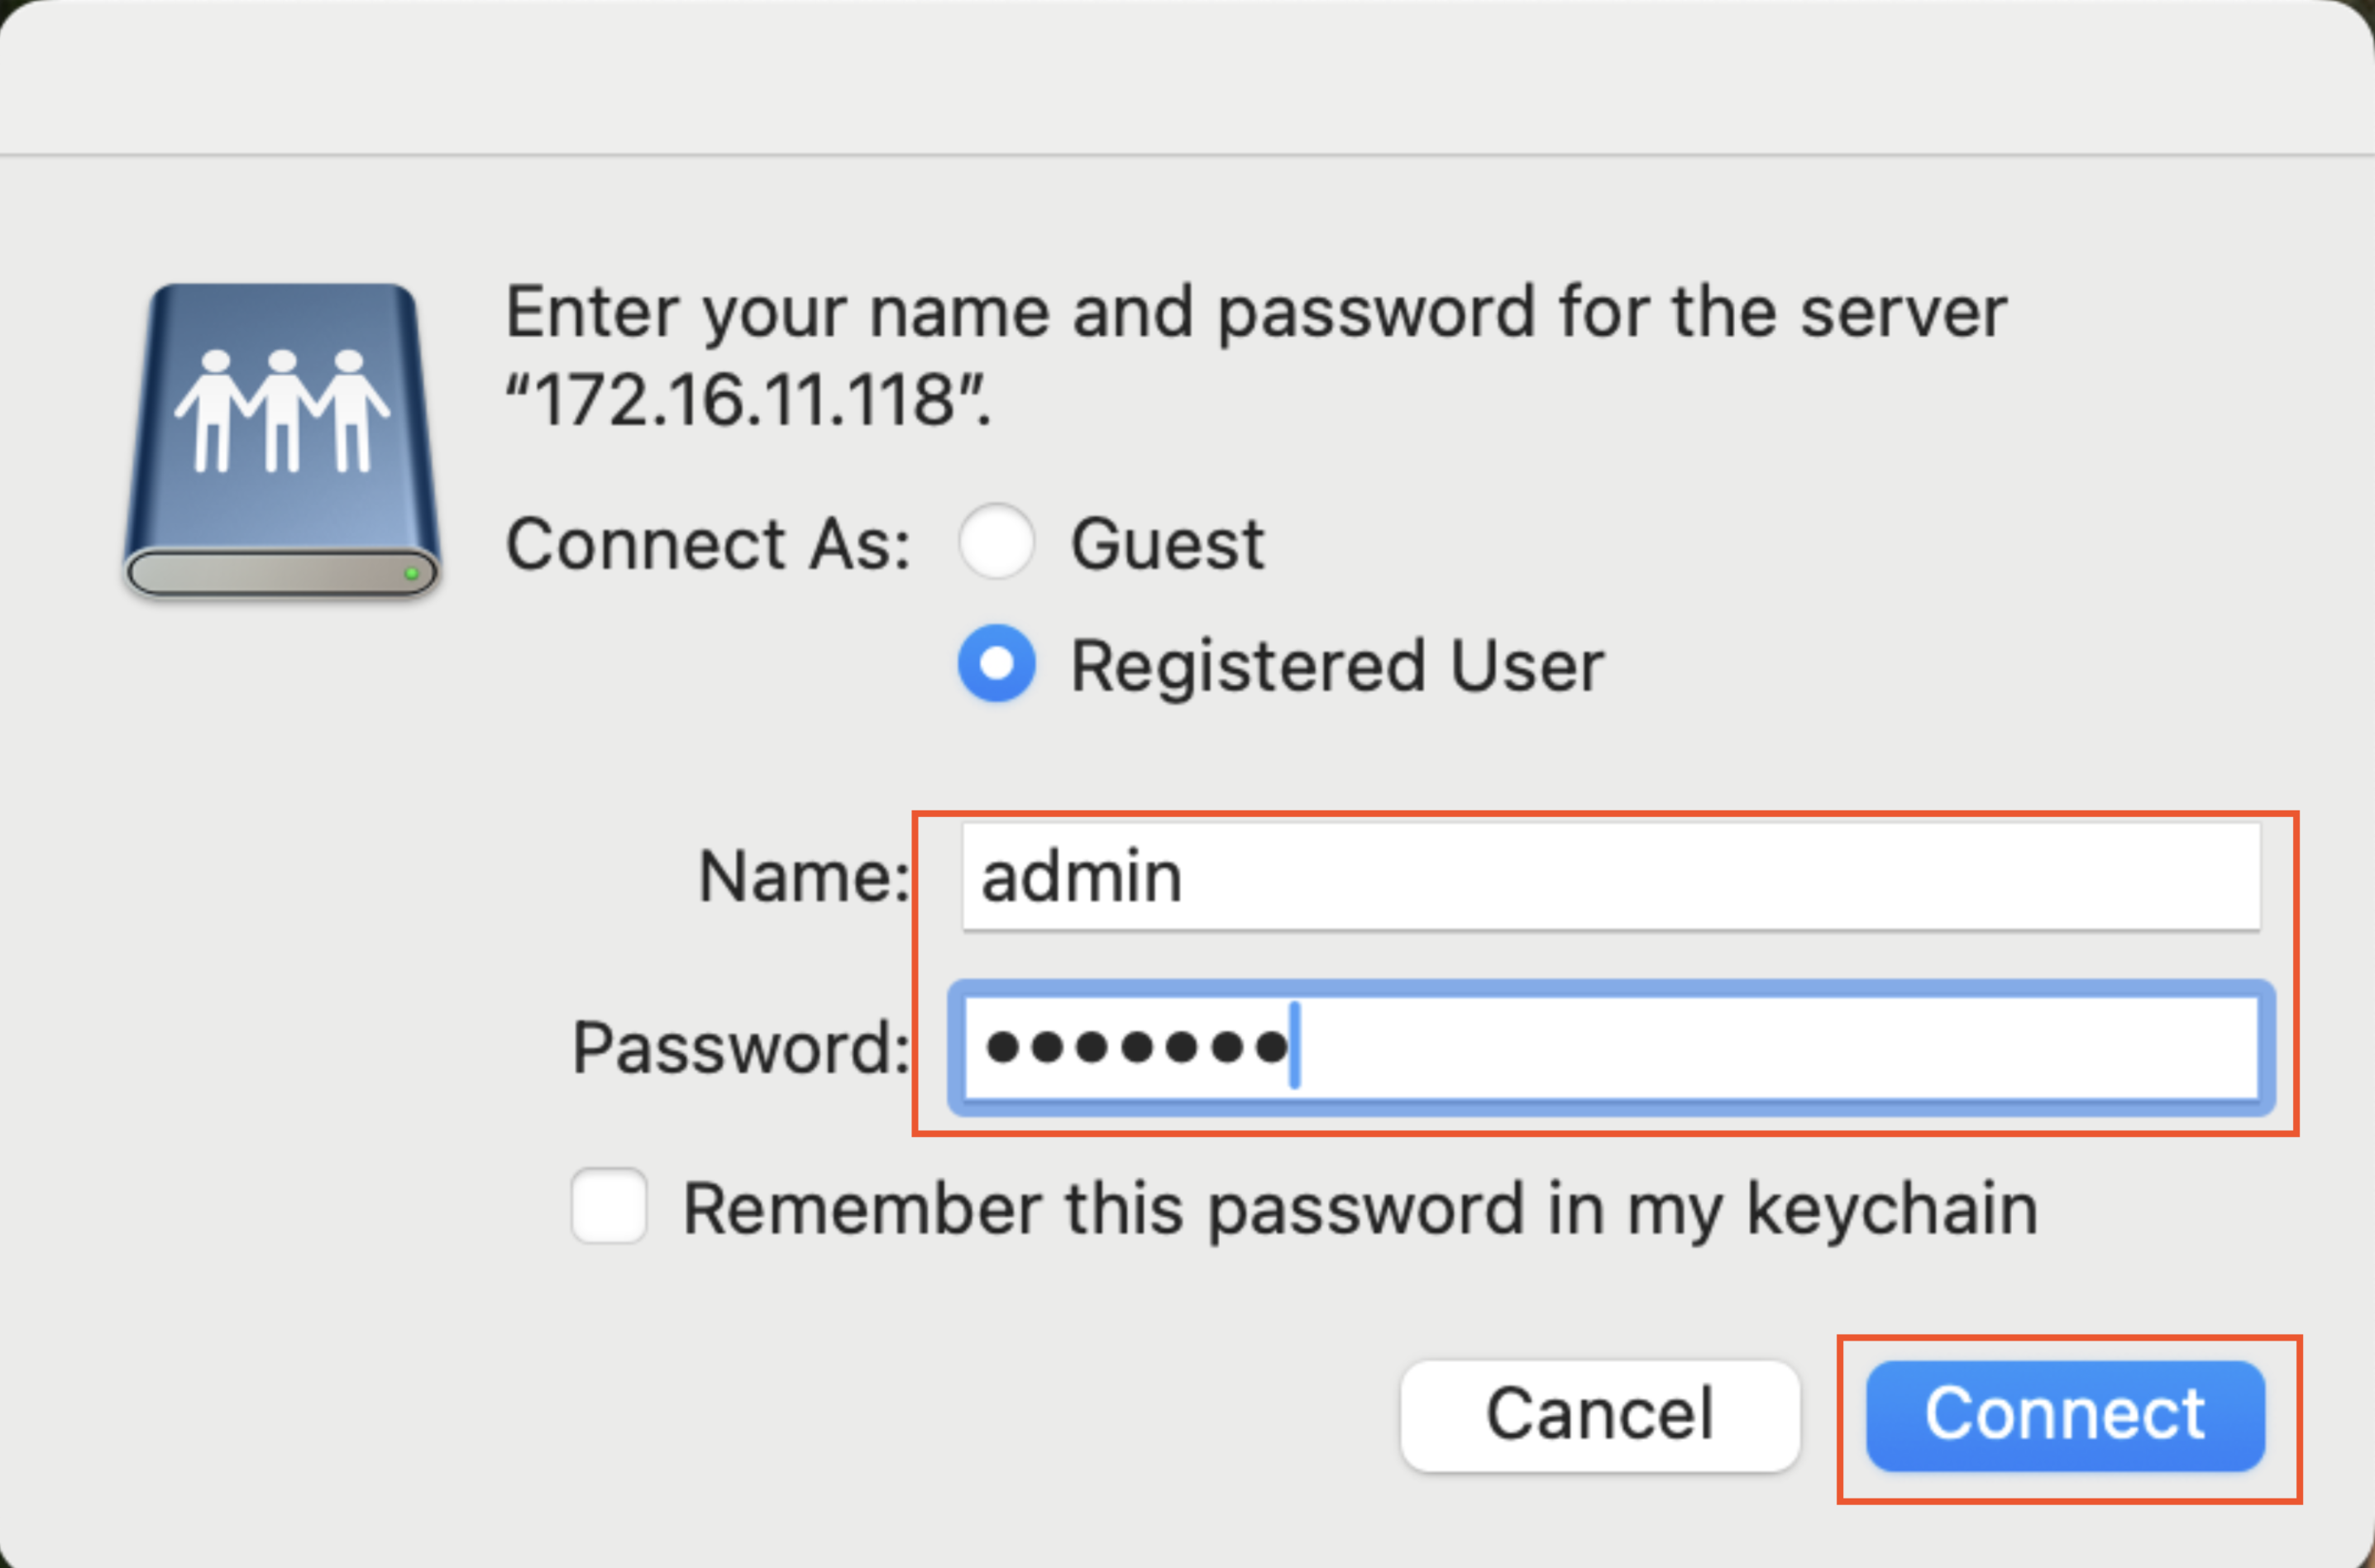
Enter your username and password, then click Connect.
You can now browse and manage NAS files in Finder just like local folders.