
¶ Enable DDNS Support
When you are away from home, such as at work, traveling, or using a mobile network, you can use DDNS together with router port forwarding to access files and applications on your NAS directly without relay bandwidth limits.
¶ Check Whether You Have a Public IP Address
- Sign in to your home router's administration page and locate its WAN IP address.
- When creating the DDNS configuration, check whether the automatically detected IP address matches the router's WAN IP address.
¶ Obtain Third-Party Provider Authentication Information
¶ 1. Cloudflare
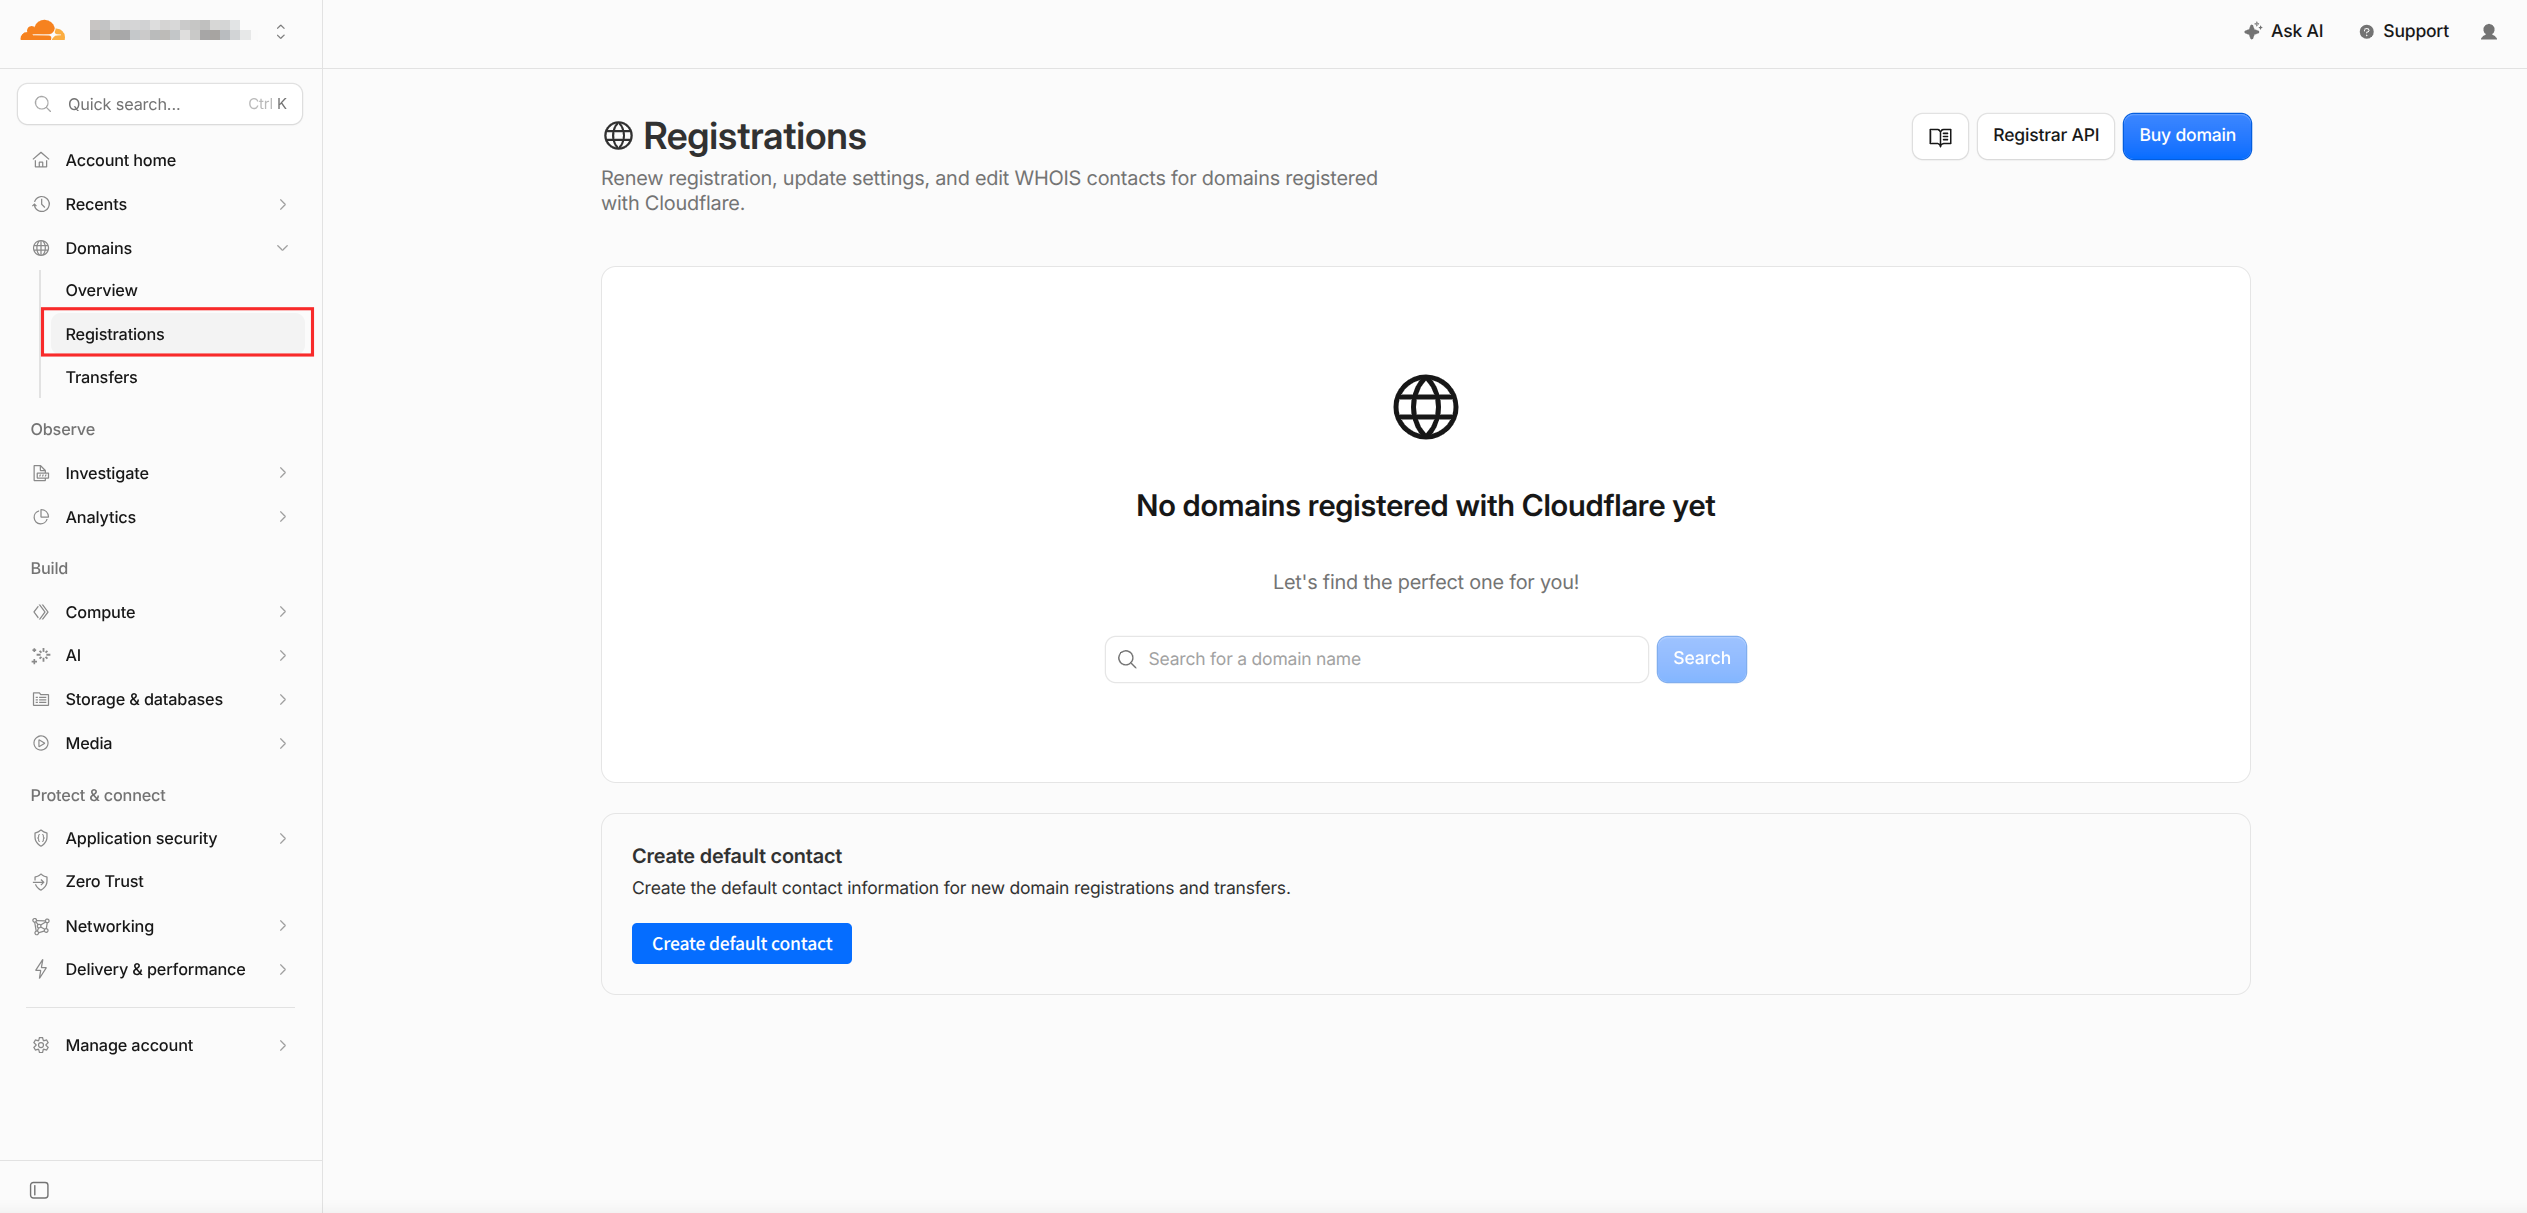
- Sign in to Cloudflare (opens new window), select
Domains>Registrationsfrom the sidebar, and find and purchase a domain.
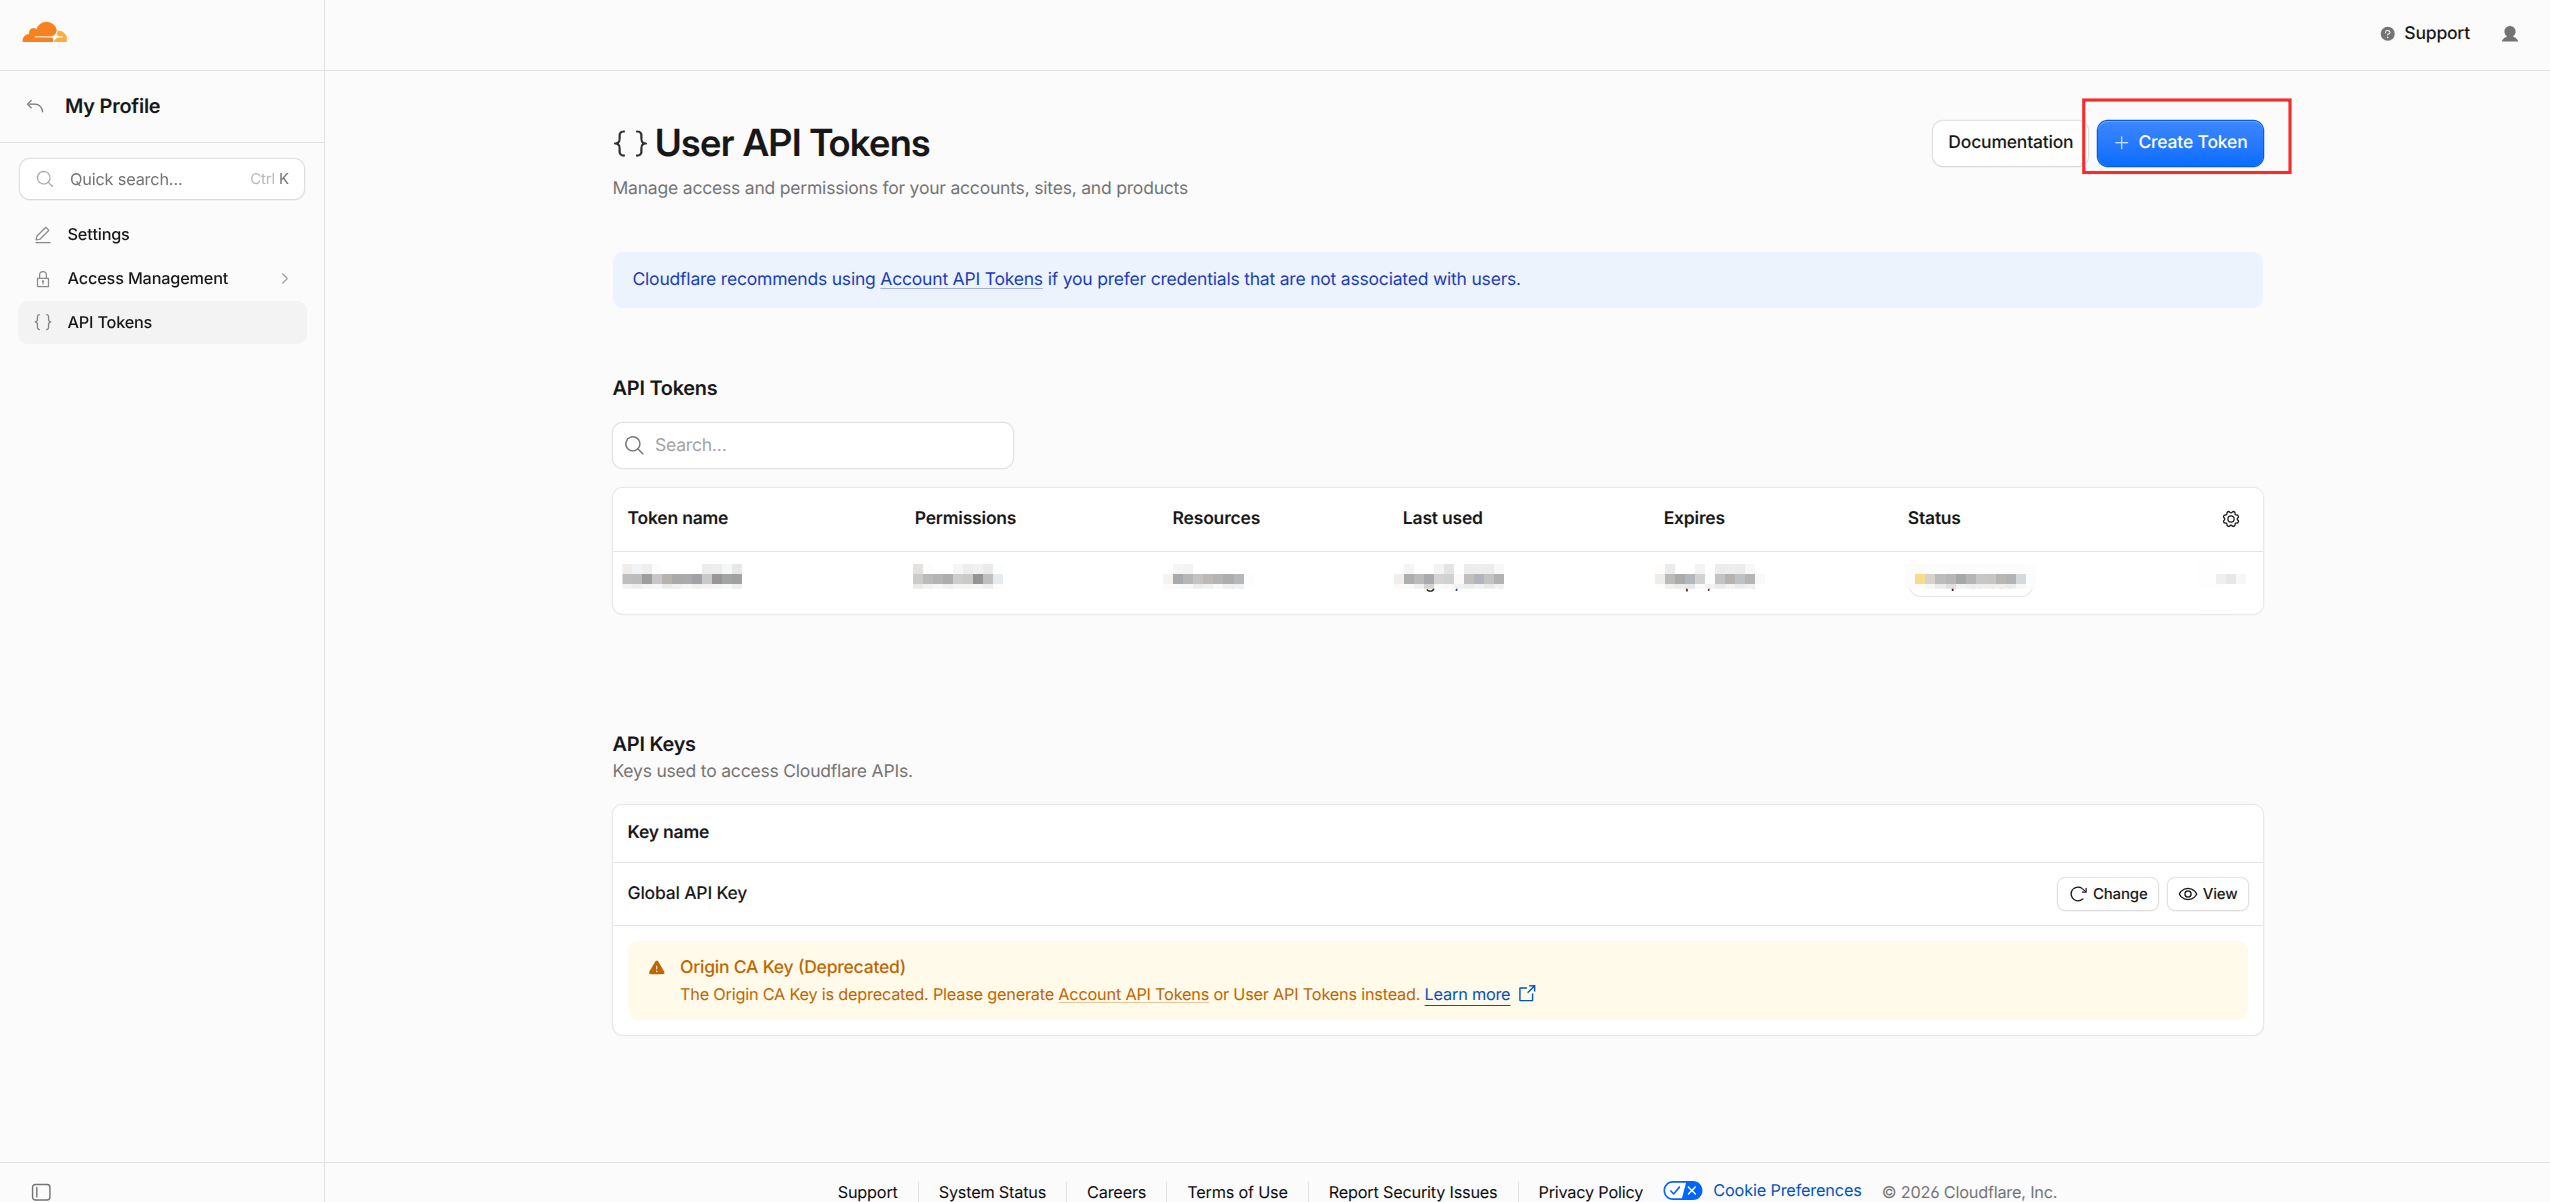
- Open Cloudflare API Tokens (opens new window).
- Click
Create Token.
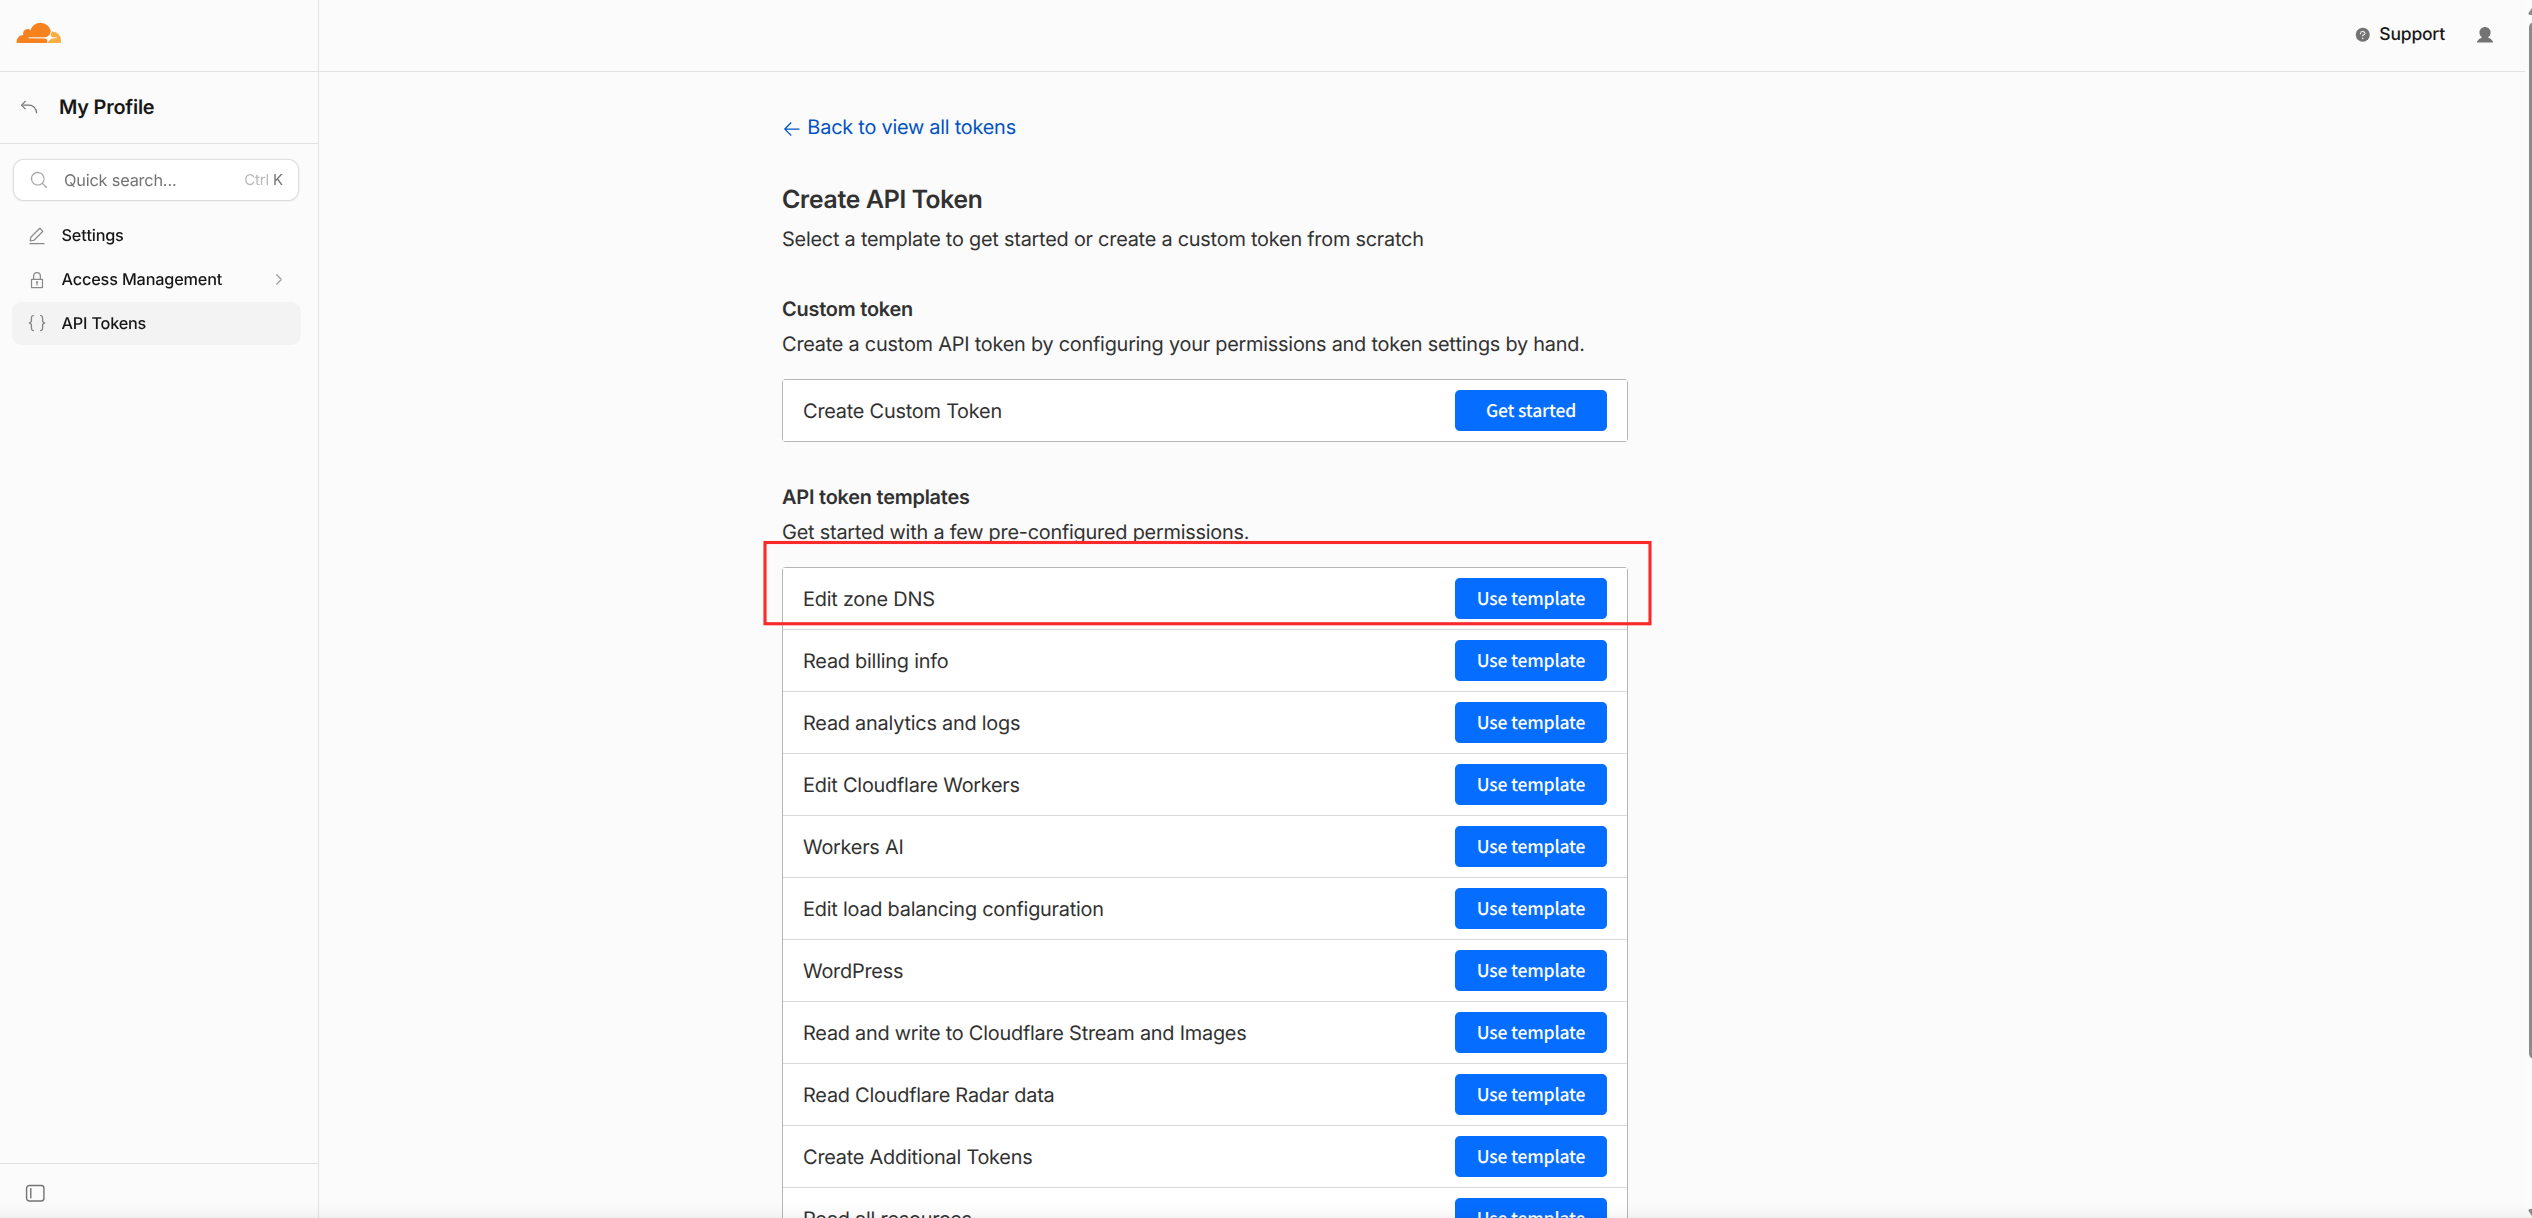
- Select
Edit zone DNS.
- Under
Zone Resources, select the domain you purchased, then clickContinue to summary.
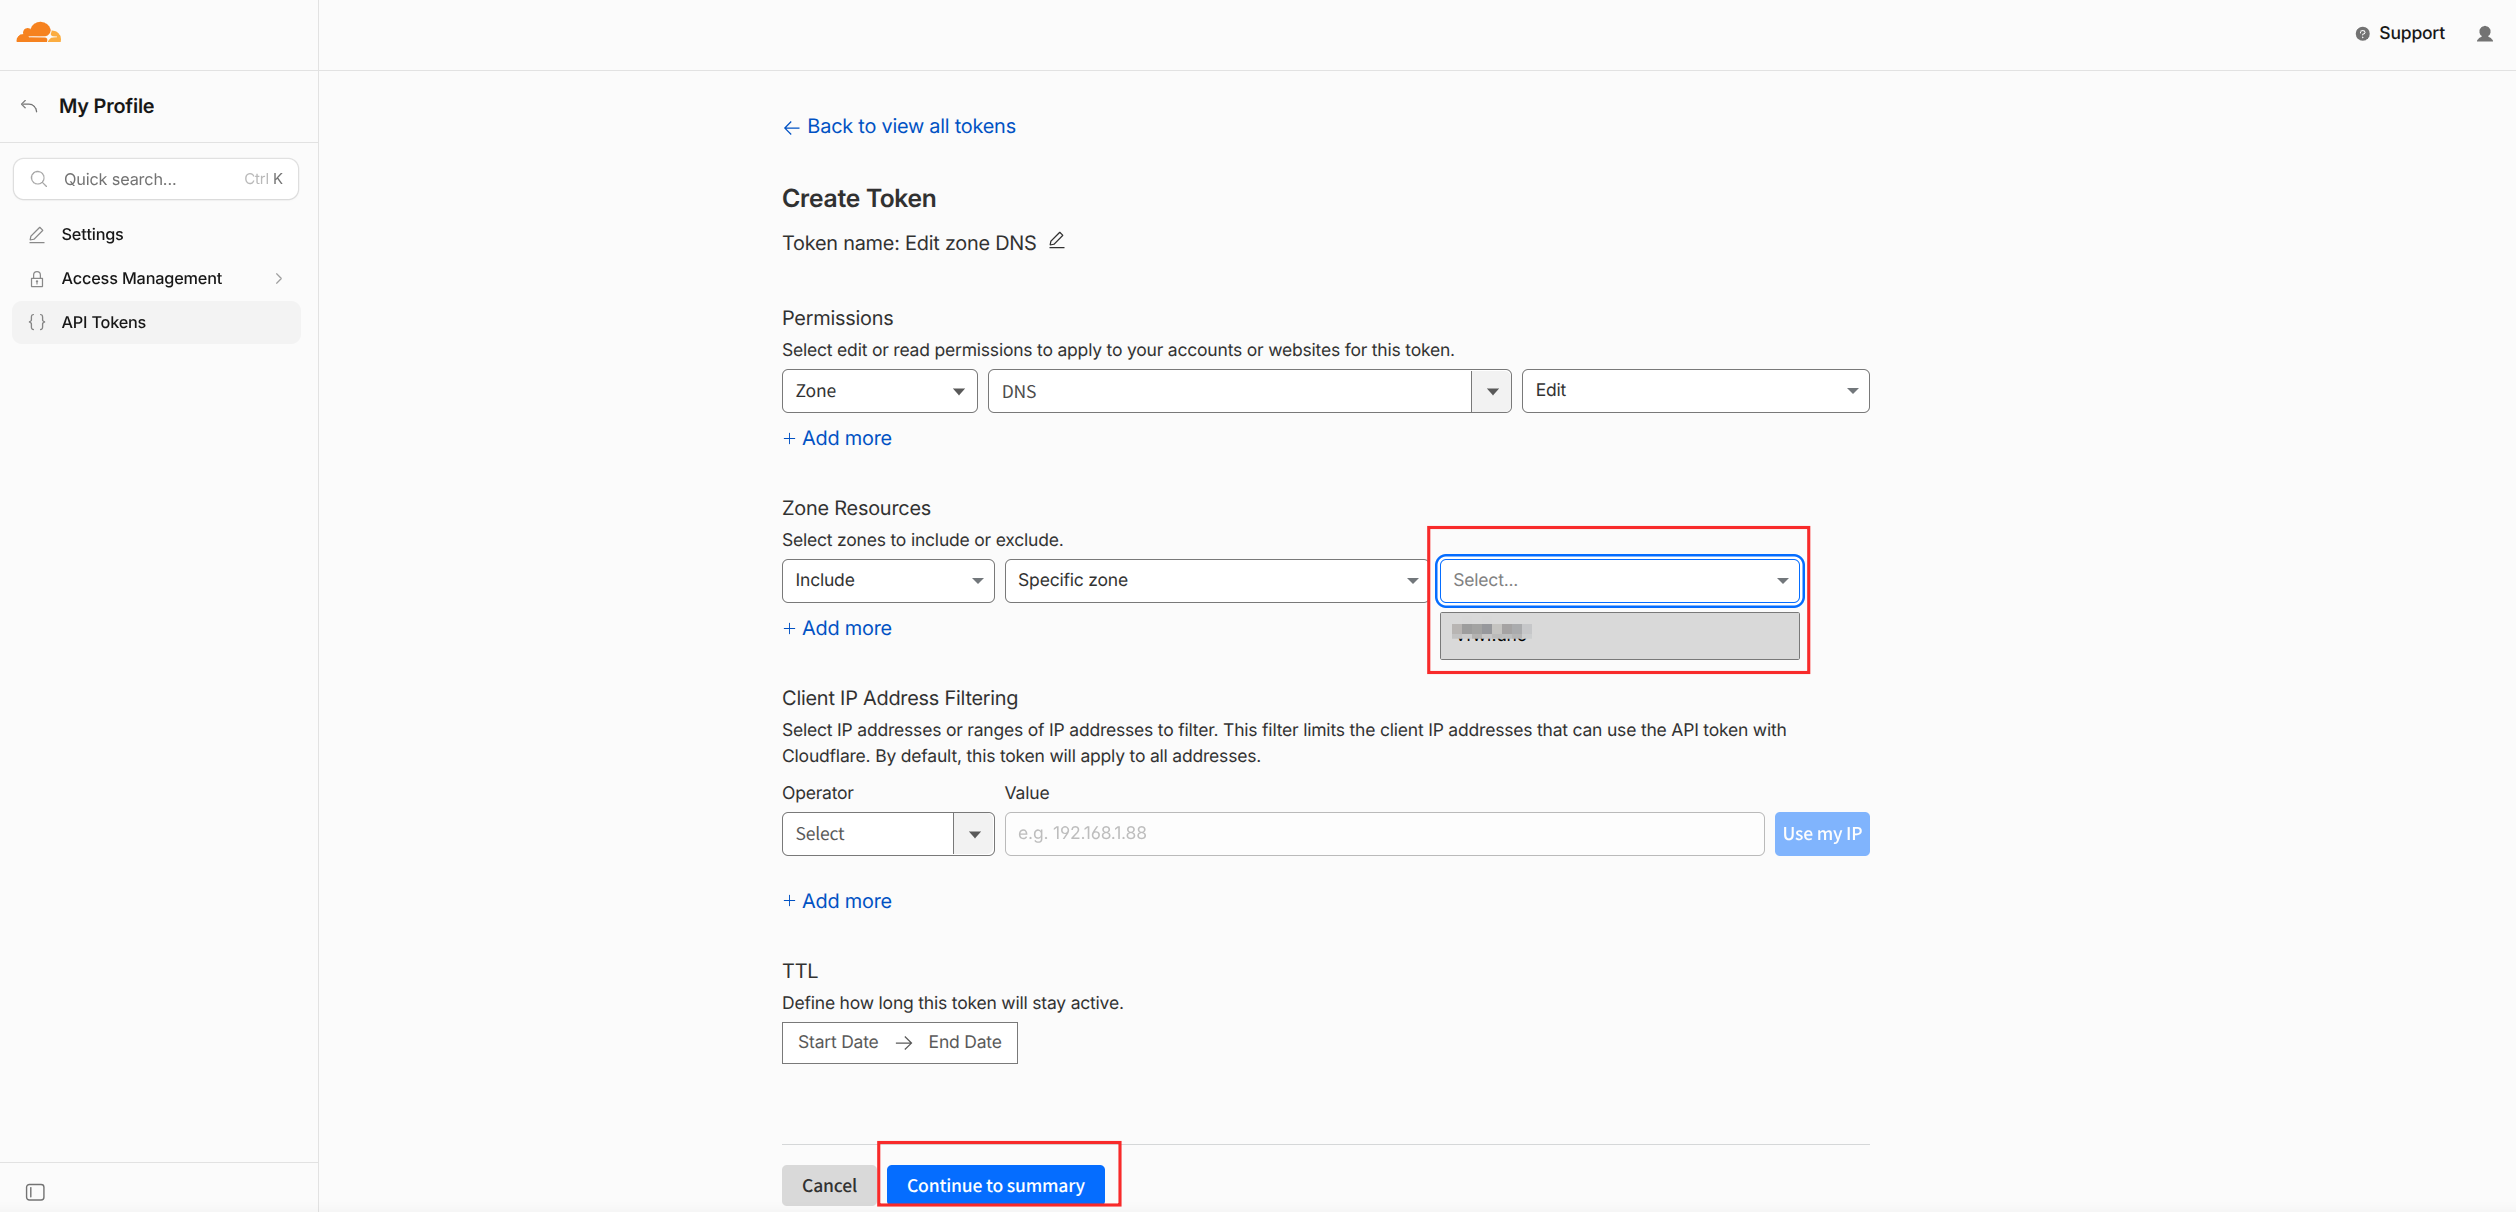
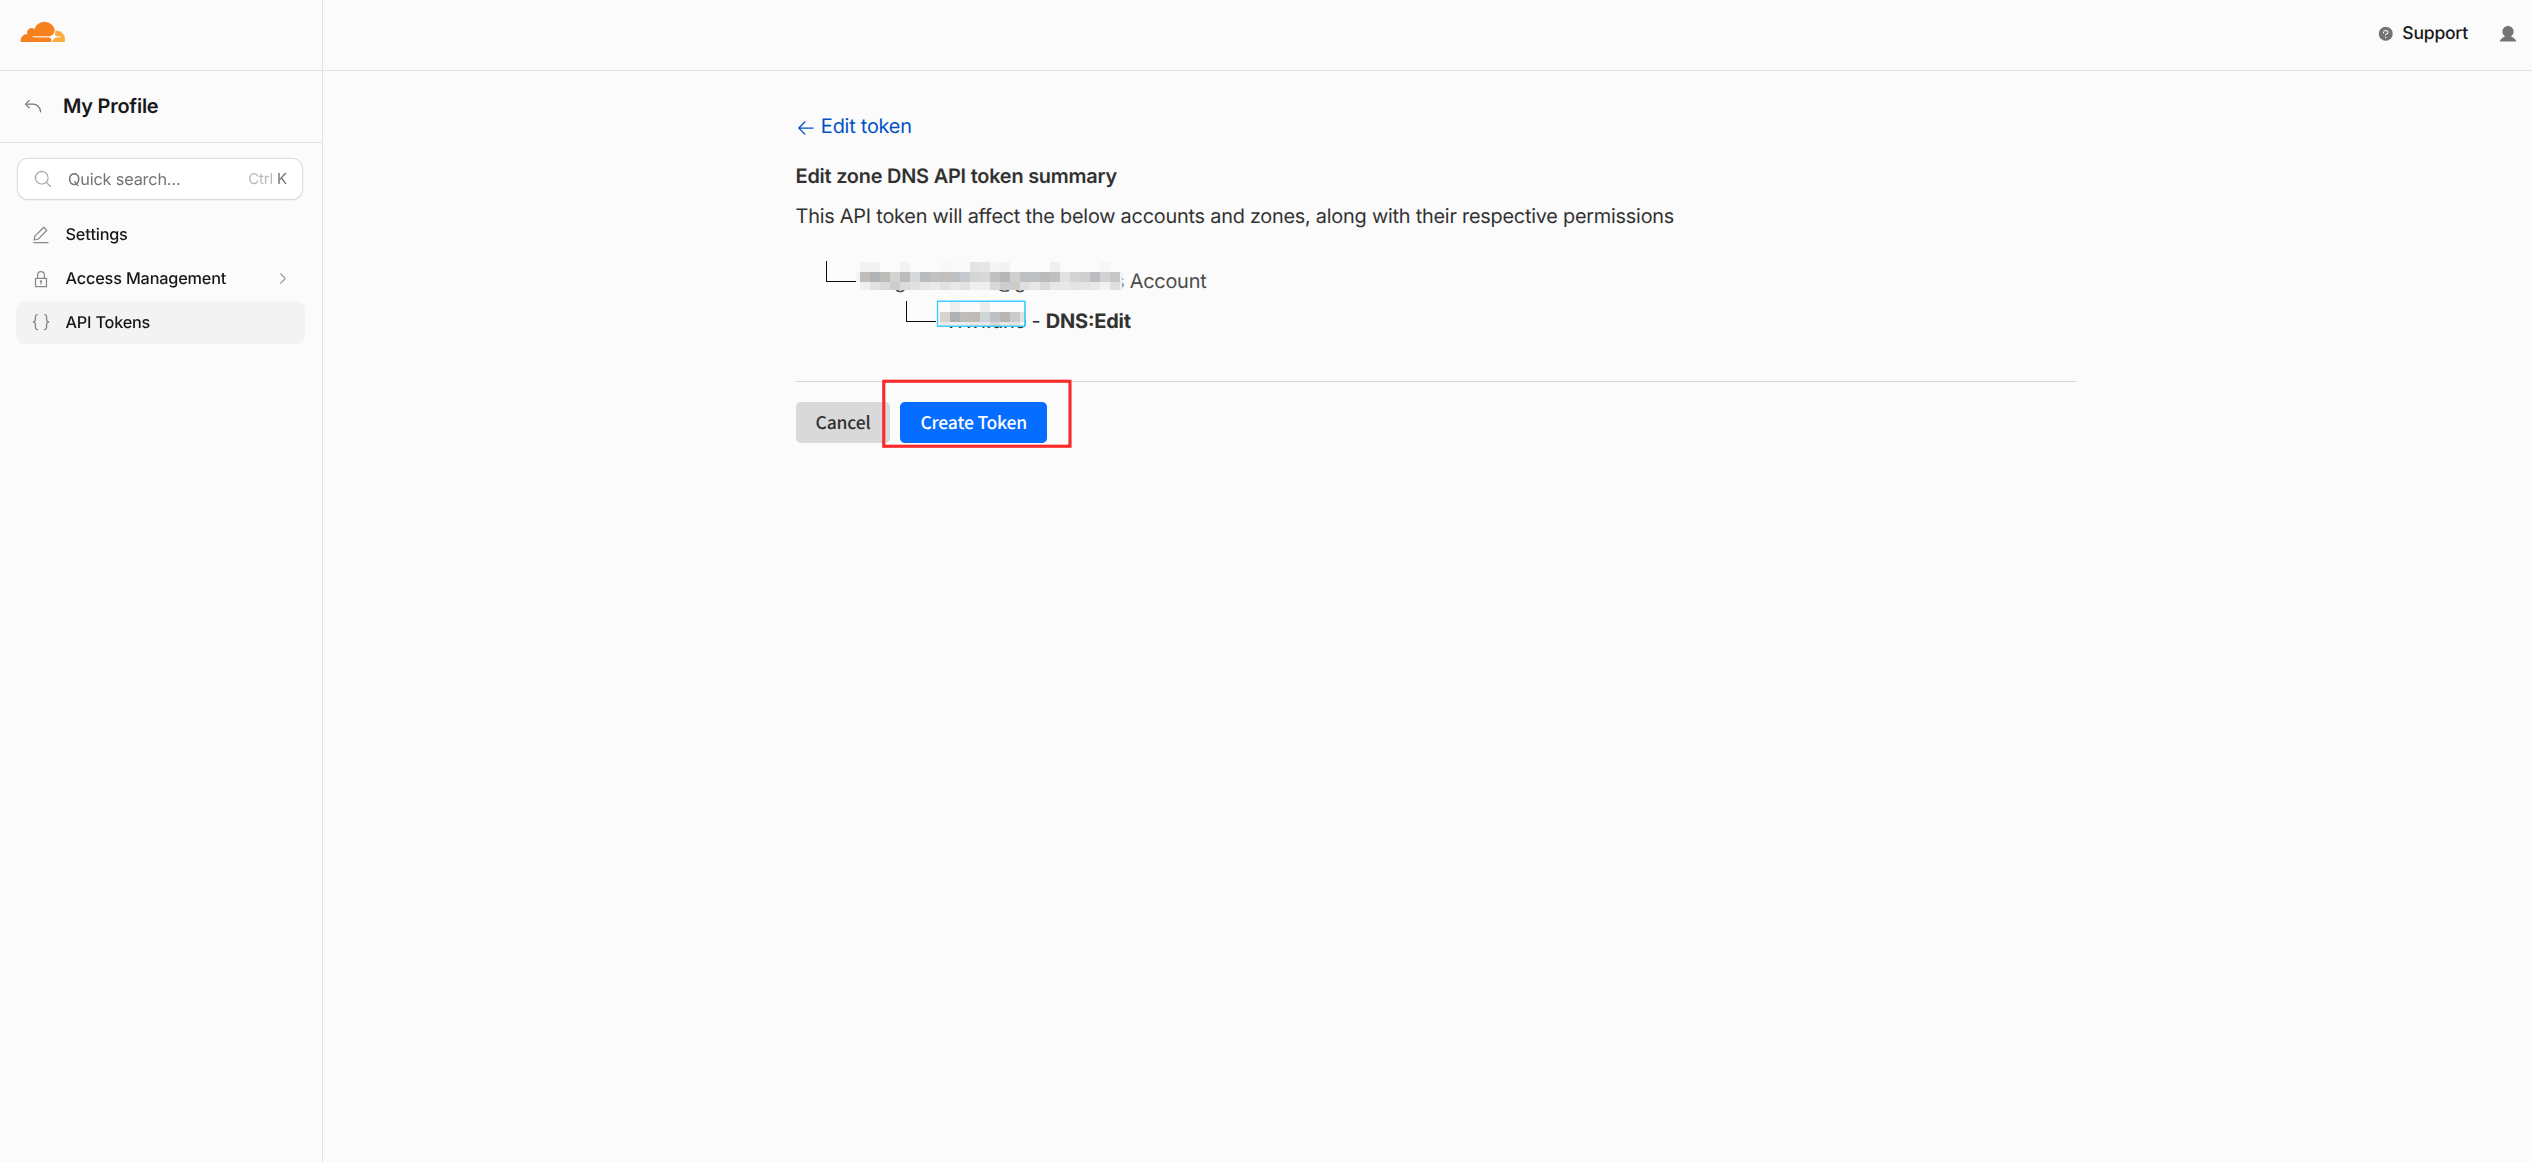
- Click
Create Token.
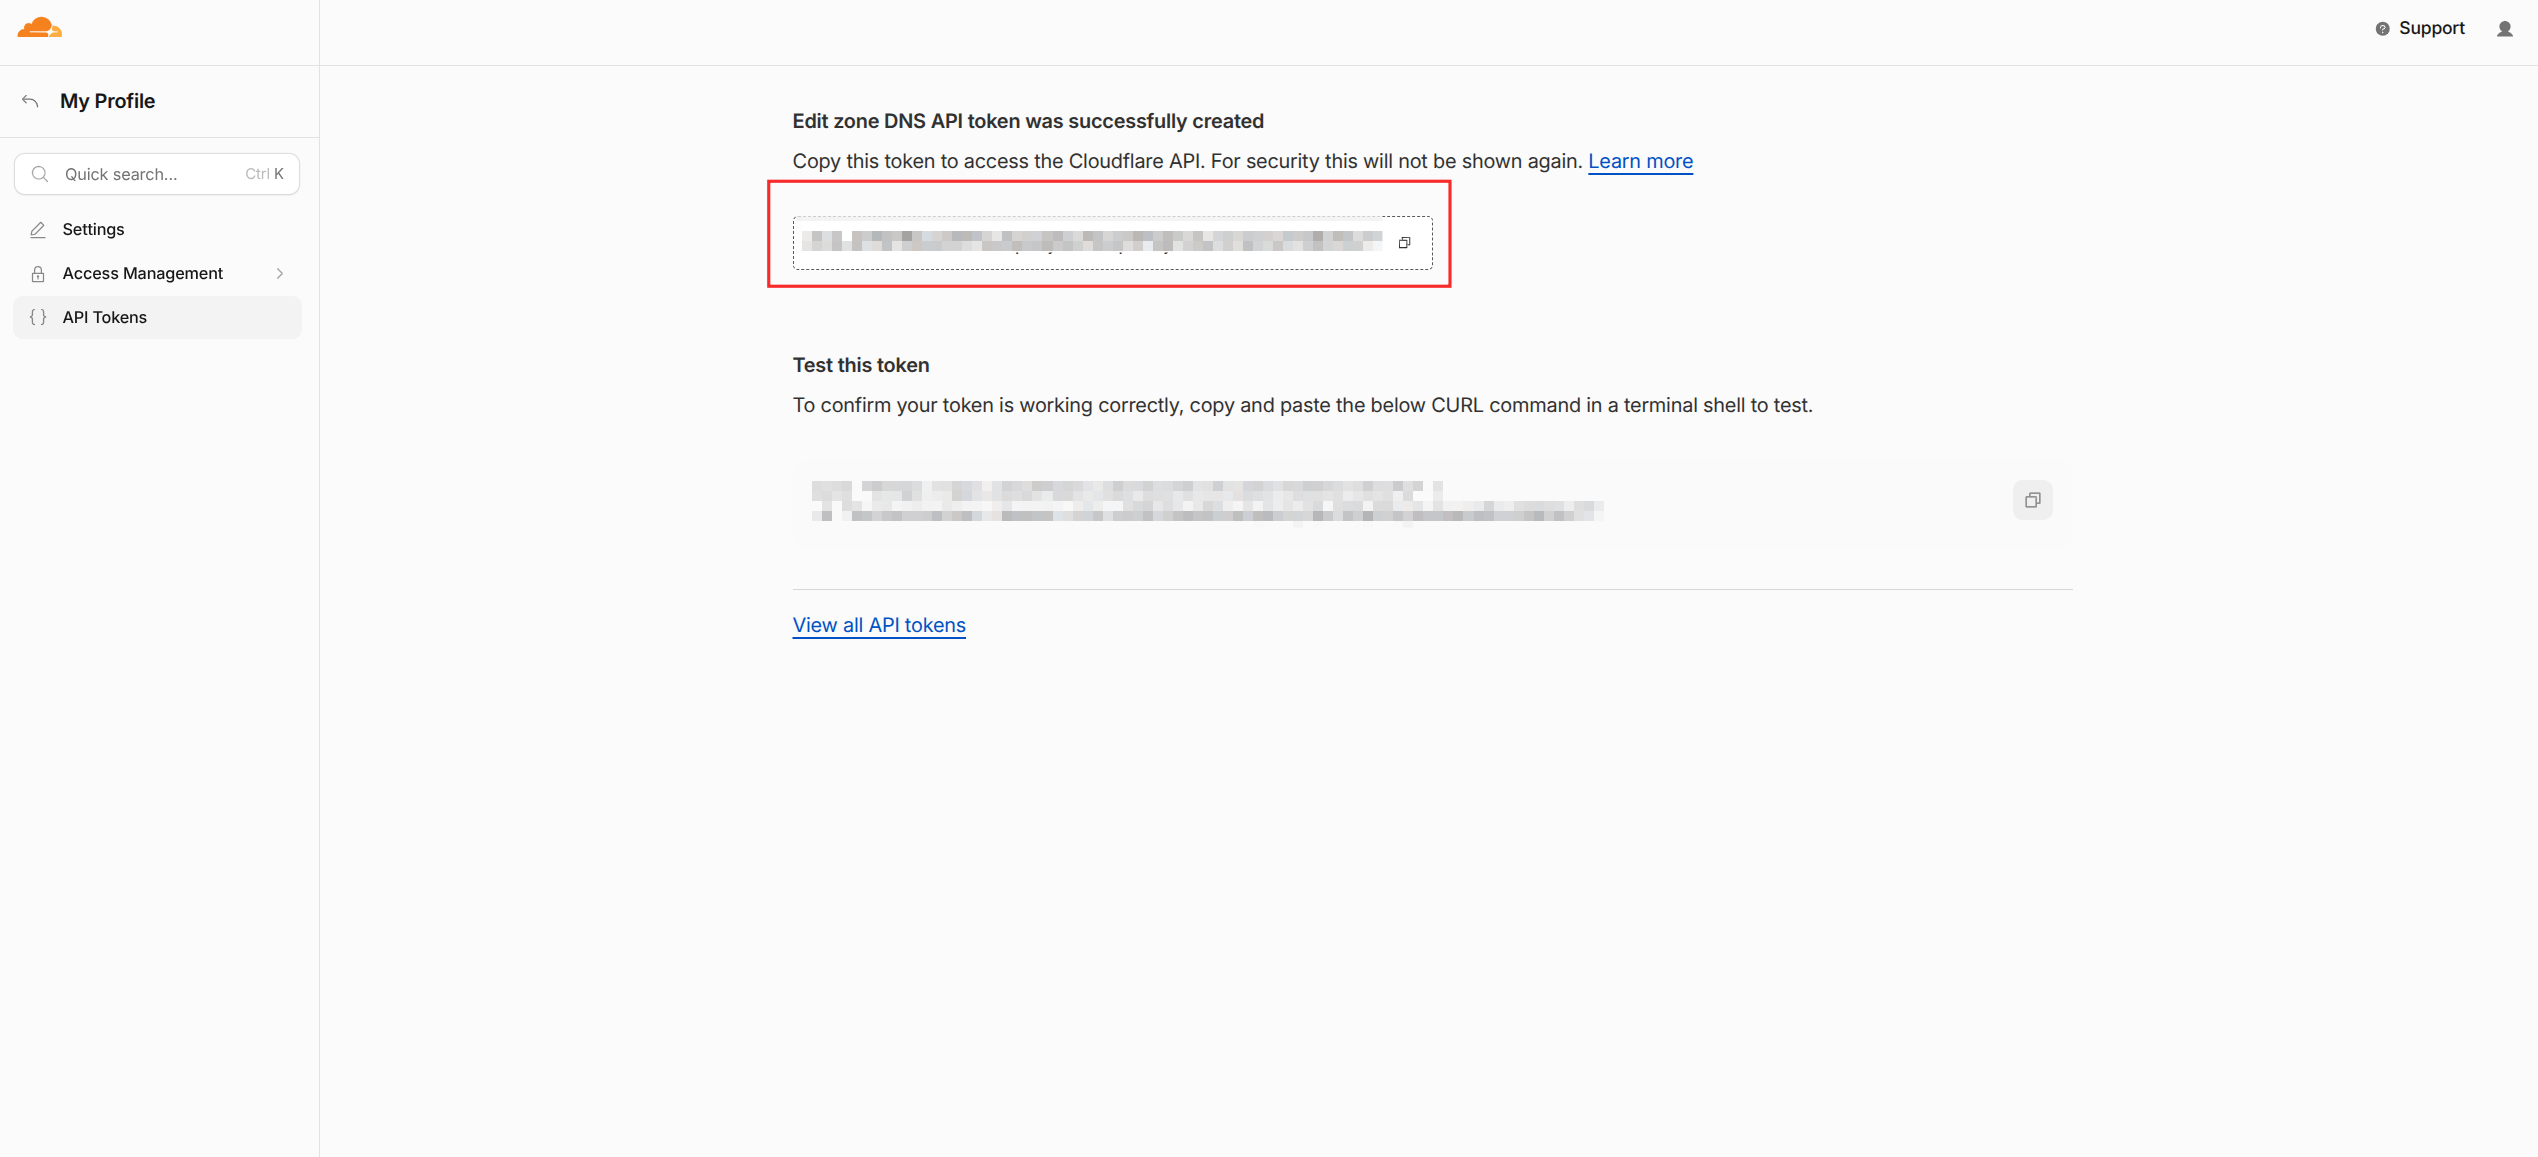
- Copy the API Token. You will use it in the NAS DDNS configuration.
¶ 2. FreeDNS
You can obtain a free domain through freedns.afraid.org (opens new window).
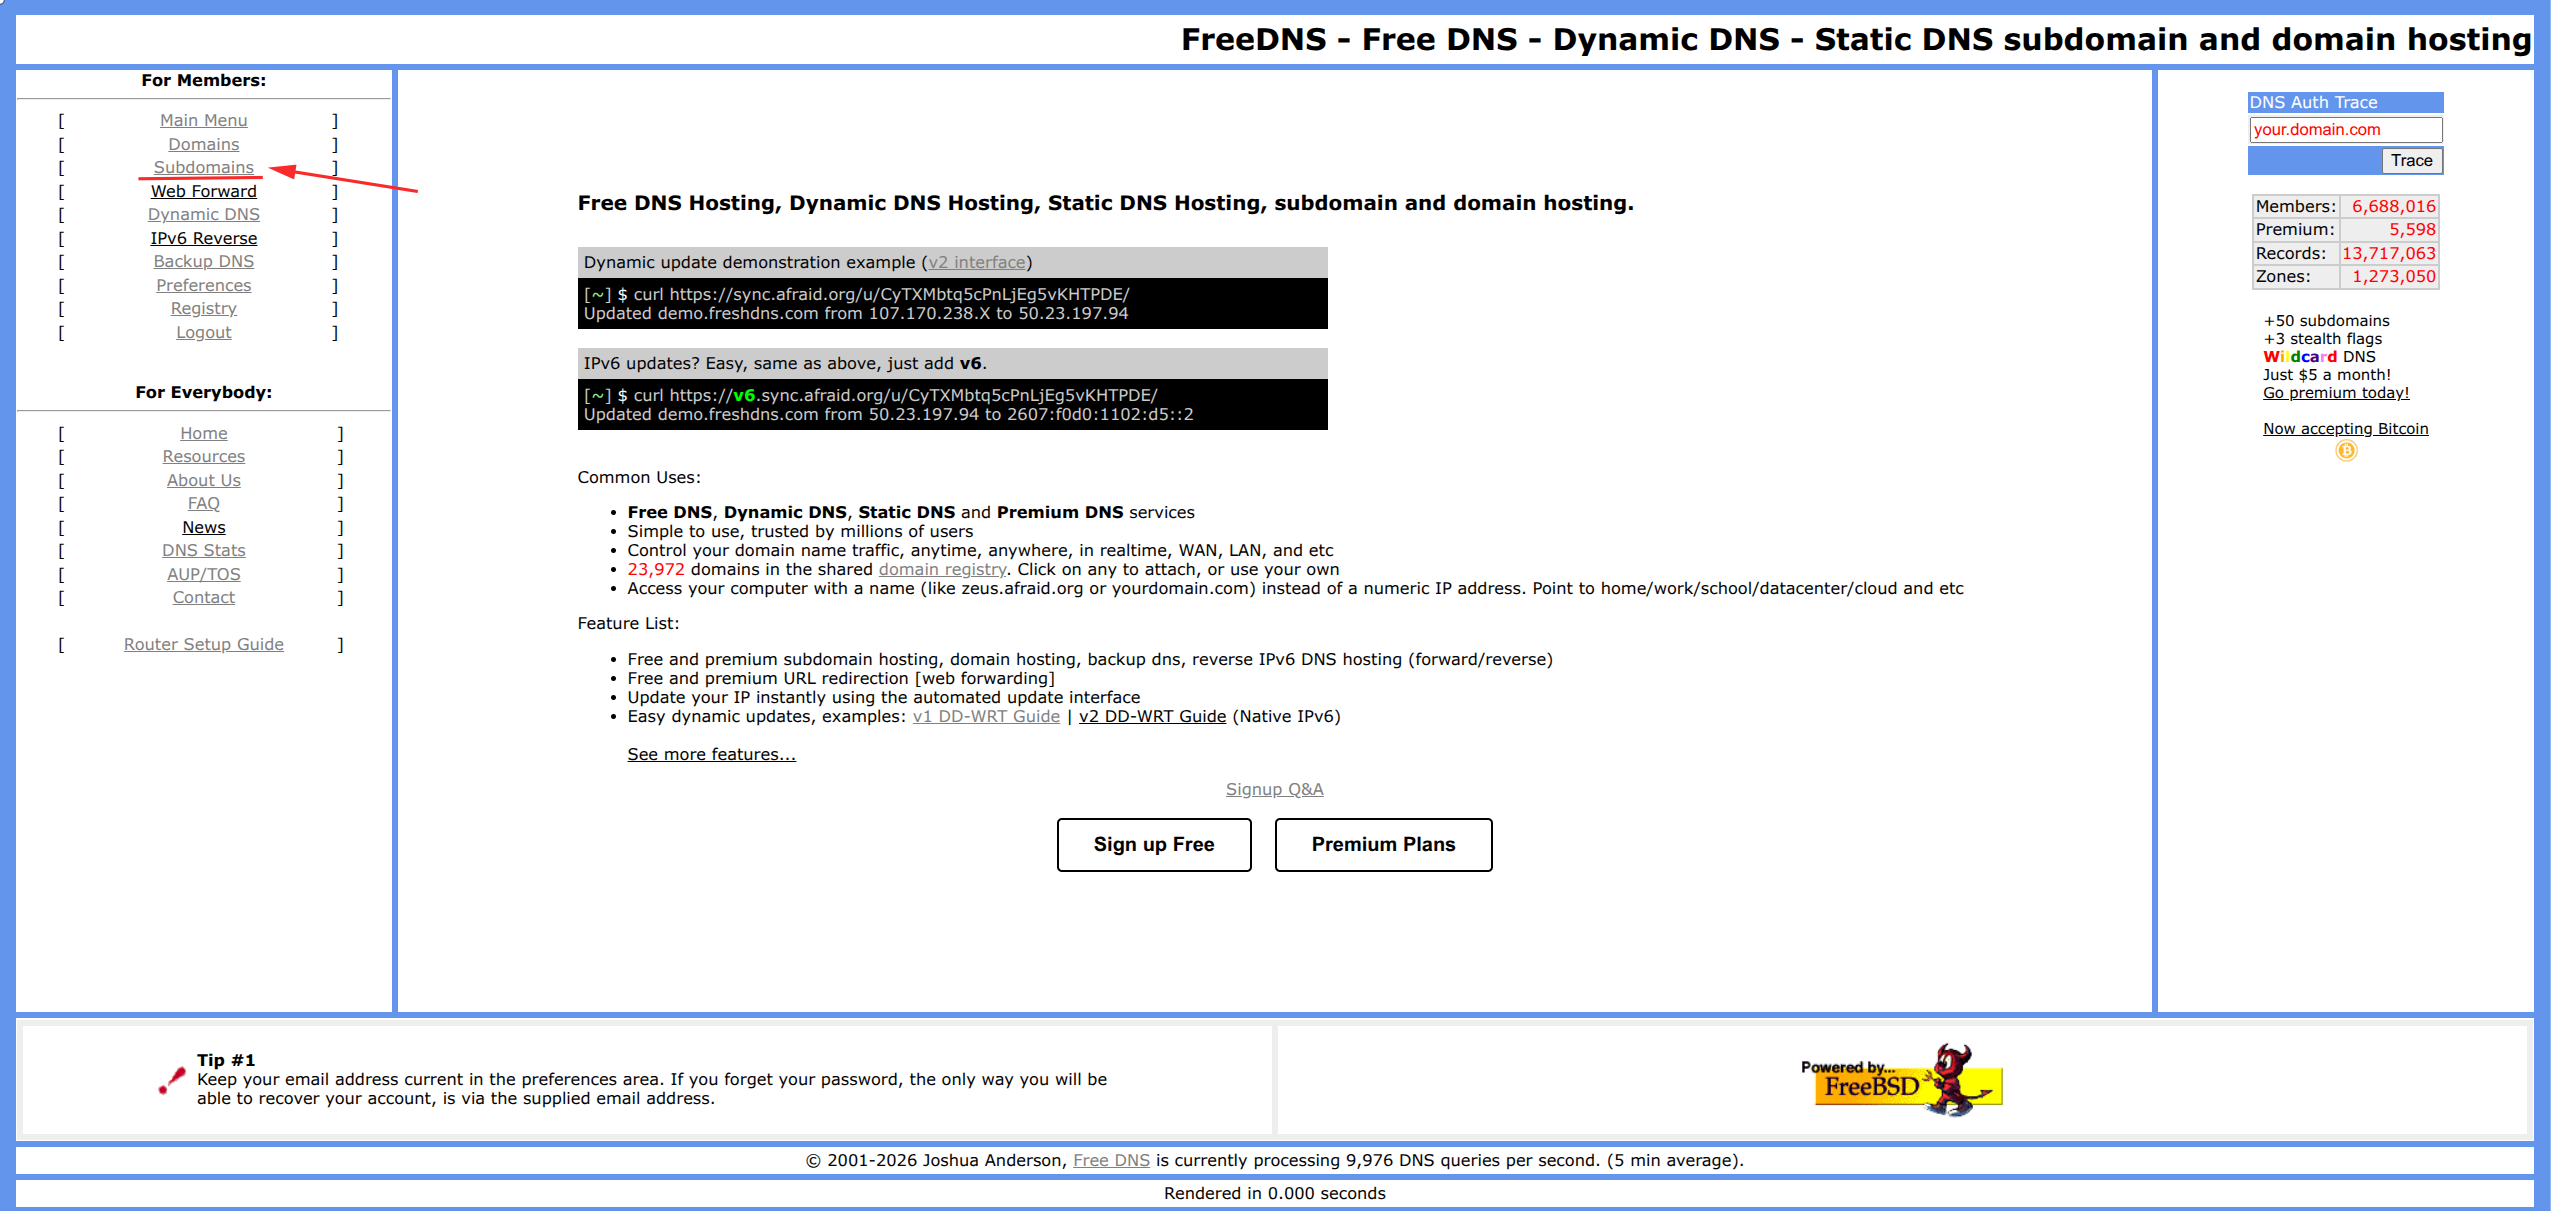
- Click
Subdomains.
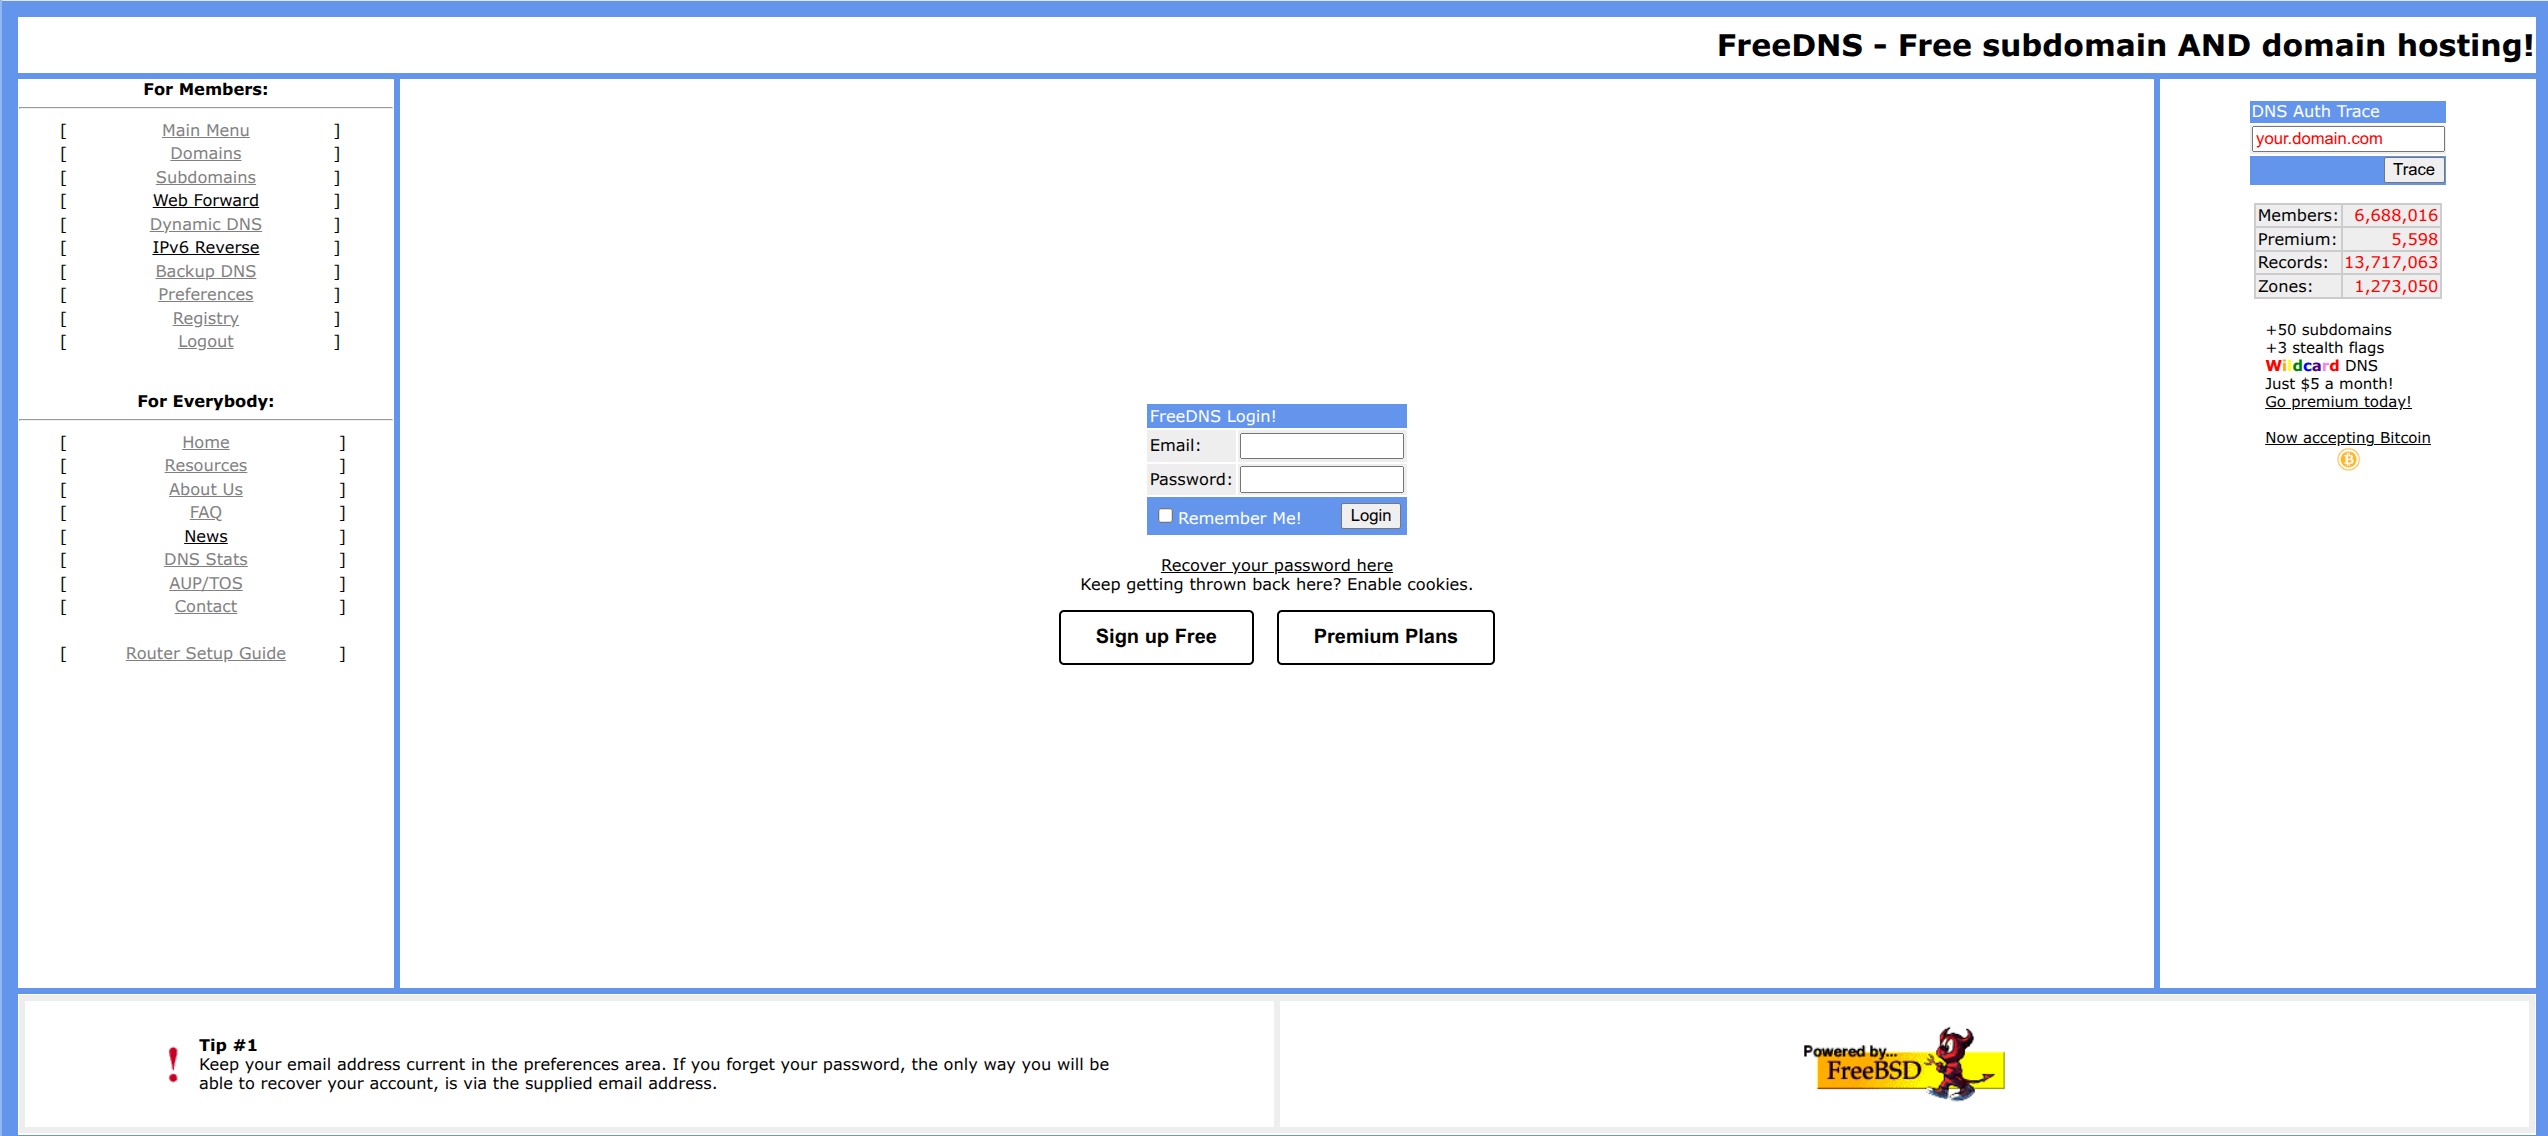
- Enter your account credentials to sign in. If you do not have an account, click
Sign up Freefirst.
- Enter the required information and click
Save.
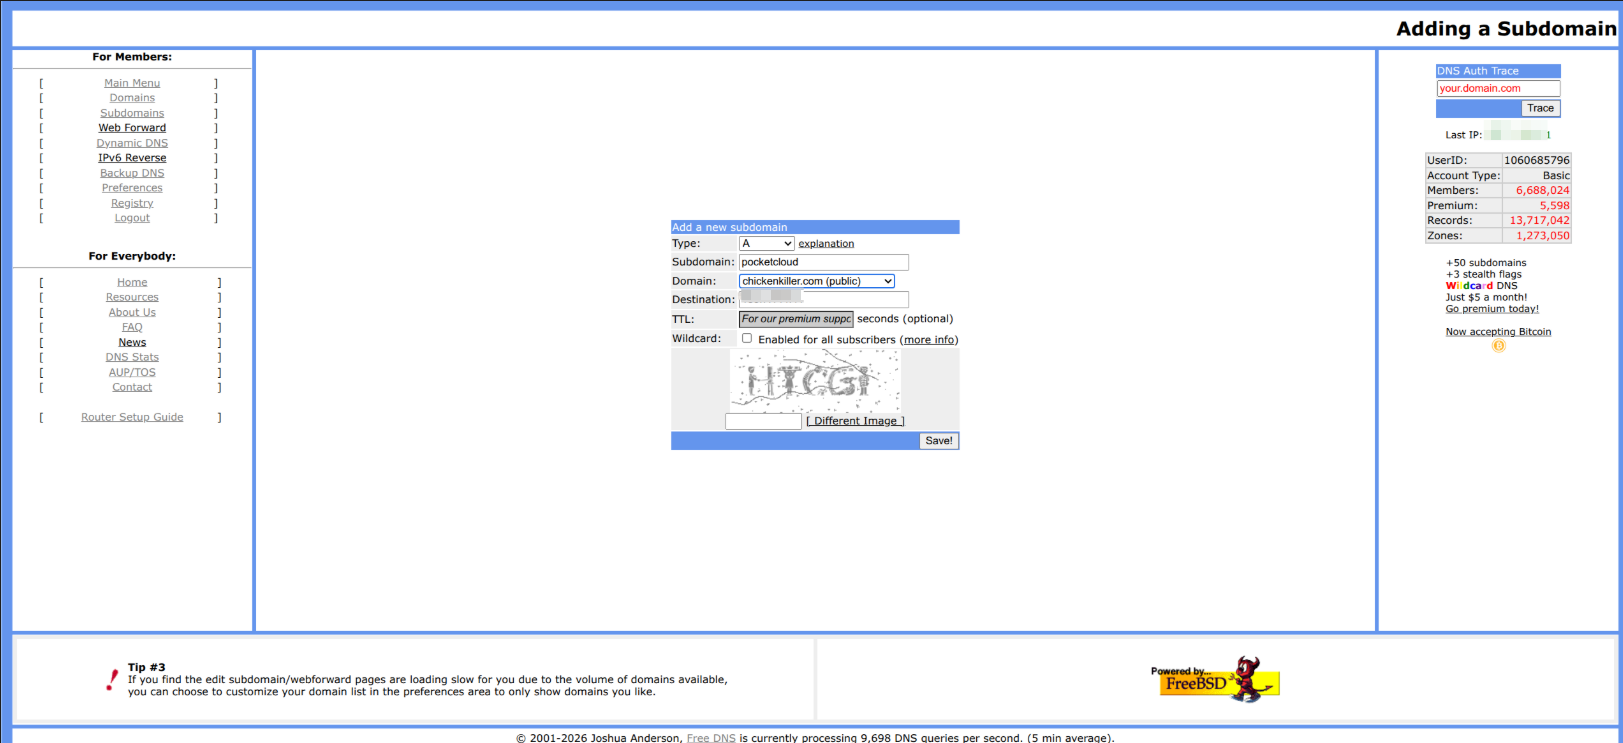
- Type: Select
Afor an IPv4 record. - Subdomain: Enter a custom subdomain.
- Domain: Select a preferred parent domain.
- Click
Dynamic DNS>quick cron example.
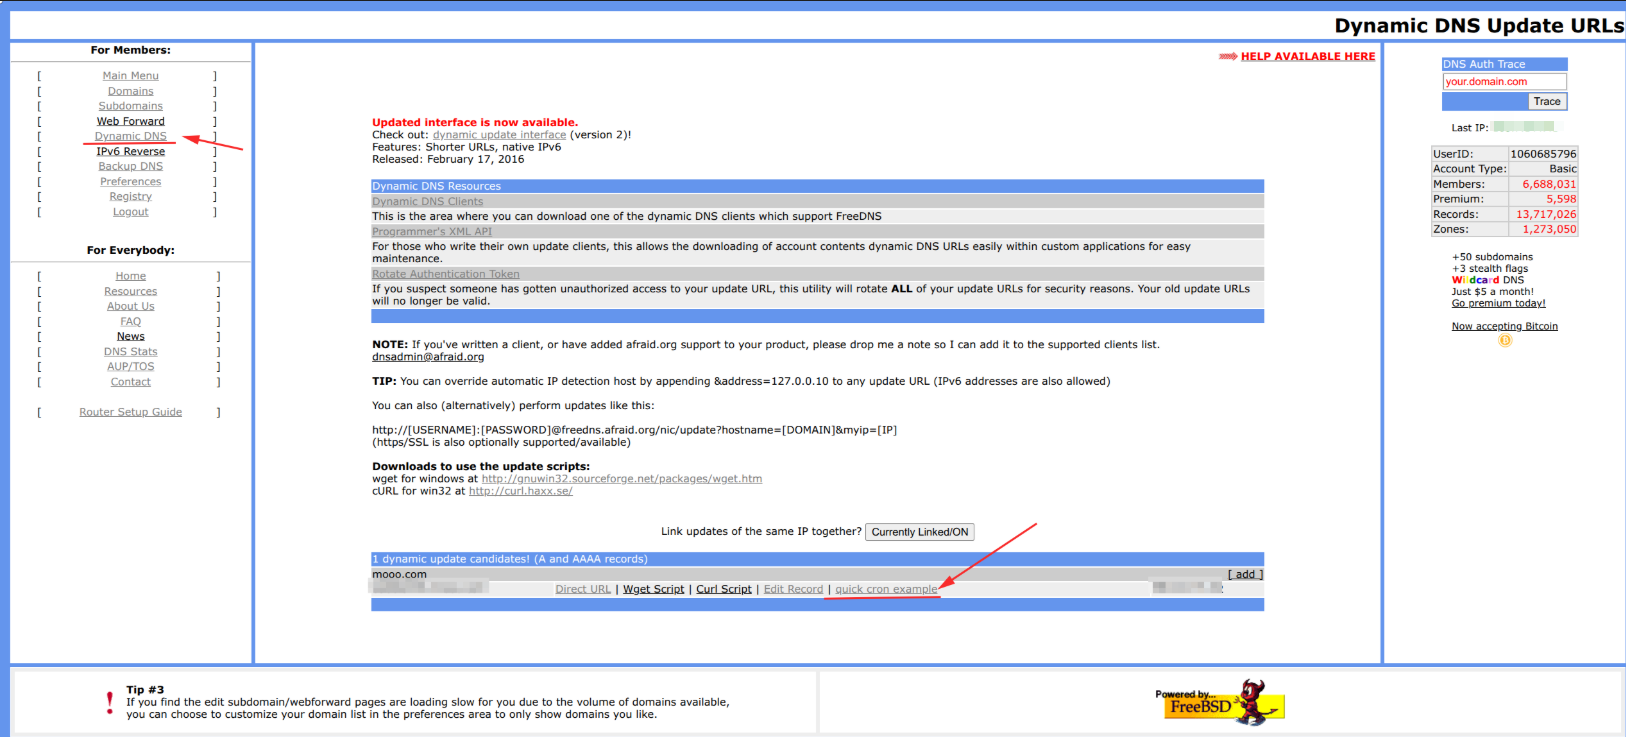
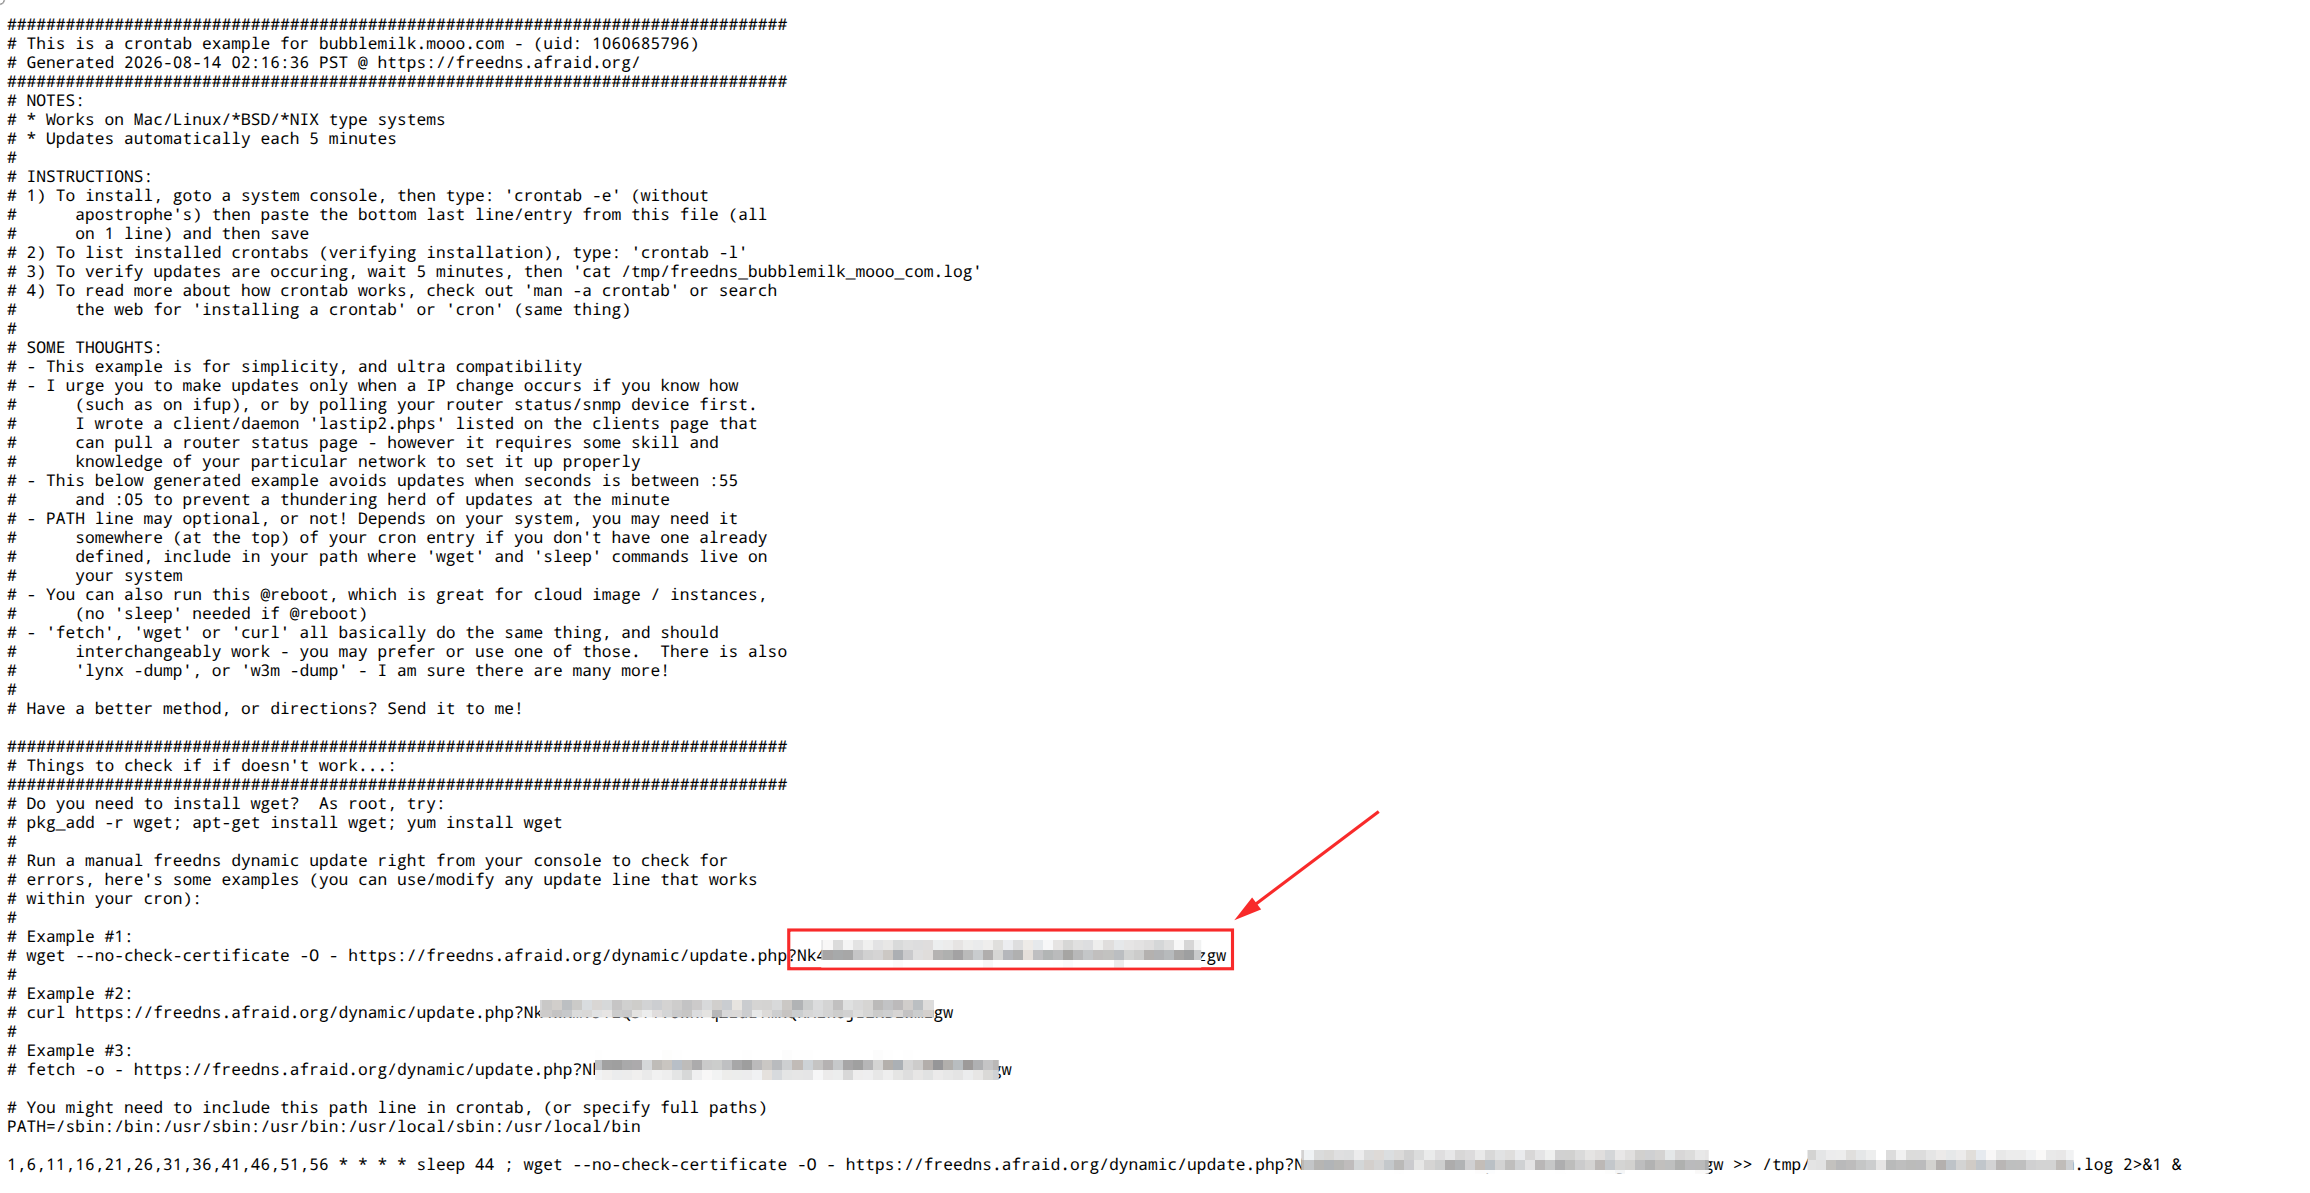
- Save the key highlighted in the image. Use the value after
?, excluding the?itself. You will need this key for the PocketCloud DDNS configuration.
¶ 3. Duck DNS
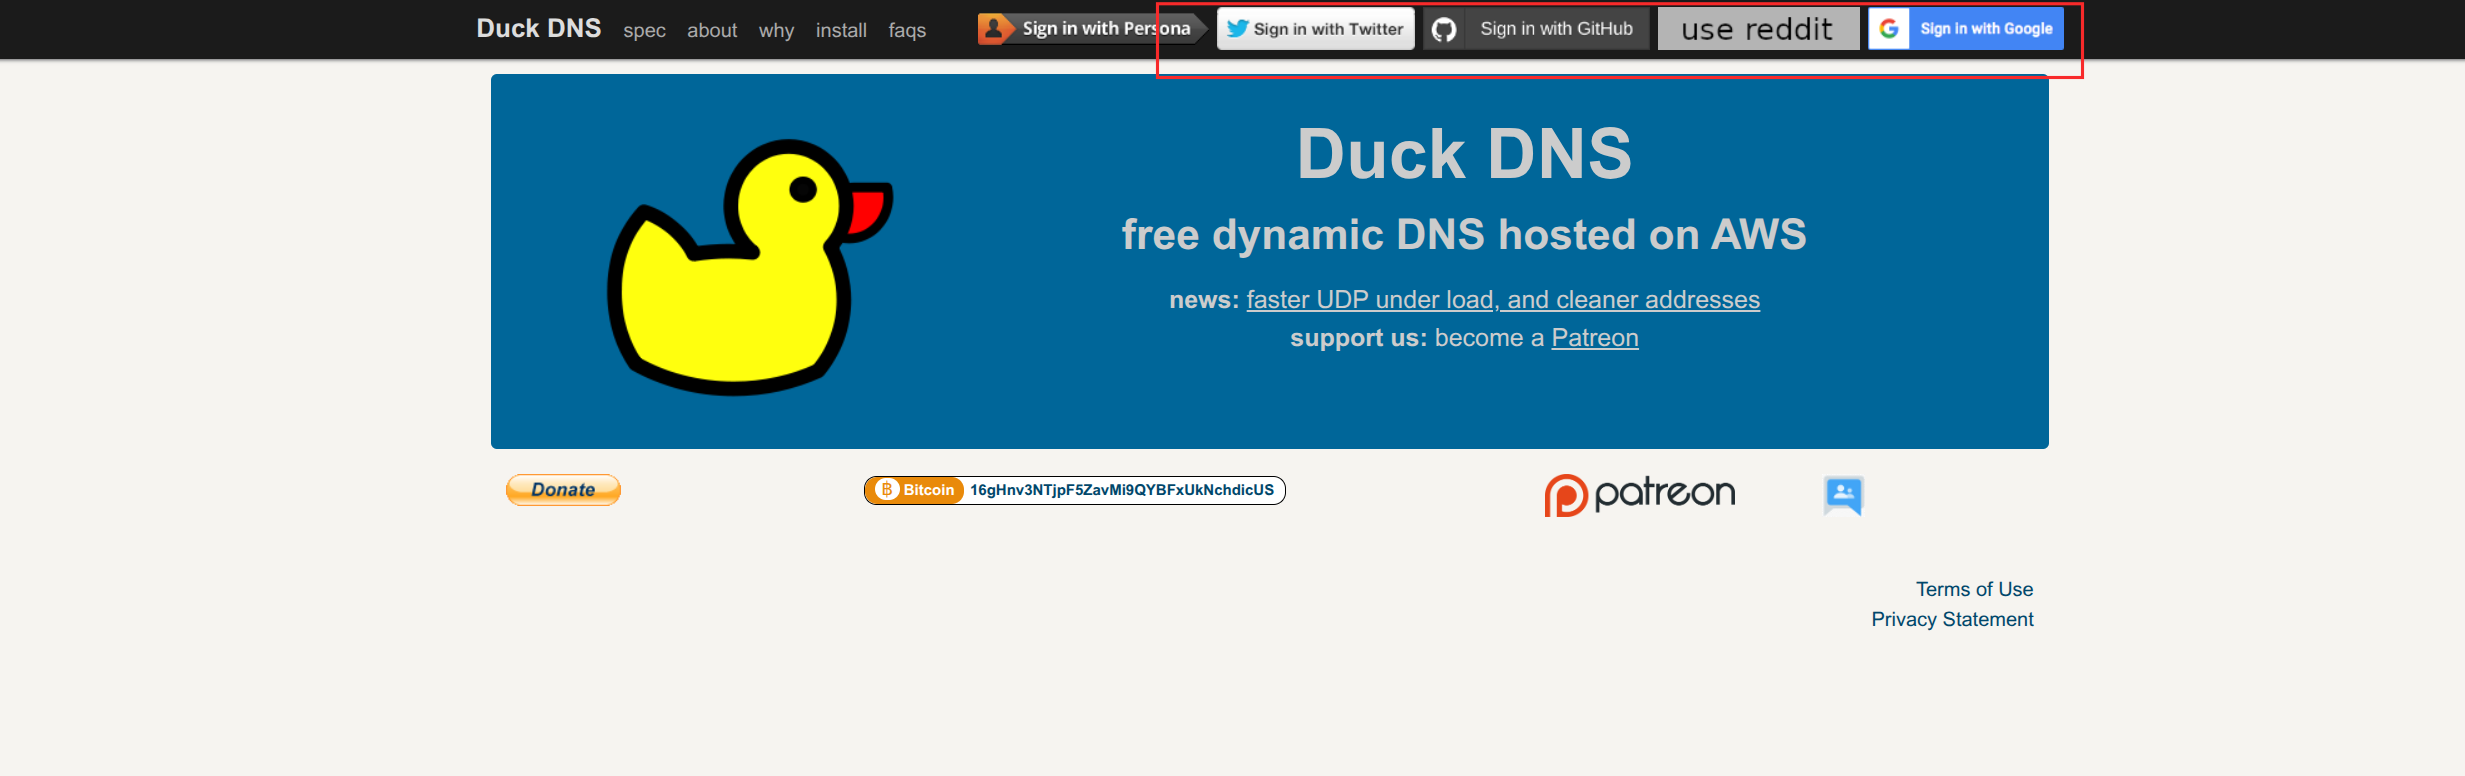
- Open Duck DNS (opens new window).
- Select a sign-in method and sign in.
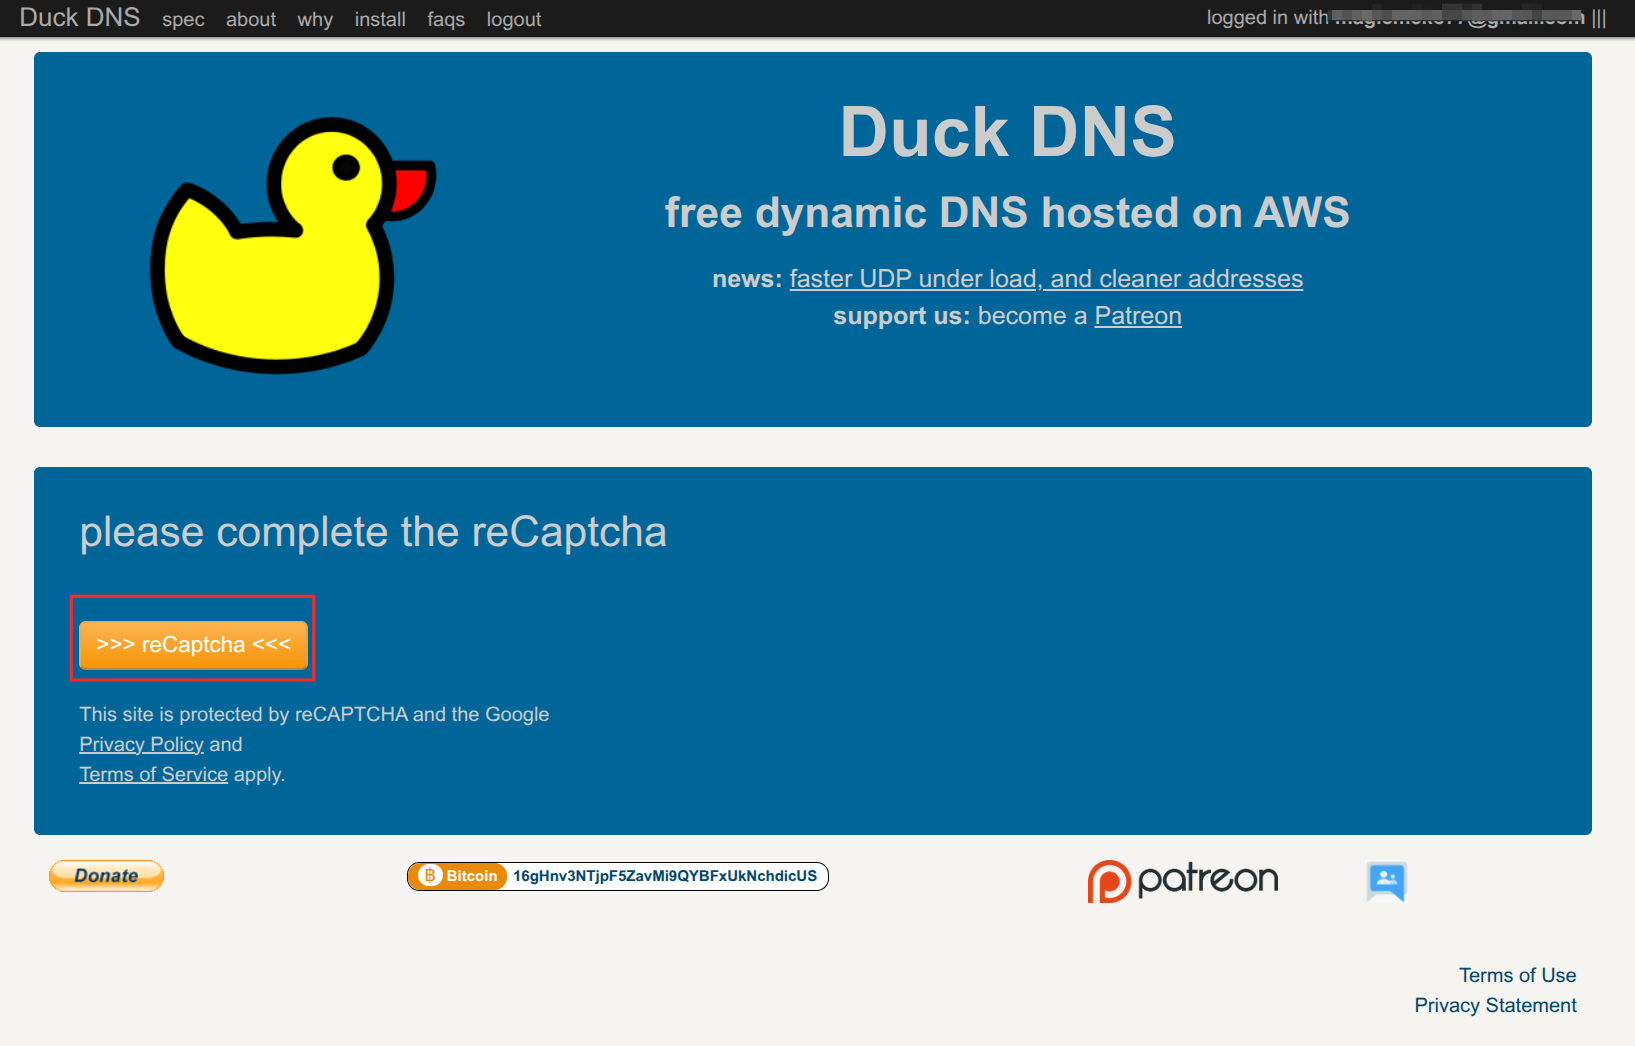
- Complete
reCaptchato register a domain.
- Under
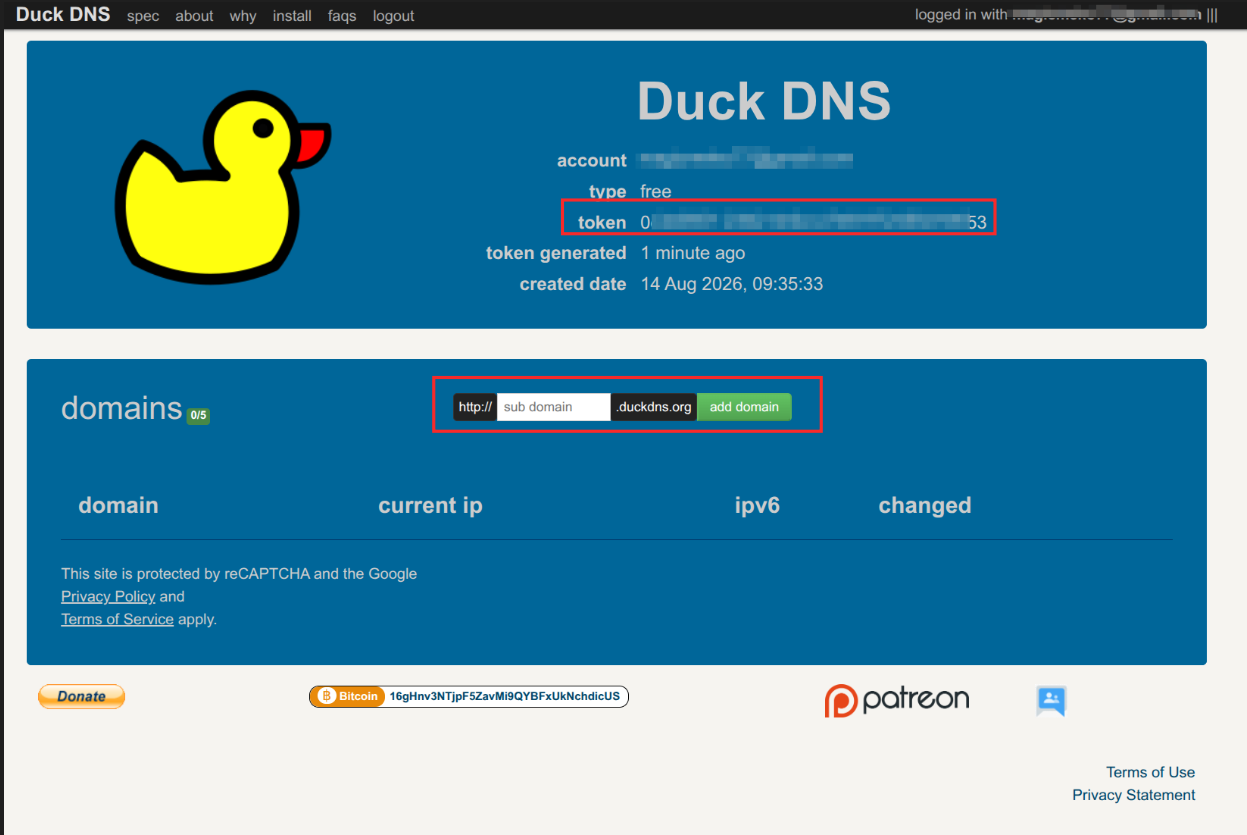
domains, enter a subdomain and clickadd domain.
- Save the
Token. You will need it when configuring PocketCloud DDNS.
¶ Configure DDNS on the NAS
- Go to
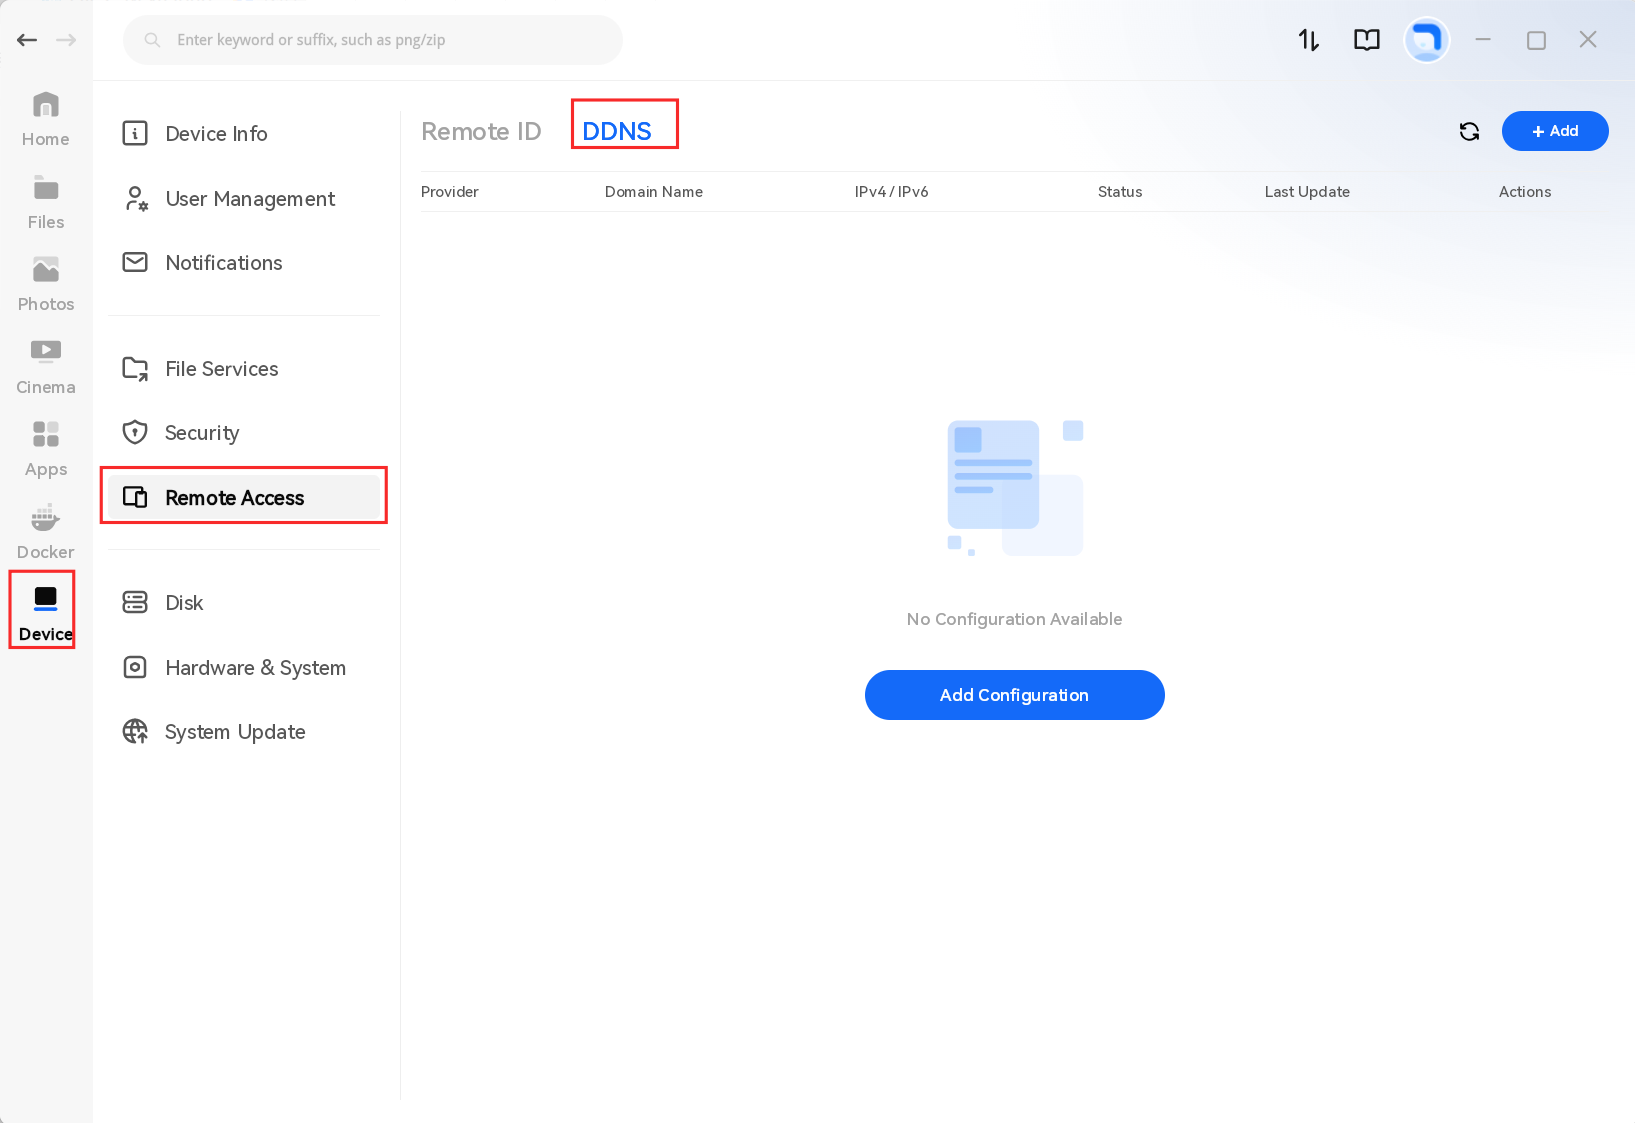
Device>Remote Access>DDNS, then clickAddin the upper-right corner orAdd Configurationin the center.
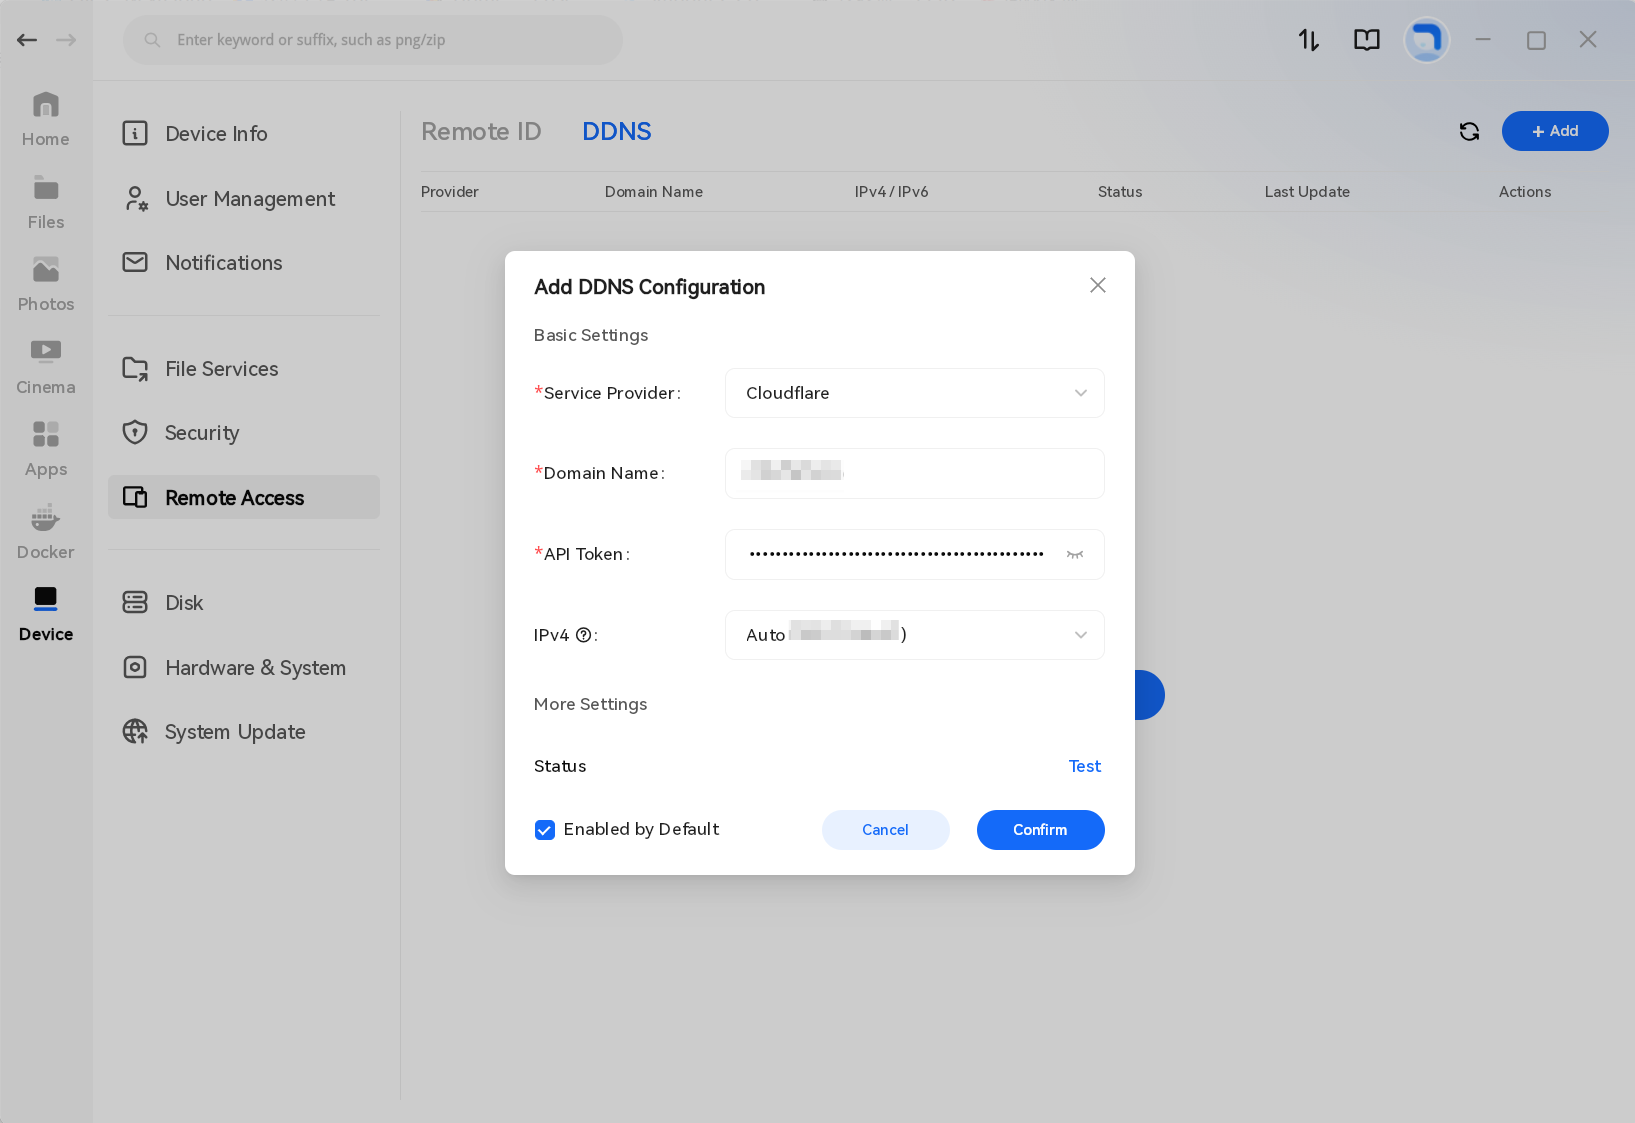
- Select your domain service provider and enter the domain and authentication information according to the provider's requirements.
- Click
Test. After the connection status changes toNormal, clickConfirmto save. The NAS will automatically update the domain record when its IP address changes.
¶ Configure Router Port Forwarding
Sign in to the router administration page
Enter the router's IP address, such as
192.168.1.1or192.168.0.1, in a browser and sign in.Configure a static IP address
Open the router's LAN settings and locate DHCP static IP assignment.
- Bind the NAS MAC address to a static IP address.
- Select the connected NAS and click
Applyto save.
Note: Port-forwarding settings vary by router brand. Refer to the router manufacturer's documentation and make sure the external port does not conflict with another configured port.
Add a port-forwarding rule
Go to
Advanced Settings>Port ForwardingorPort Mapping, then clickAddto create a rule.Save the settings
Review the settings and save the rule.
Verify access
From an external network, access the service using
domain:portand confirm that it is reachable.
¶ Access NAS Using a Domain
After port forwarding is configured on the router and DDNS is set up successfully, use the following method to remotely sign in to PocketCloud from an external network (such as a company network or mobile data).
On the device sign-in screen, enter domain:router-mapped-port to access the device.
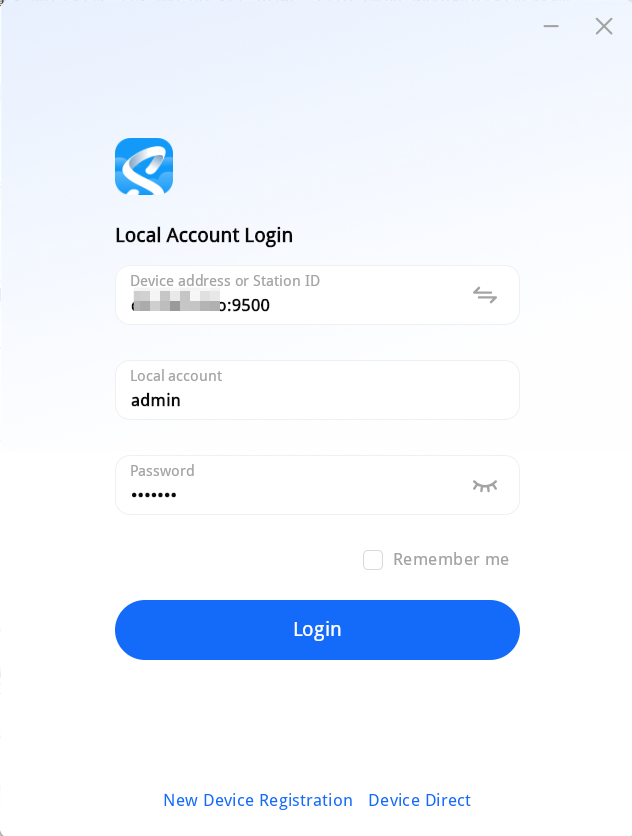
Note: The sign-in method below applies to the PocketCloud PC client, web browser, and app.
¶ Troubleshoot Domain Access
If the service cannot be reached externally after DDNS is configured, check the following common causes.
¶ 1. Router Port Mapping Issue
Confirm that the router's port-forwarding rule maps the external port to NAS port 9500. When connecting, use the external port exposed by the router.
¶ 2. The Client Cannot Obtain a Public IP Address
Your ISP may have assigned a private IP address, such as 10.10.x.x.
Sign in to your home router and locate the WAN IPv4 address. Compare it with the IP address shown at What Is My IP Address (opens new window). If they do not match, contact your ISP for assistance.
¶ 3. DNS Resolution Does Not Return the Correct IP Address
If the domain does not resolve to the correct IP address, the cause may be an outdated DNS cache or abnormal DNS resolution.
1. The DNS Cache Has Not Updated
Symptom
After changing the DNS record, some devices or networks still cannot connect or resolve to the previous IP address, while other devices work normally.
Cause
DNS record changes do not take effect immediately on every DNS server. Because DNS uses a TTL (Time to Live) cache, your computer, router, or ISP DNS server may still store the previous result.
Solution
- Clear the local DNS cache, then resolve the domain again.
- Change to another DNS server and verify whether the correct IP address is returned.
Note: DNS cache update time depends on the record's TTL. It may take some time for a change to become effective across different networks.
2. Abnormal DNS Resolution or DNS Pollution
Symptom
A DNS query returns an IP address different from the one configured for the domain.
For example, run:
ping www.example.comIf the returned address is incorrect, check the DNS result for the current network. You can also use DNS Checker (opens new window) to compare the domain's resolution results across countries and regions.
Solution
- Change the client device's DNS server, for example to Google Public DNS:
8.8.8.88.8.4.4dns.google
- Use another reliable DNS provider, then resolve the domain again.
- Change the client device's DNS server, for example to Google Public DNS:
Note: If the problem occurs only on certain networks or in certain regions, test with DNS providers in multiple regions to determine whether a specific DNS service or network is responsible.