¶ How to Access PocketCloud Files via WebDAV?
WebDAV (Web-based Distributed Authoring and Versioning) is an extension of the HTTP protocol that enables file sharing and collaboration over the network. It allows users to access, edit, and manage files stored on remote servers through web browsers or client applications.
WebDAV provides the following main features:
- File Upload and Download – Supports uploading local files to the server and downloading remote files to local devices.
- File Management – Enables users to create, delete, rename, and move files or folders on the remote server.
- File Synchronization – Keeps local and remote files in sync to ensure data consistency.
- File Sharing and Collaboration – Allows users to share files on the server with others, facilitating teamwork and collaboration.
¶ Enable WebDAV
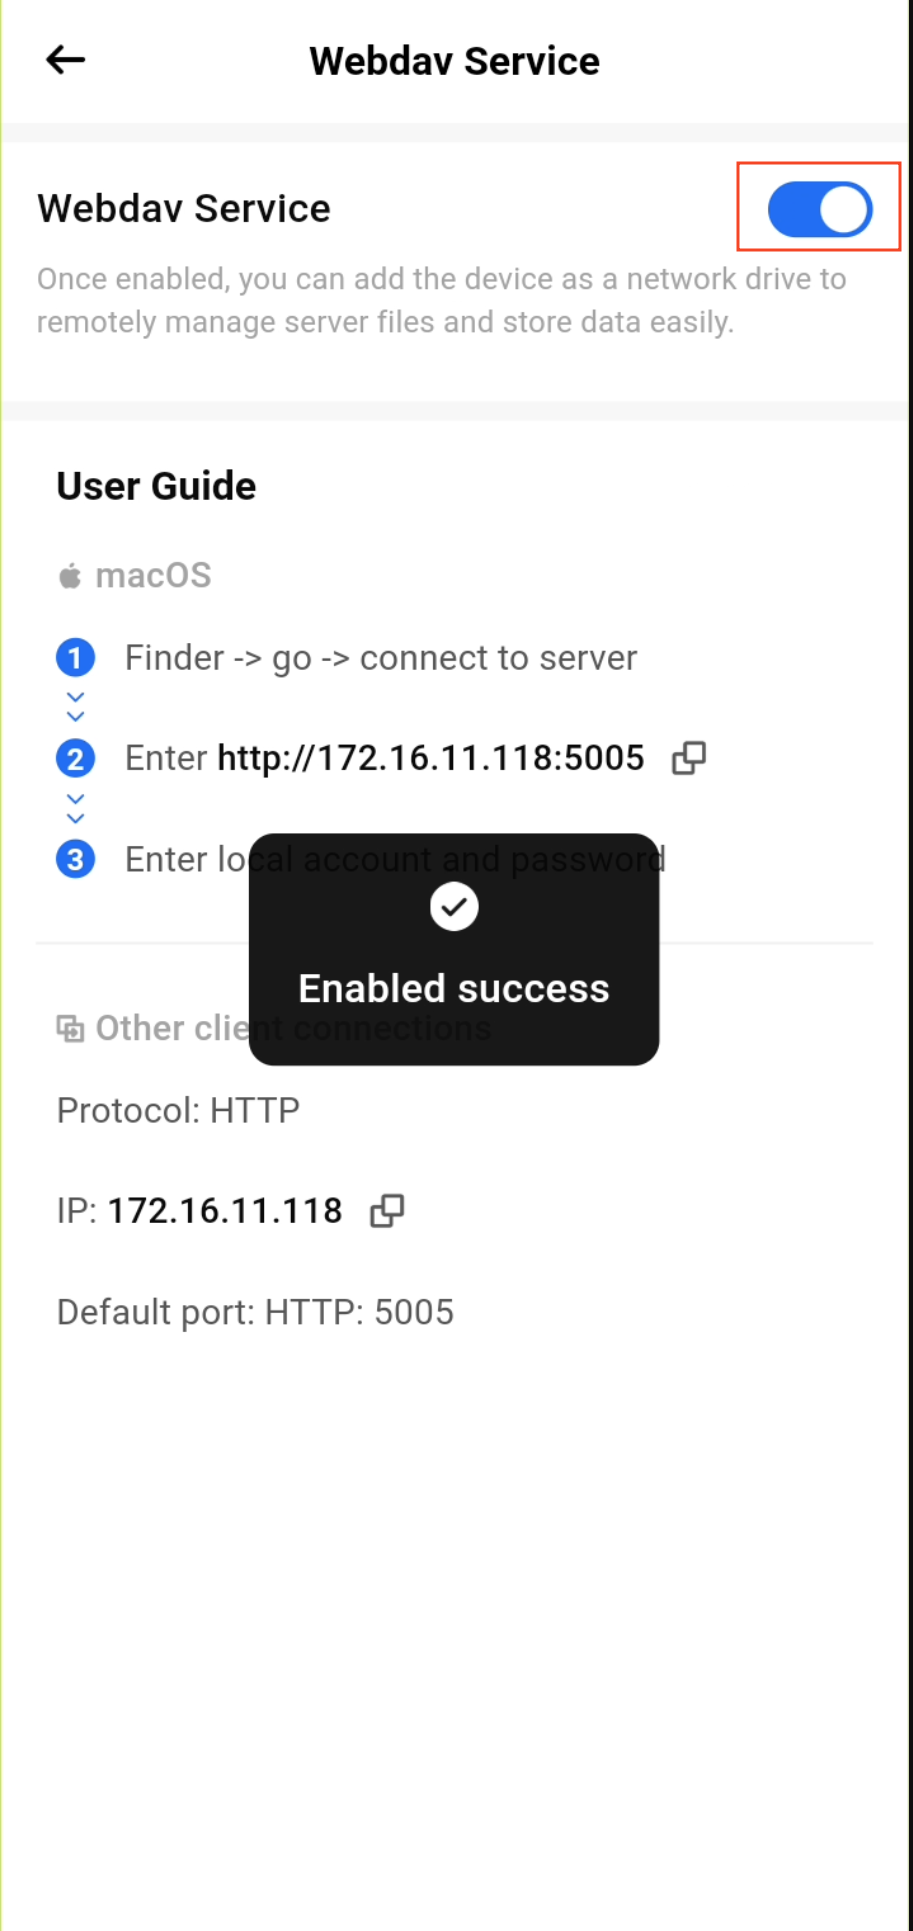
By default, WebDAV is disabled. You need to manually enable it by following these steps:
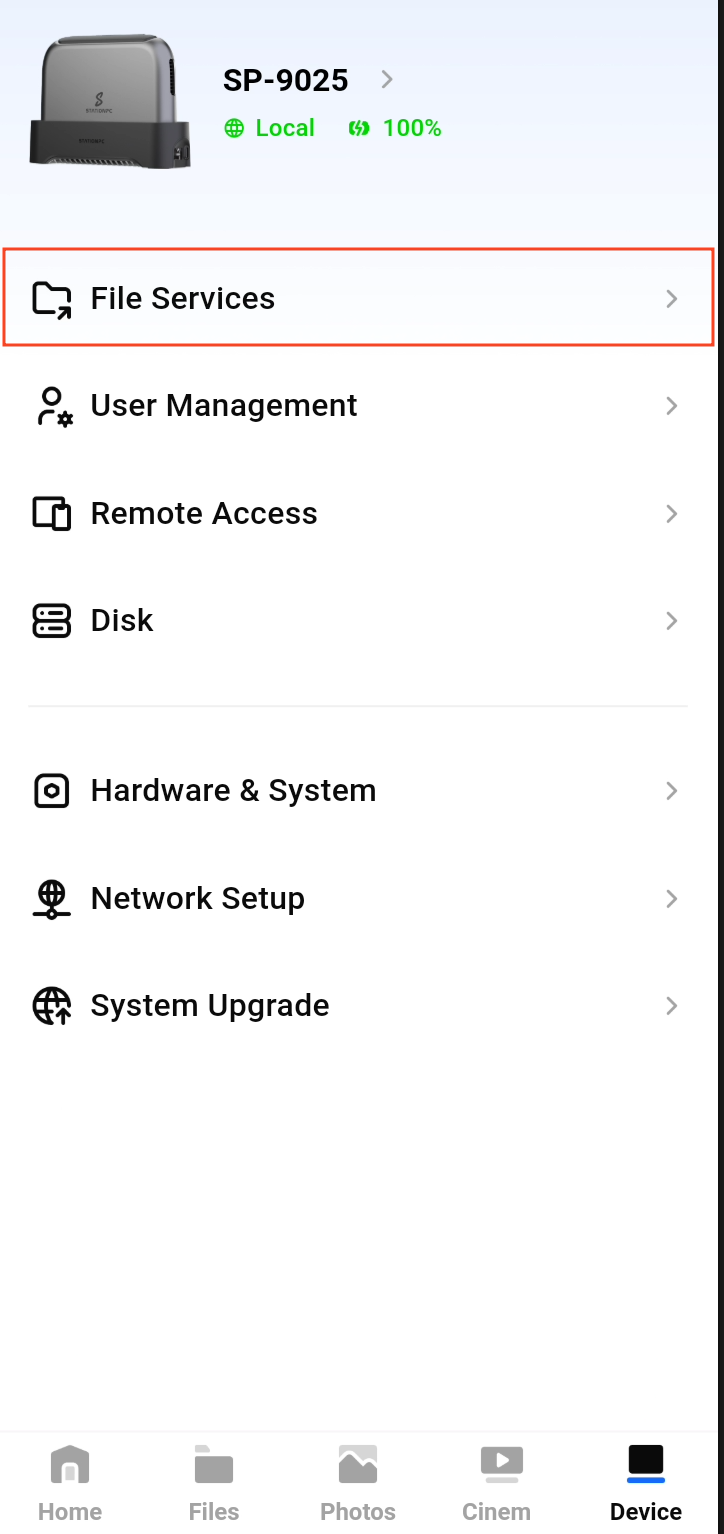
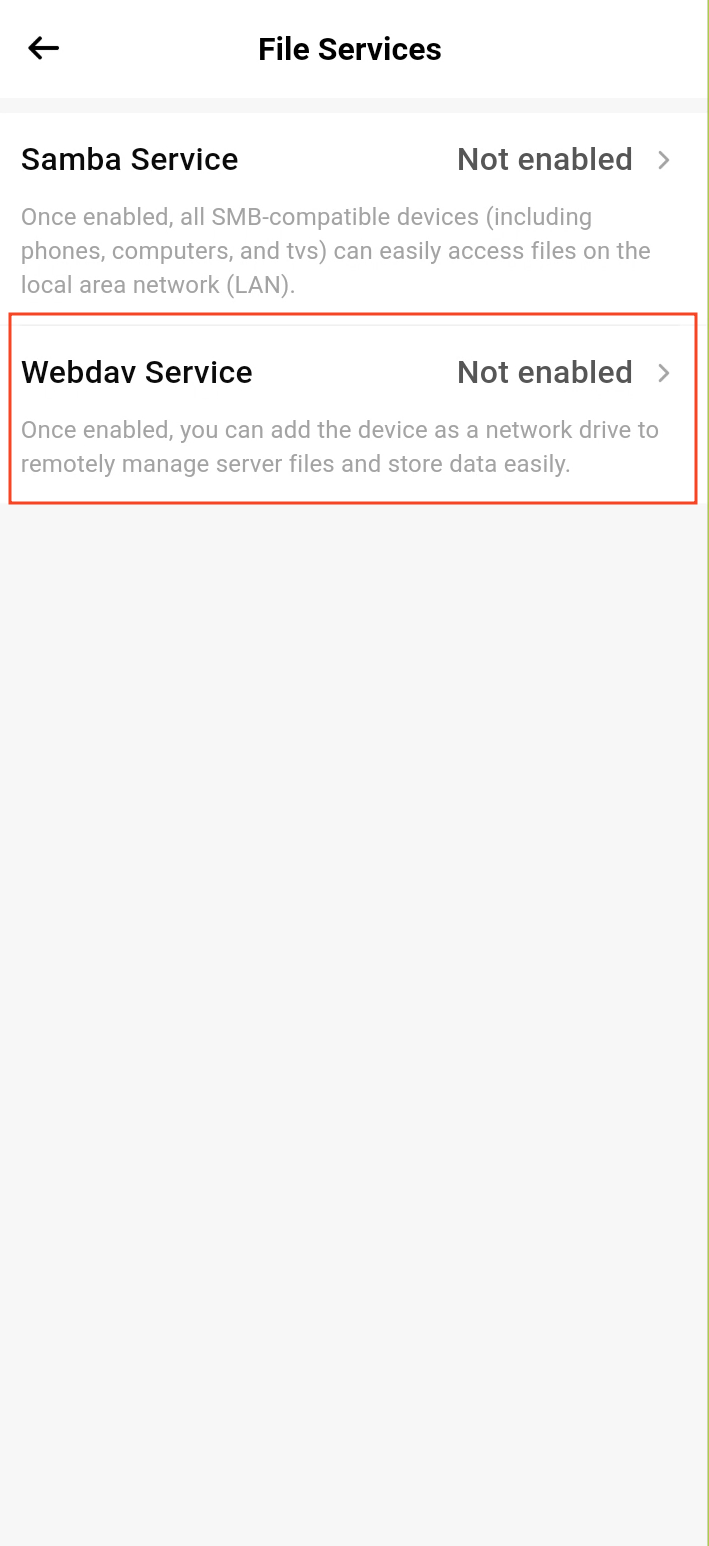
Open the File Services section in the app.
Tap Webdav Service.
Toggle the switch to turn on the WebDAV service.
¶ Accessing via Browser
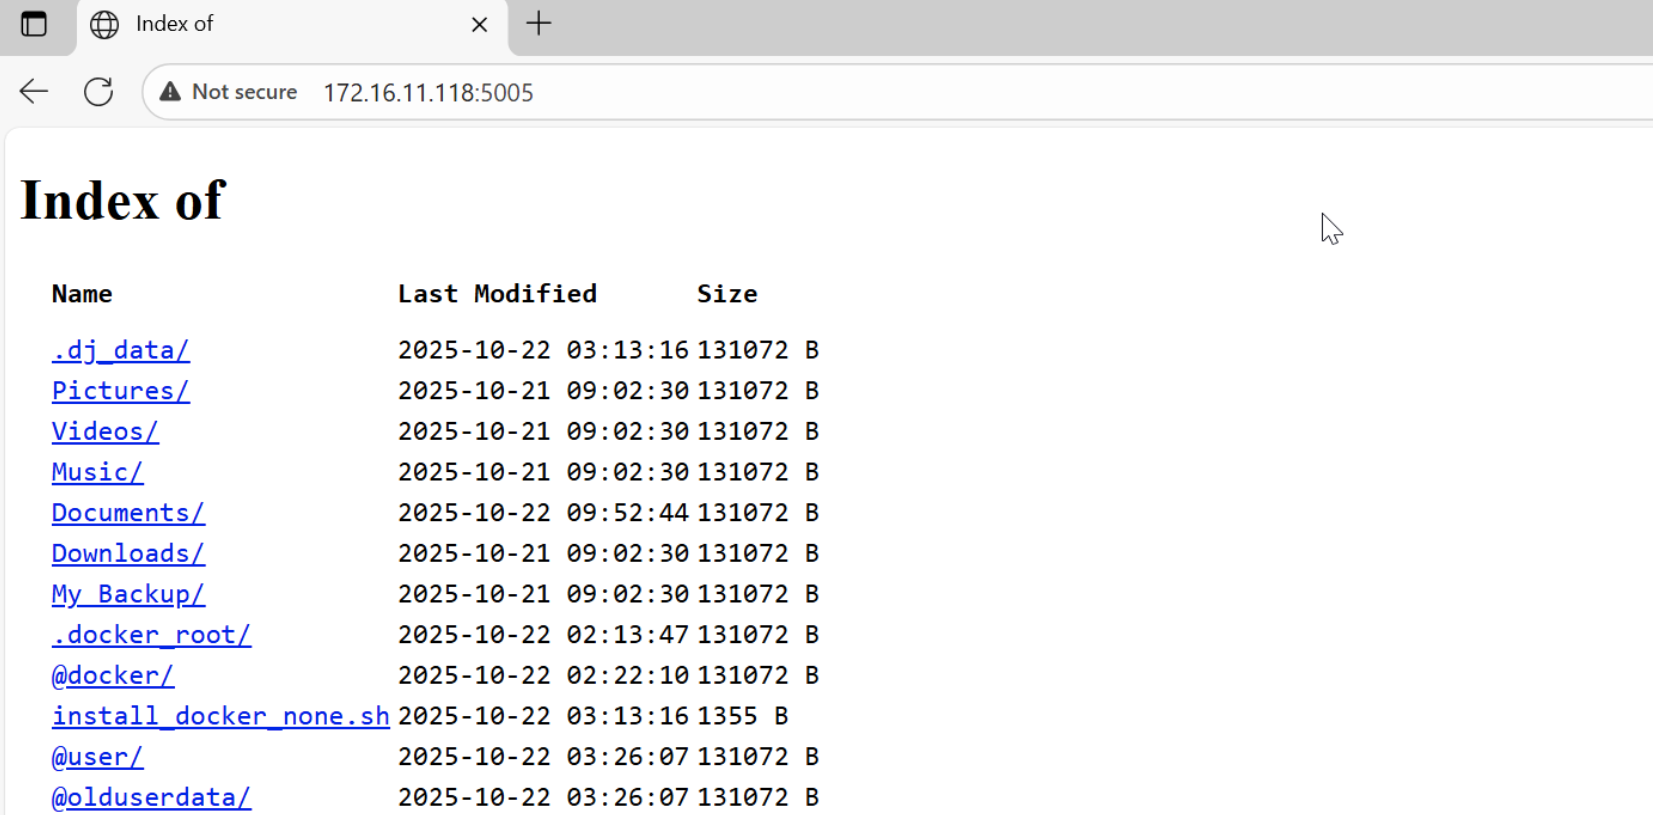
Open a browser and enter the following URL in the address bar:
http://NAS_IP_Address:5005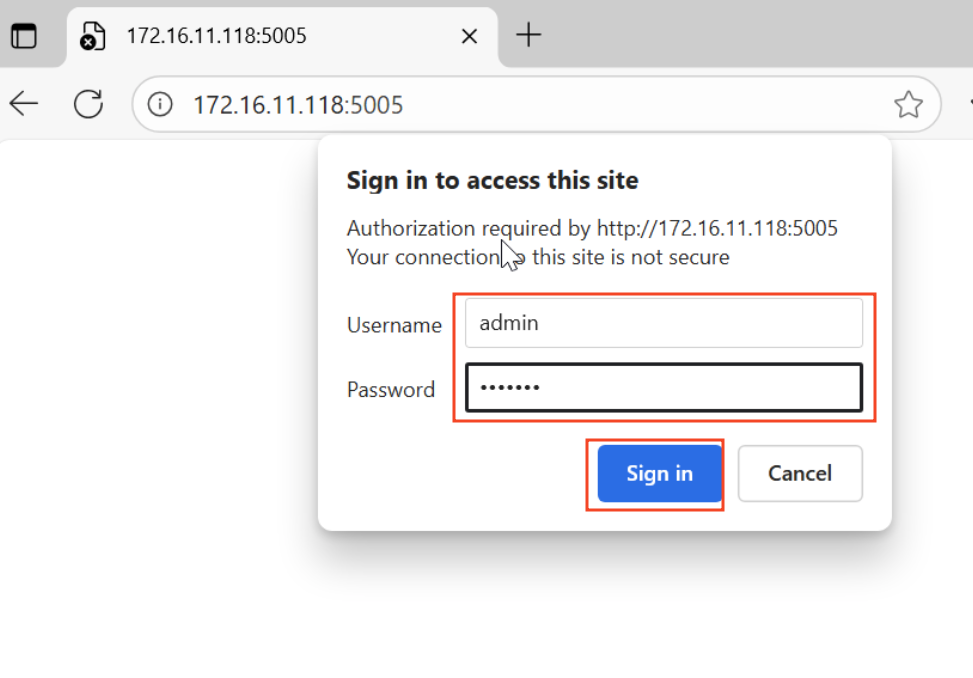
Enter your username and password to access the WebDAV file share.
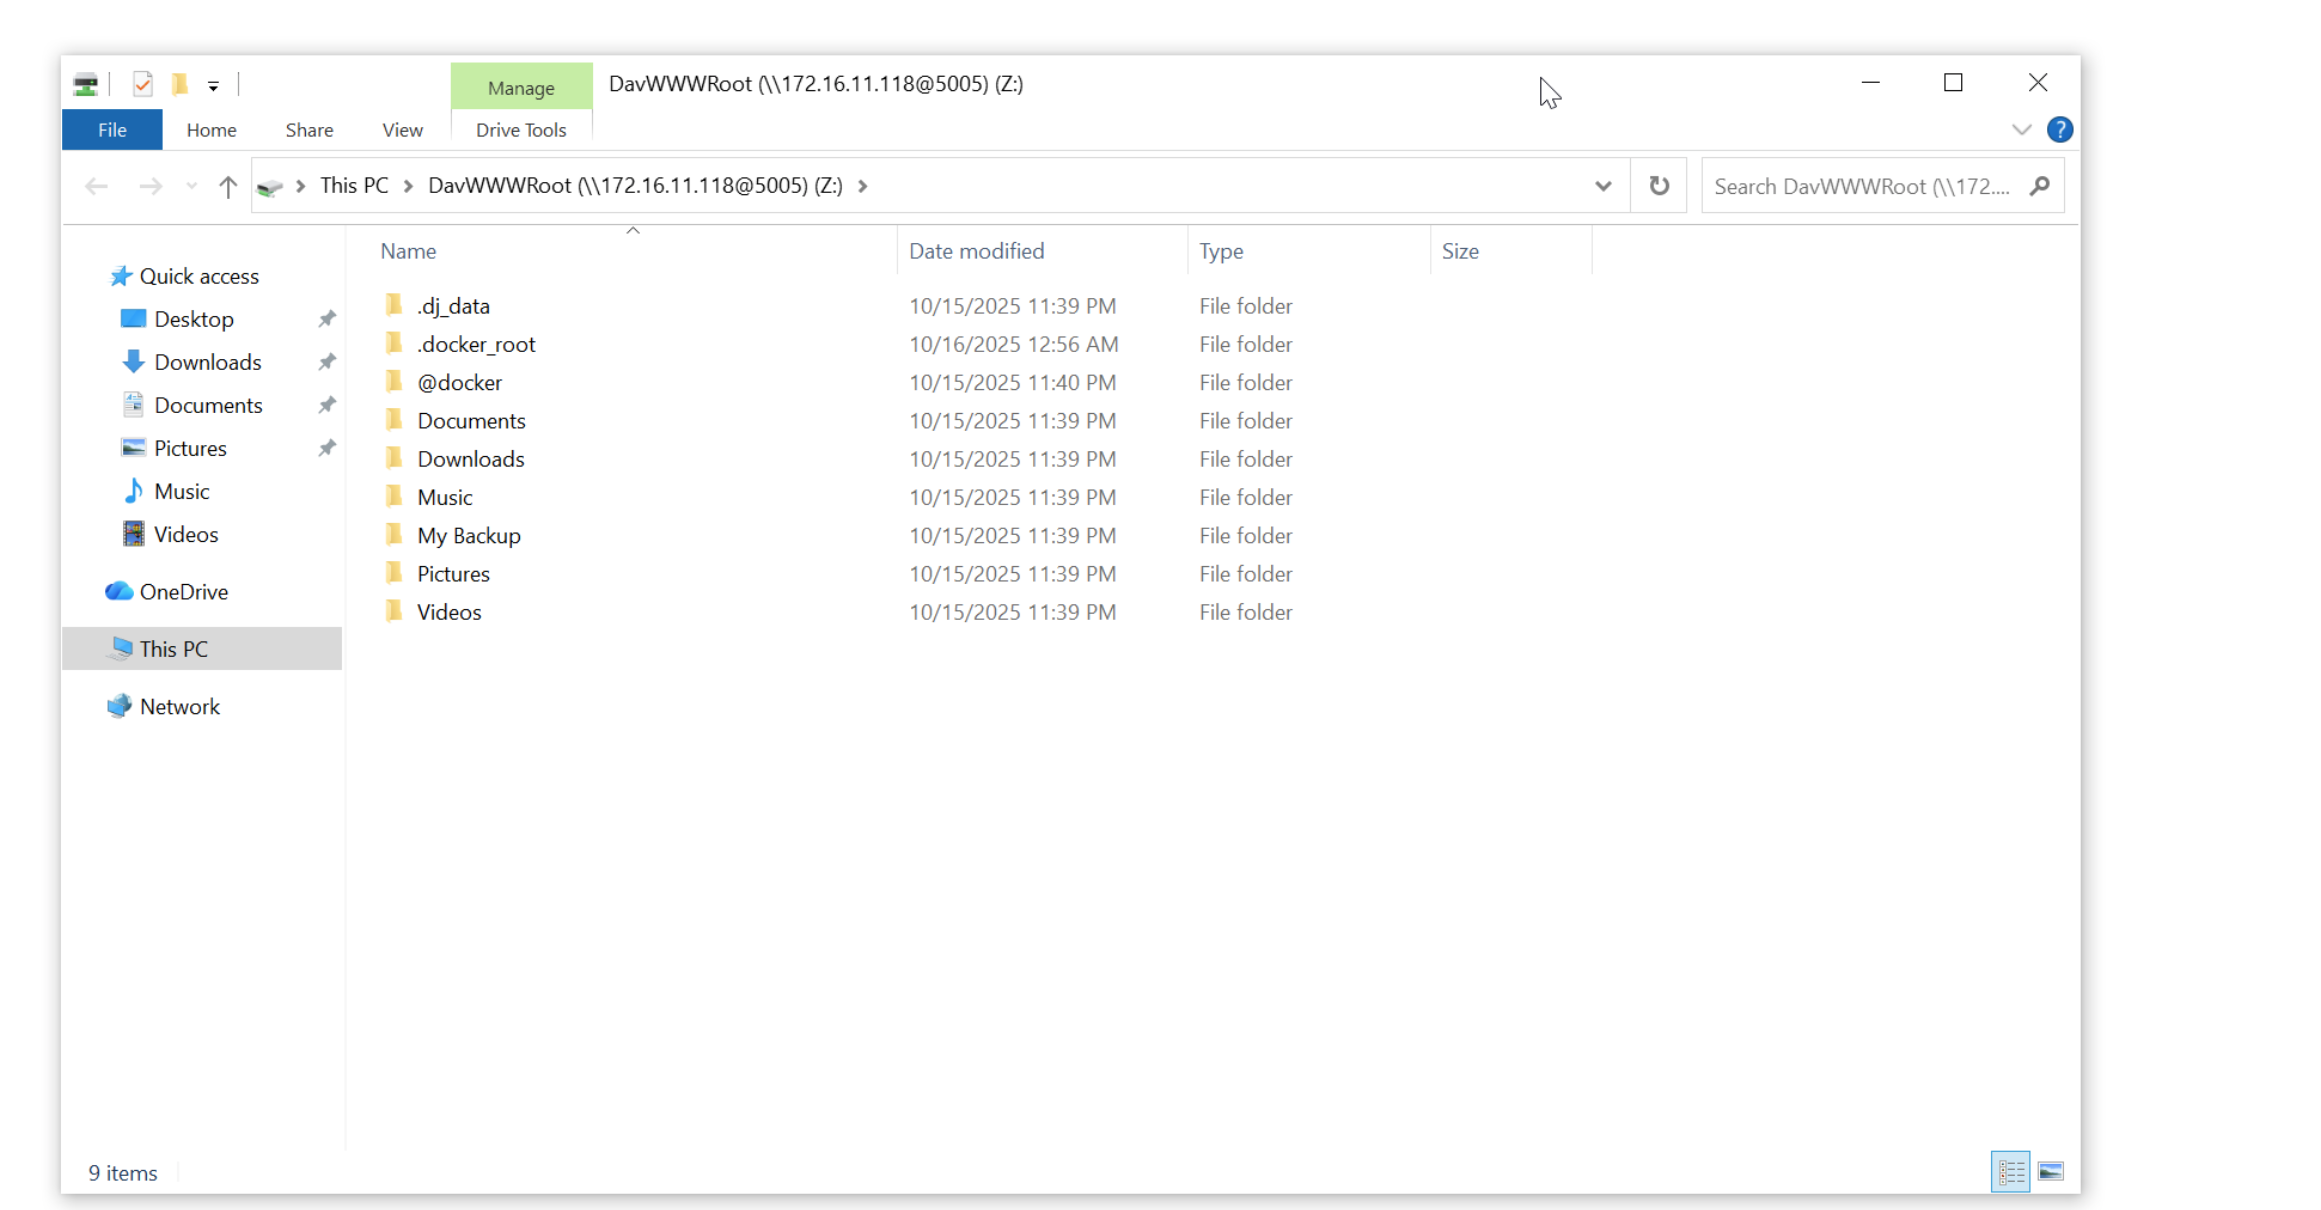
¶ Accessing on Windows
Note: We recommend using RaiDrive (opens new window) to access the WebDAV service on Windows.
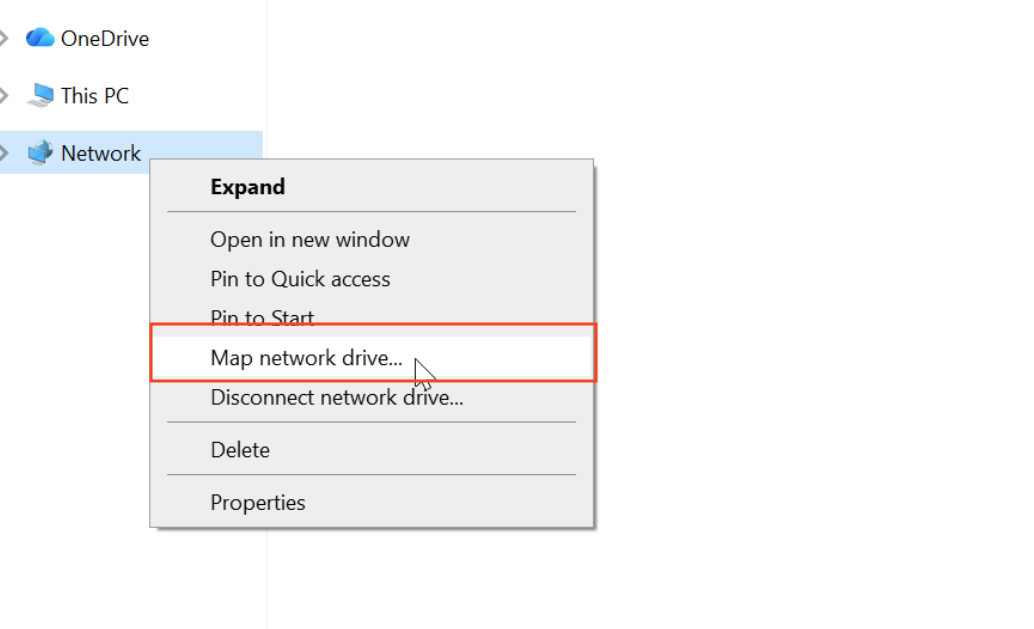
Press Win + E to open File Explorer.
Right-click Network in the left sidebar and select Map Network Drive.
In the popup window, enter the WebDAV address:
http://NAS_IP_Address:5005
Then click Finish.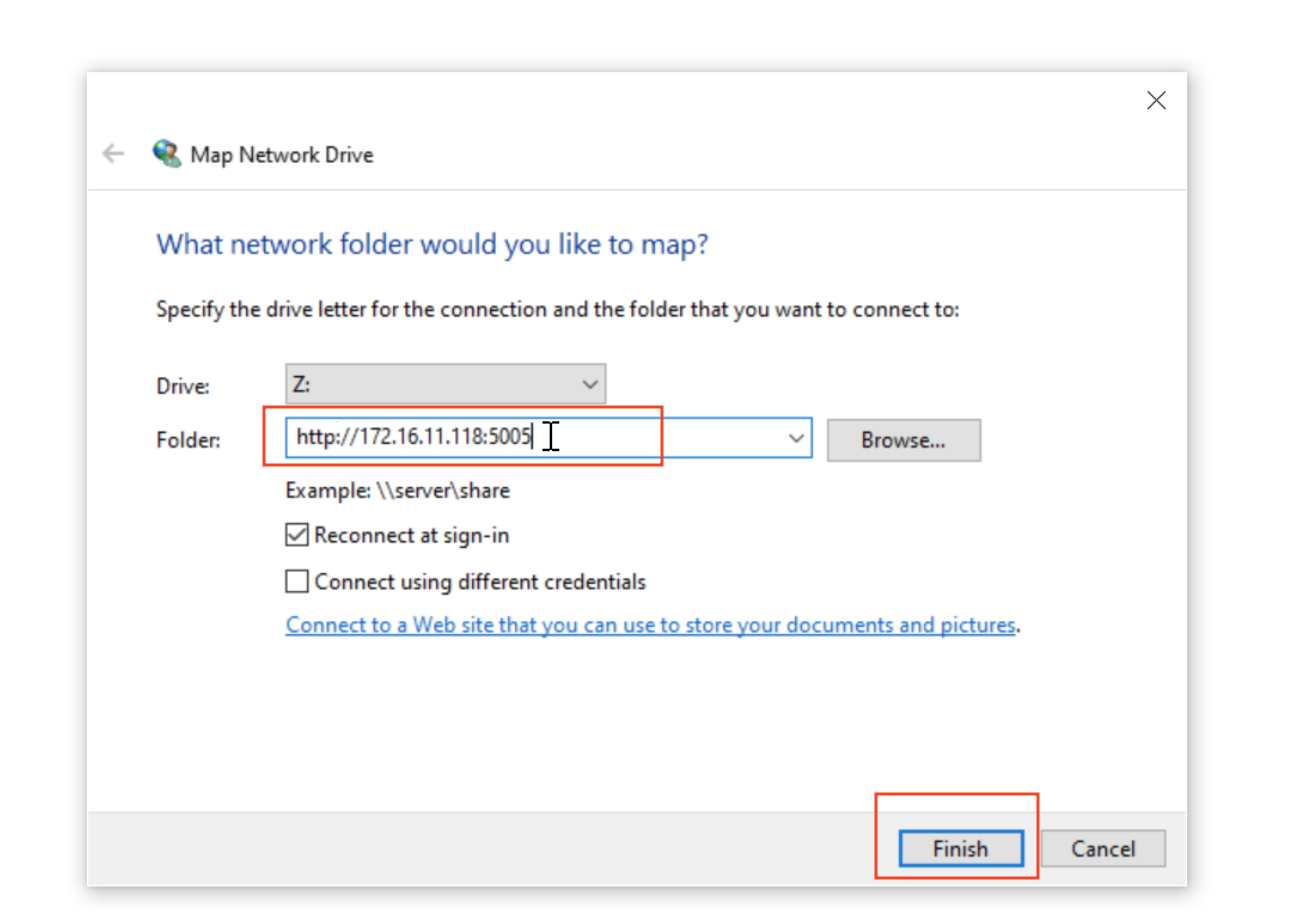
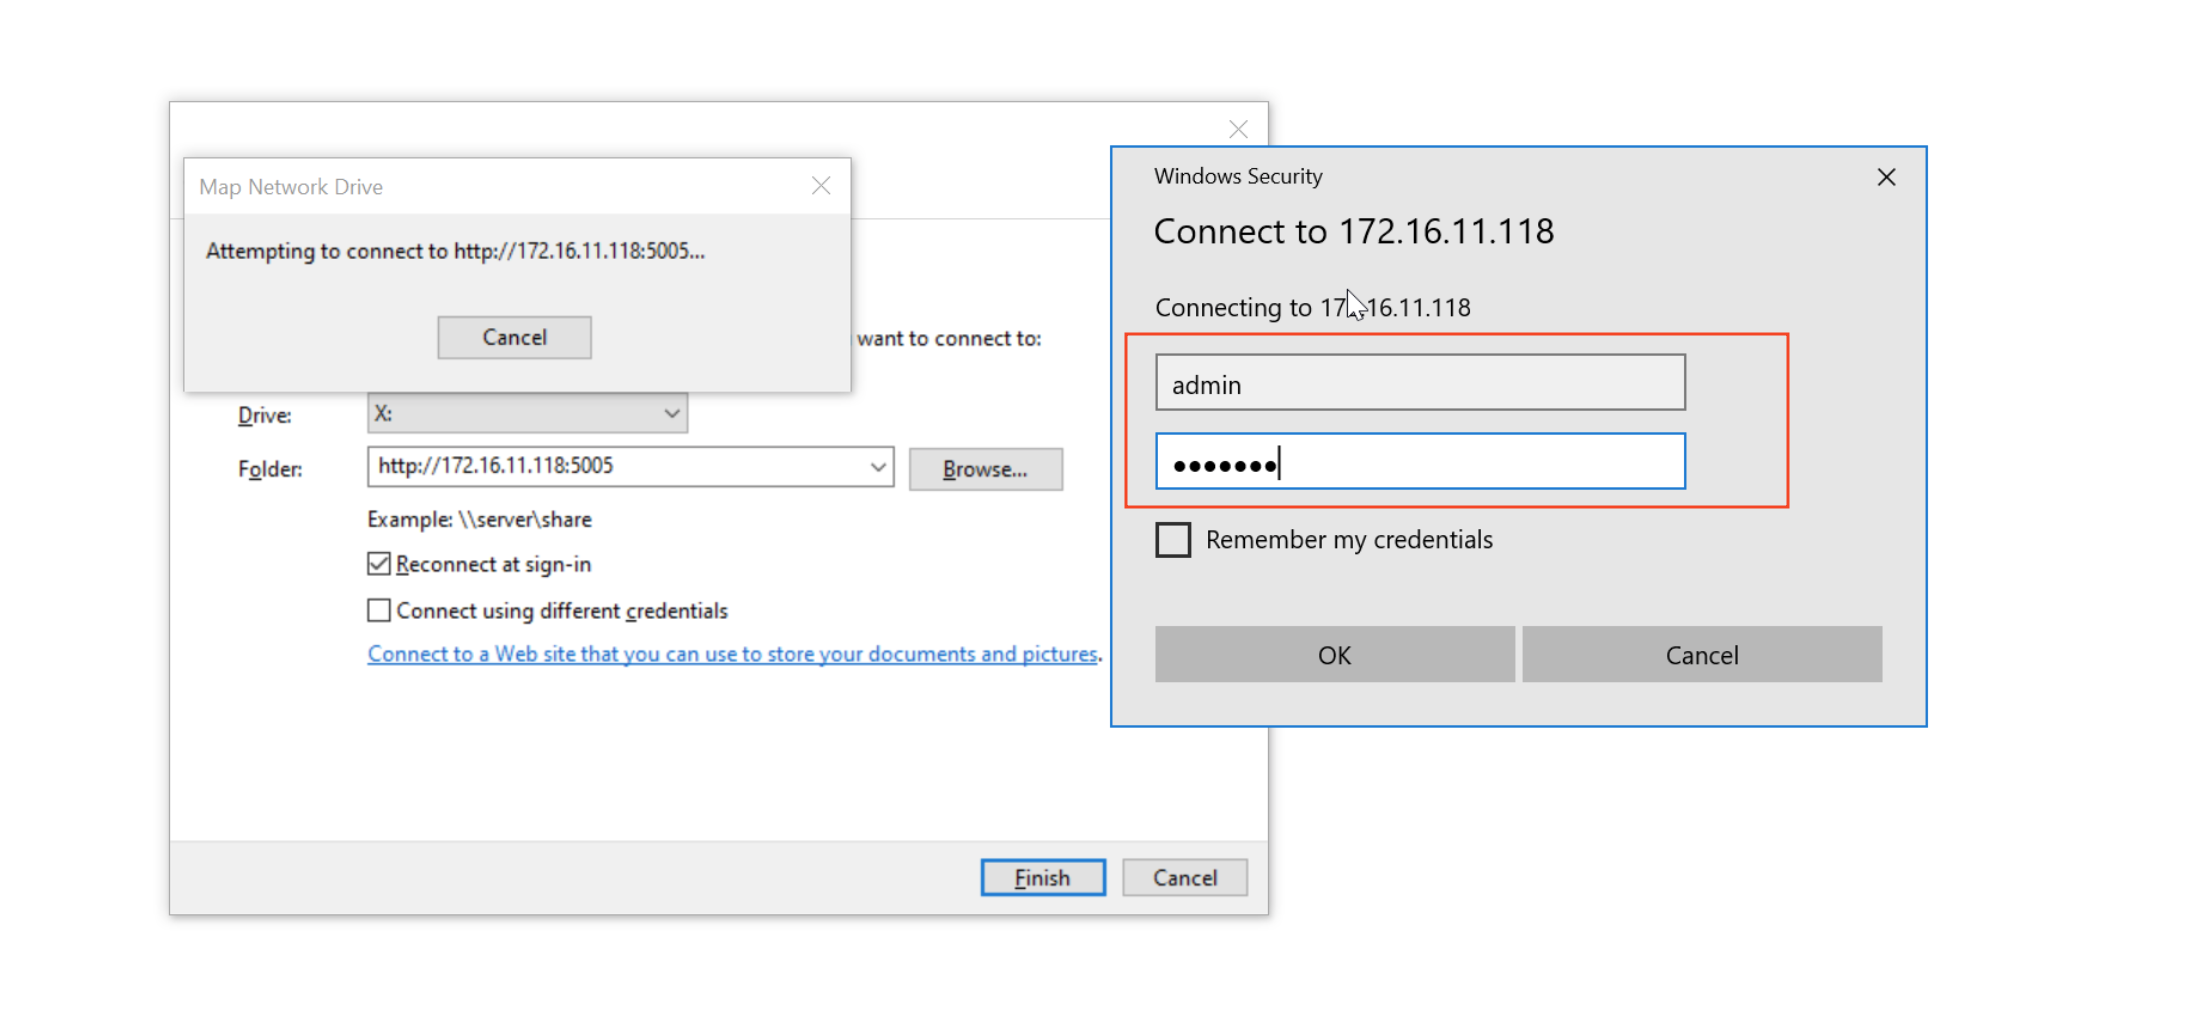
Enter your username and password in the login prompt.
Once completed, you can access NAS files from This PC, just like a local drive.
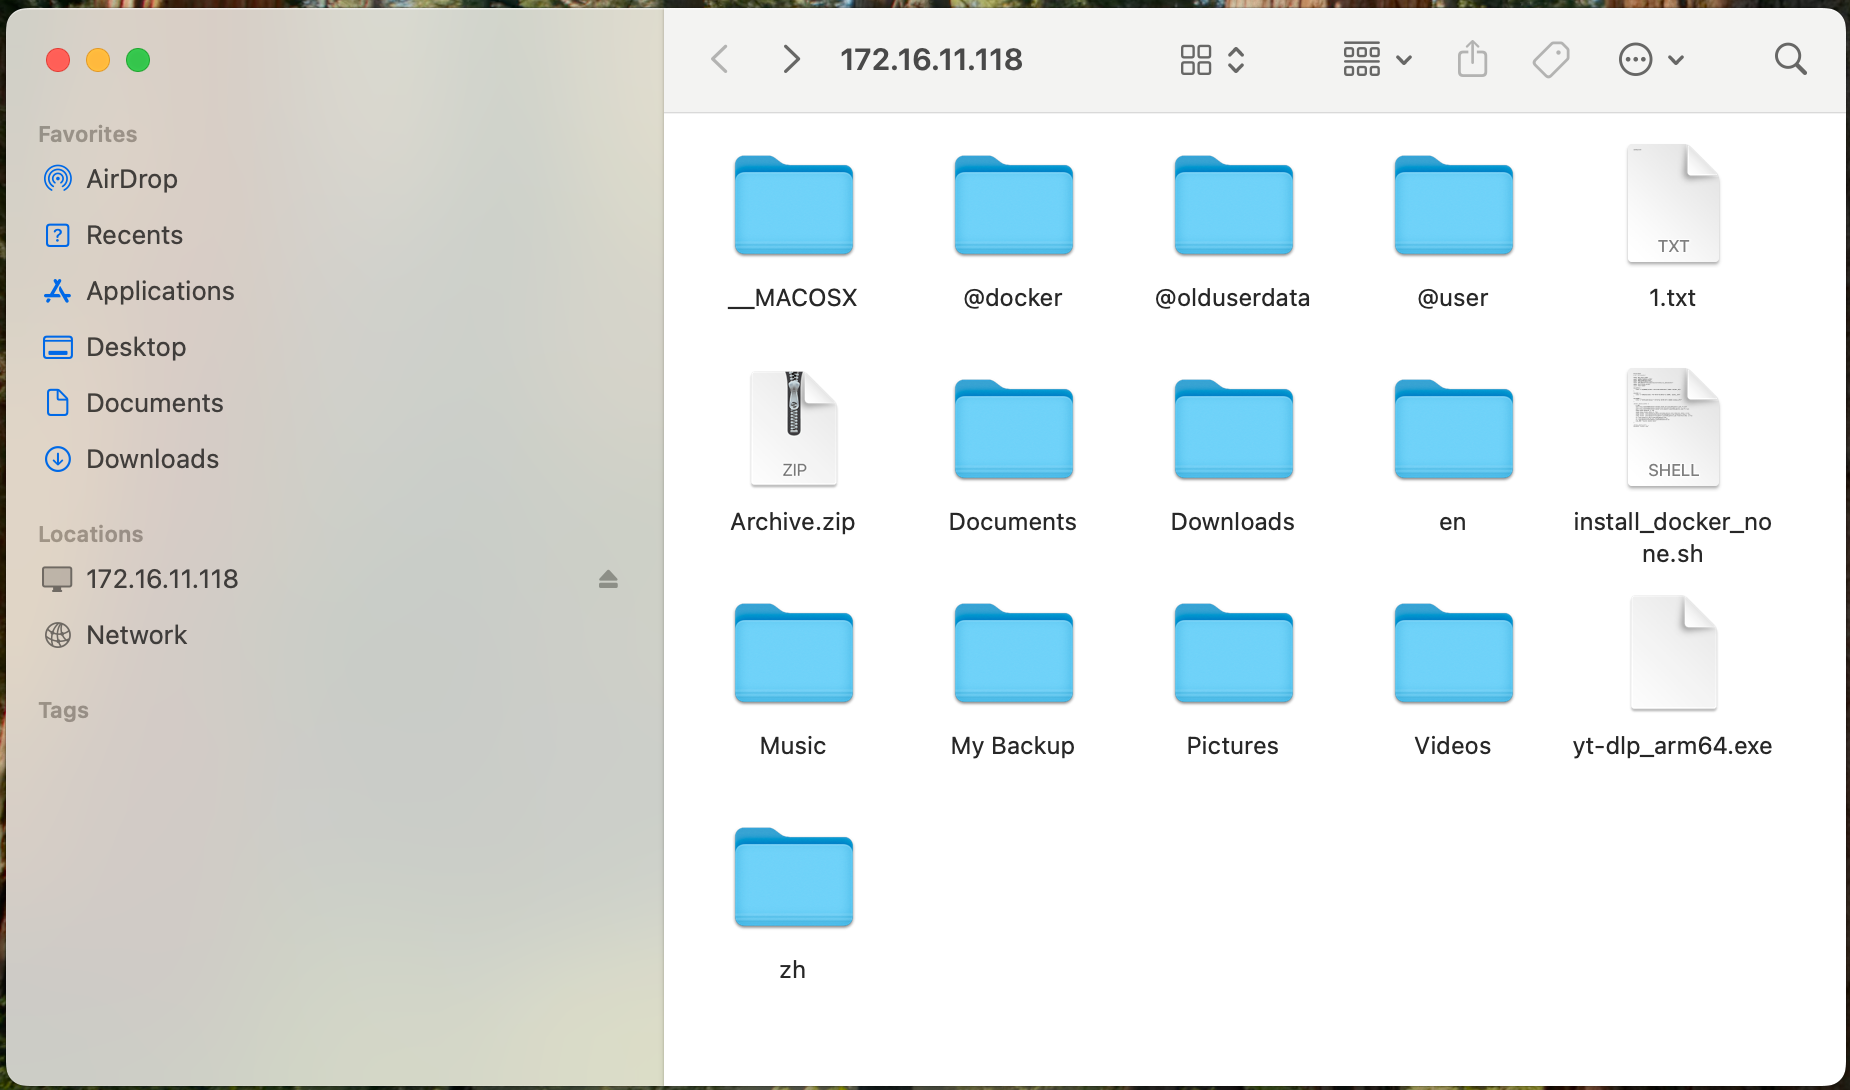
¶ Accessing on macOS
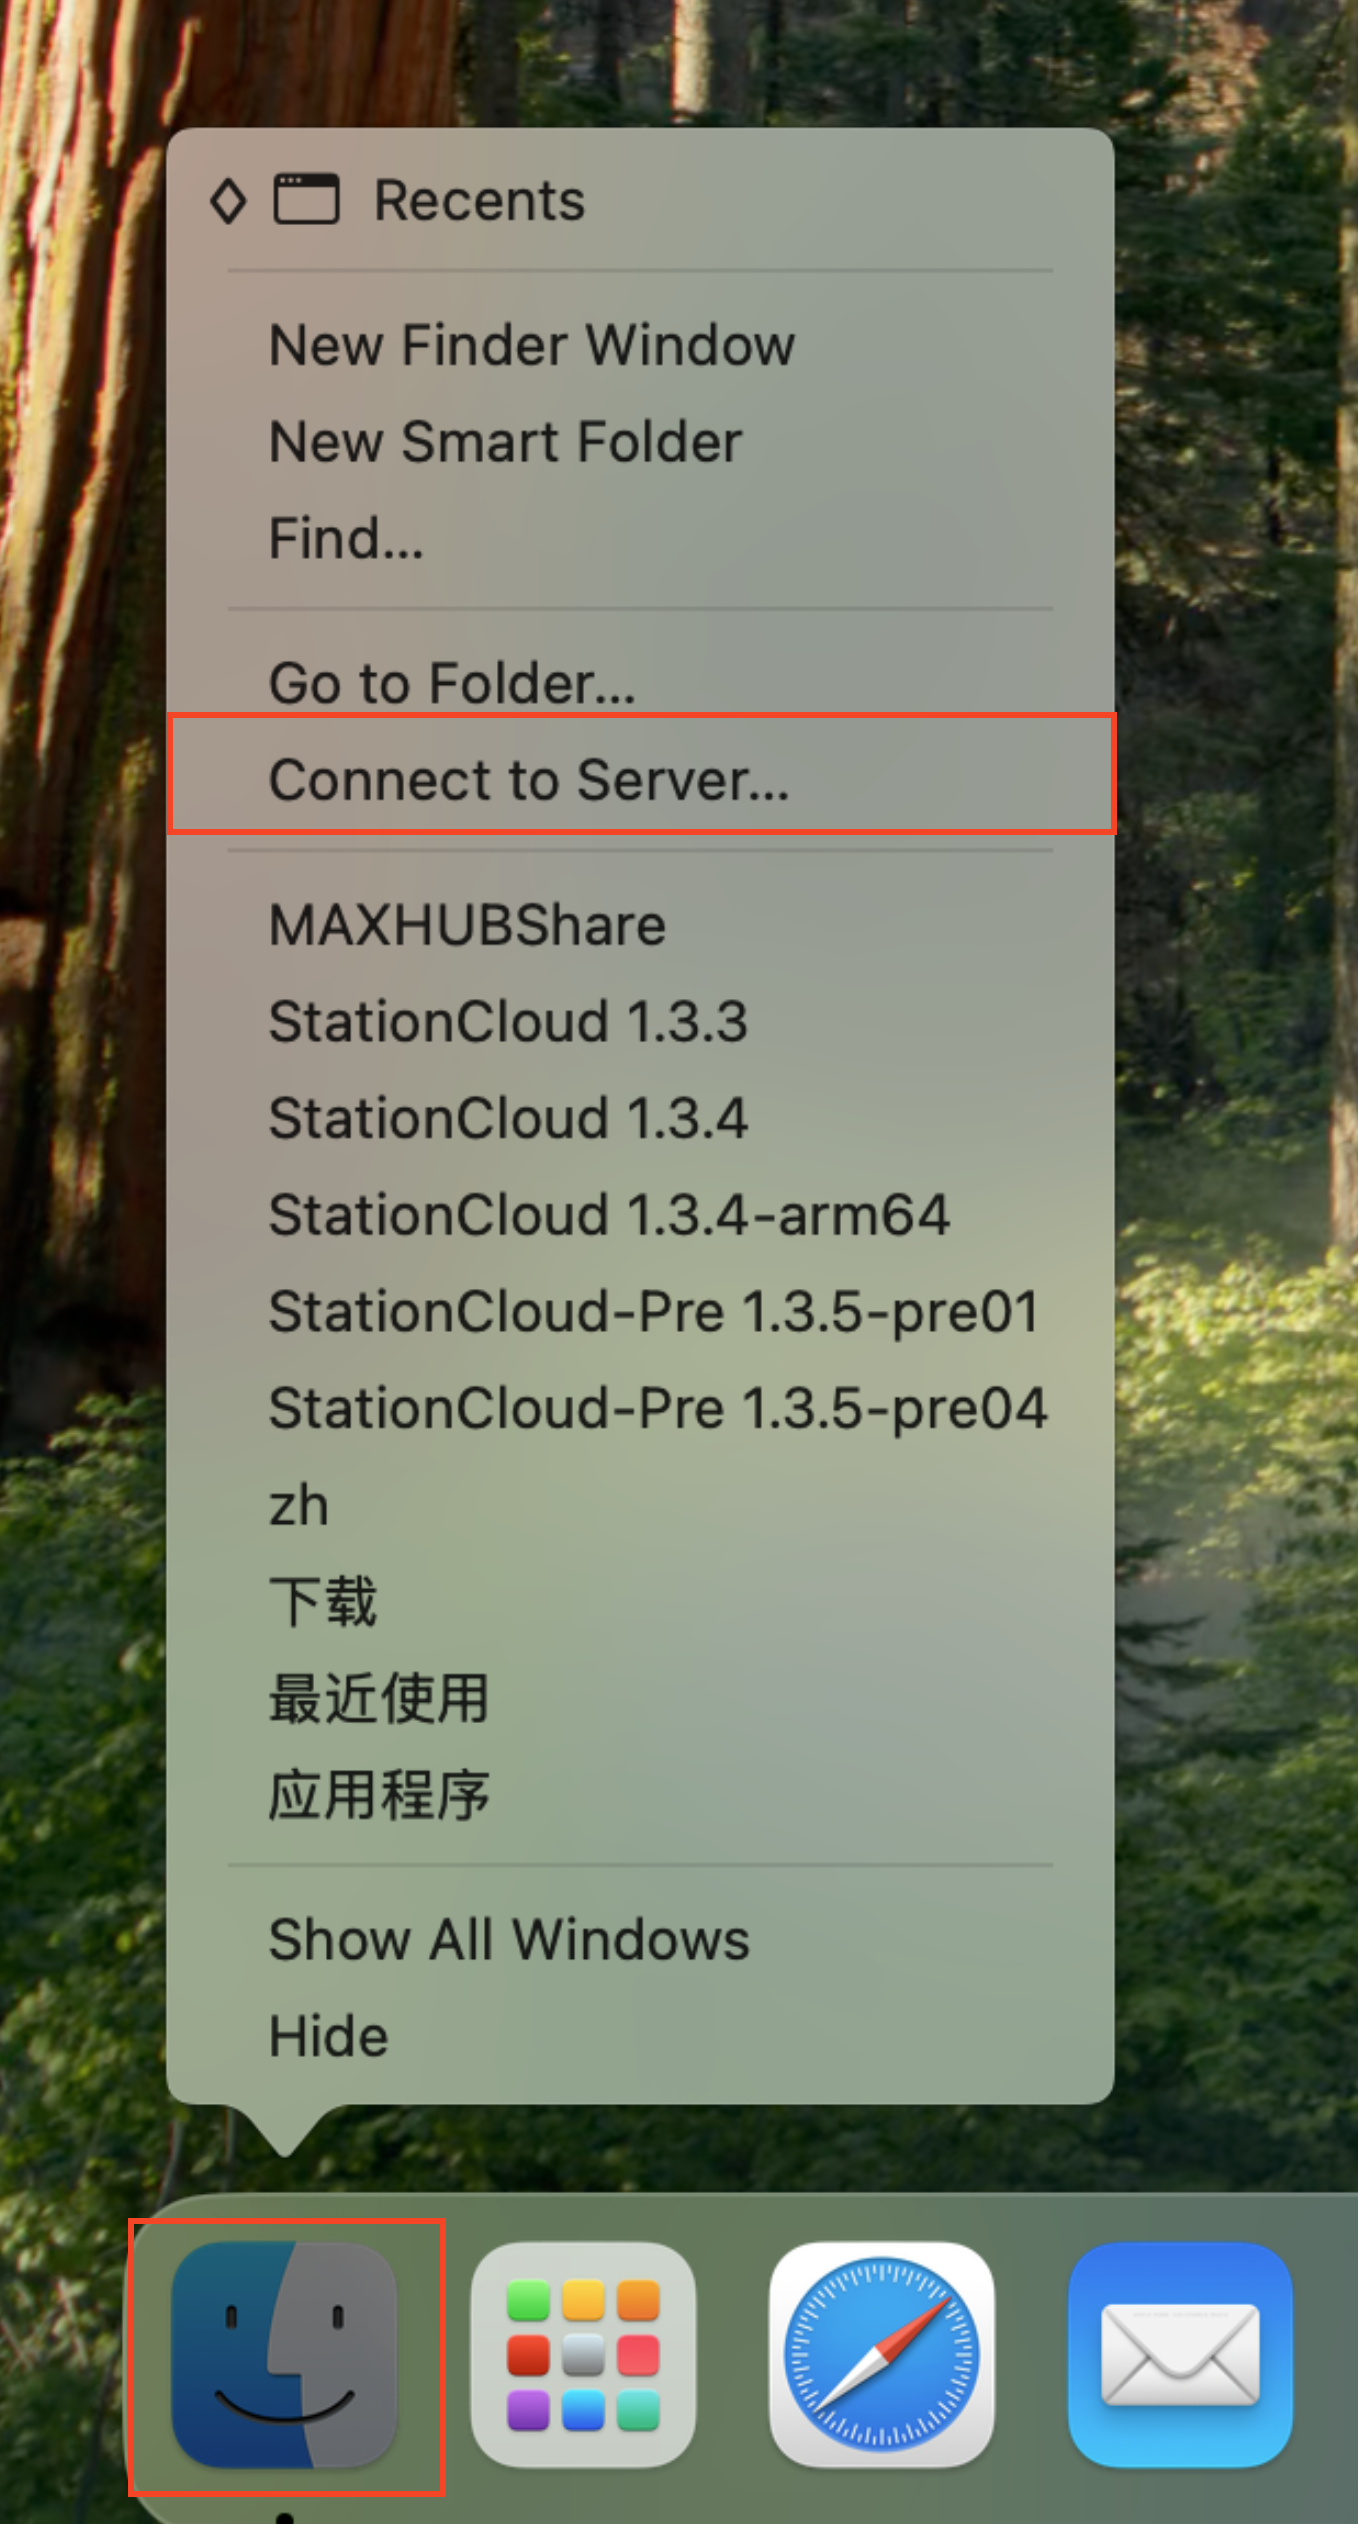
Open Finder, then in the menu bar select Go → Connect to Server...
In the server address field, enter:
http://NAS_IP_Address:5005
Then click Connect.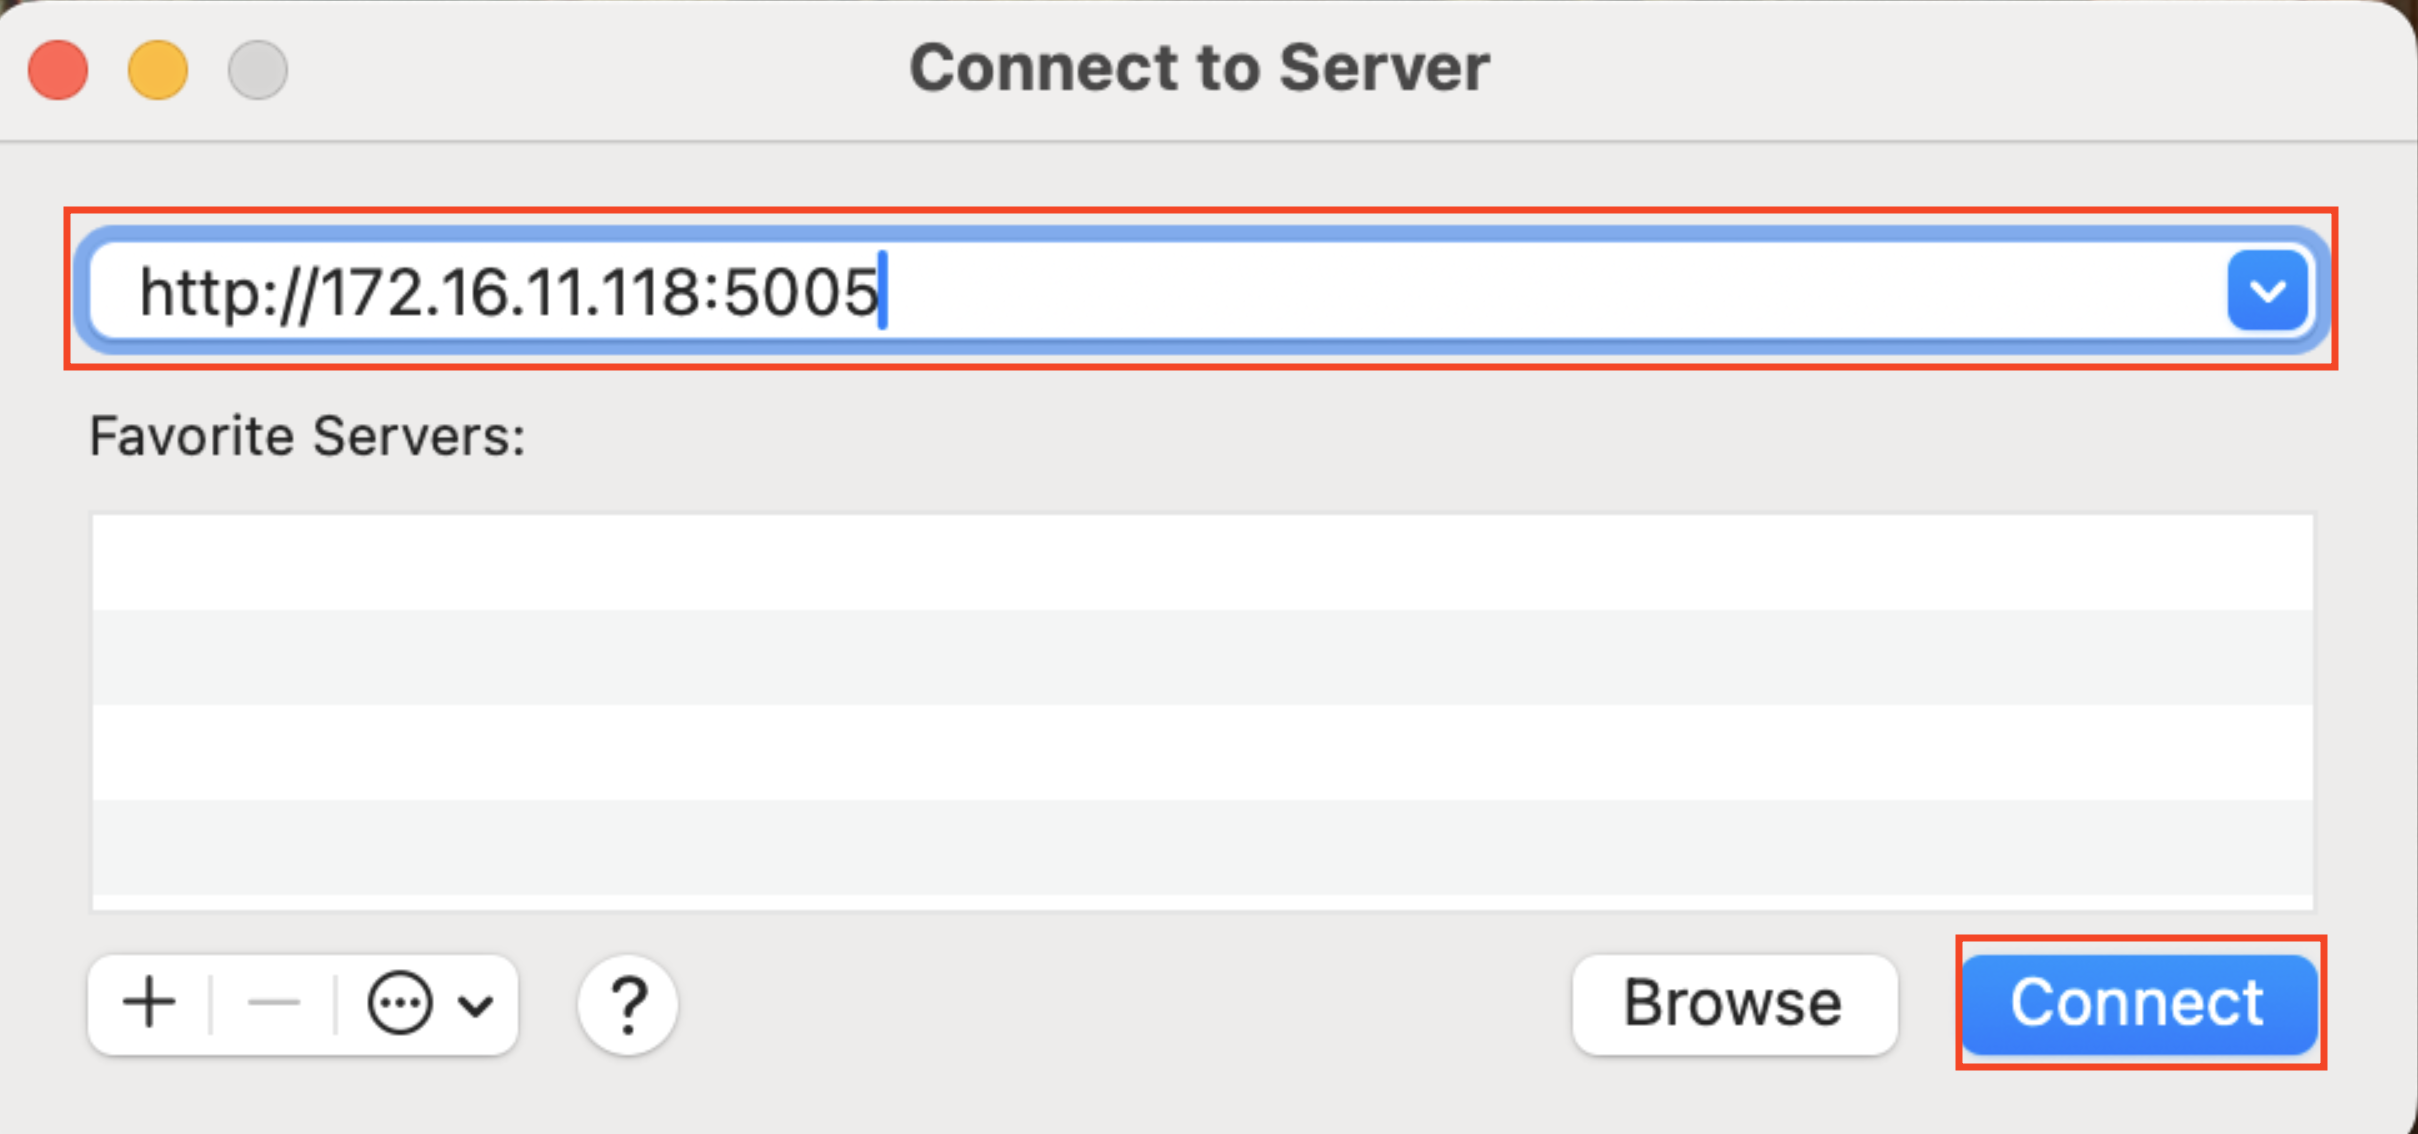
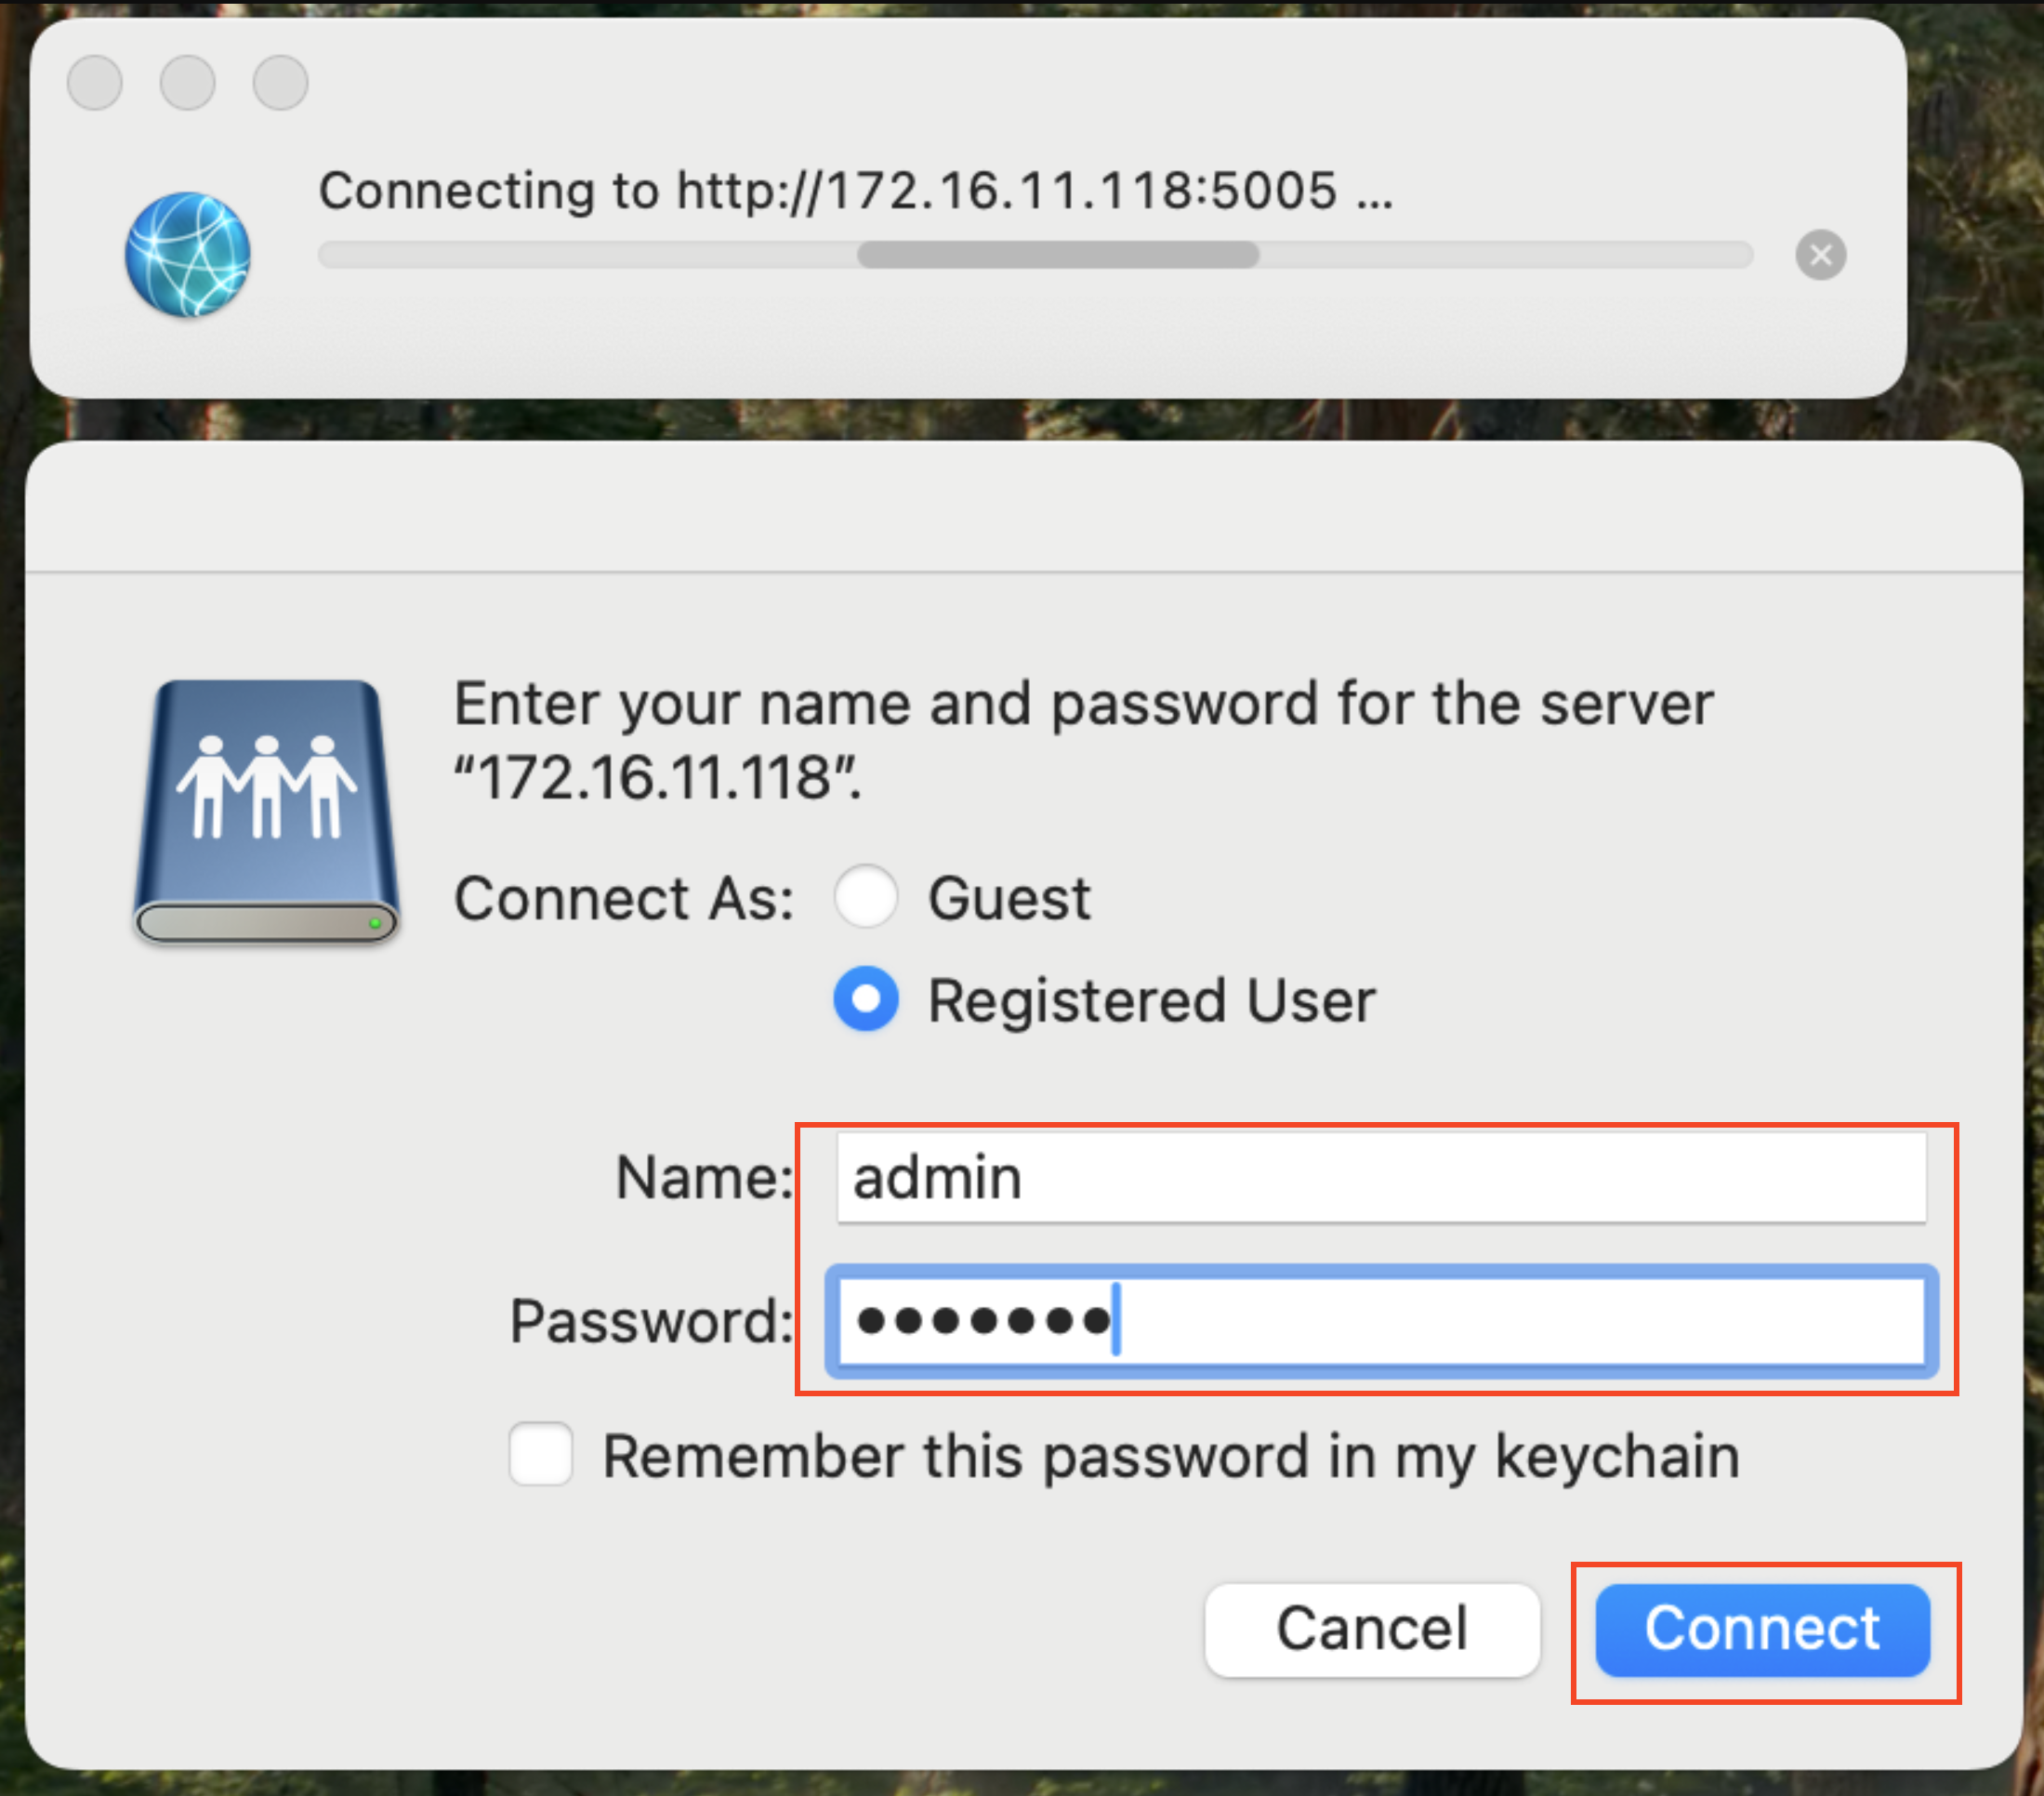
Enter your username and password, then click Connect.
You can now browse and manage NAS files in Finder just like local folders.
¶ Accessing on Linux
Use davfs to mount the WebDAV share:
# Install davfs2
sudo apt-get install davfs2

# Create a mount point
# Example: using /mnt/webdav_share as the mount directory
sudo mkdir /mnt/webdav_share

# Mount the WebDAV share
sudo mount.davfs http://NAS_IP_Address:5005 /mnt/webdav_share

# Once mounted, you can access and manage NAS files under /mnt/webdav_share
¶ Other Questions
Q: Why can't Windows File Explorer mount the WebDAV over HTTP service?
Q: Does Windows support WebDAV over HTTPS?
A: Windows File Explorer does not support WebDAV over HTTPS. You can use RaiDrive (opens new window) to mount the WebDAV-HTTPS service instead.
Q: Which port is used for the WebDAV-HTTPS service?
A: The default port for WebDAV-HTTPS is 5006. You can access the service using the following address:
https://NAS_IP_Address:5006.Q: Why can't Windows open large files through WebDAV?
A: See When accessing a WebDAV service in Windows, an error message appears for files larger than 50MB