¶ Openclaw Installation Guide
¶ Introduction
Openclaw is a personal AI assistant that runs locally on your device, supporting various communication tools to provide an intelligent interactive experience.
¶ Prerequisites
Before you begin, please ensure you have:
- ✅ A valid API Key (e.g., OpenAI (opens new window) / Z.AI (opens new window), etc.)
¶ Quick Setup
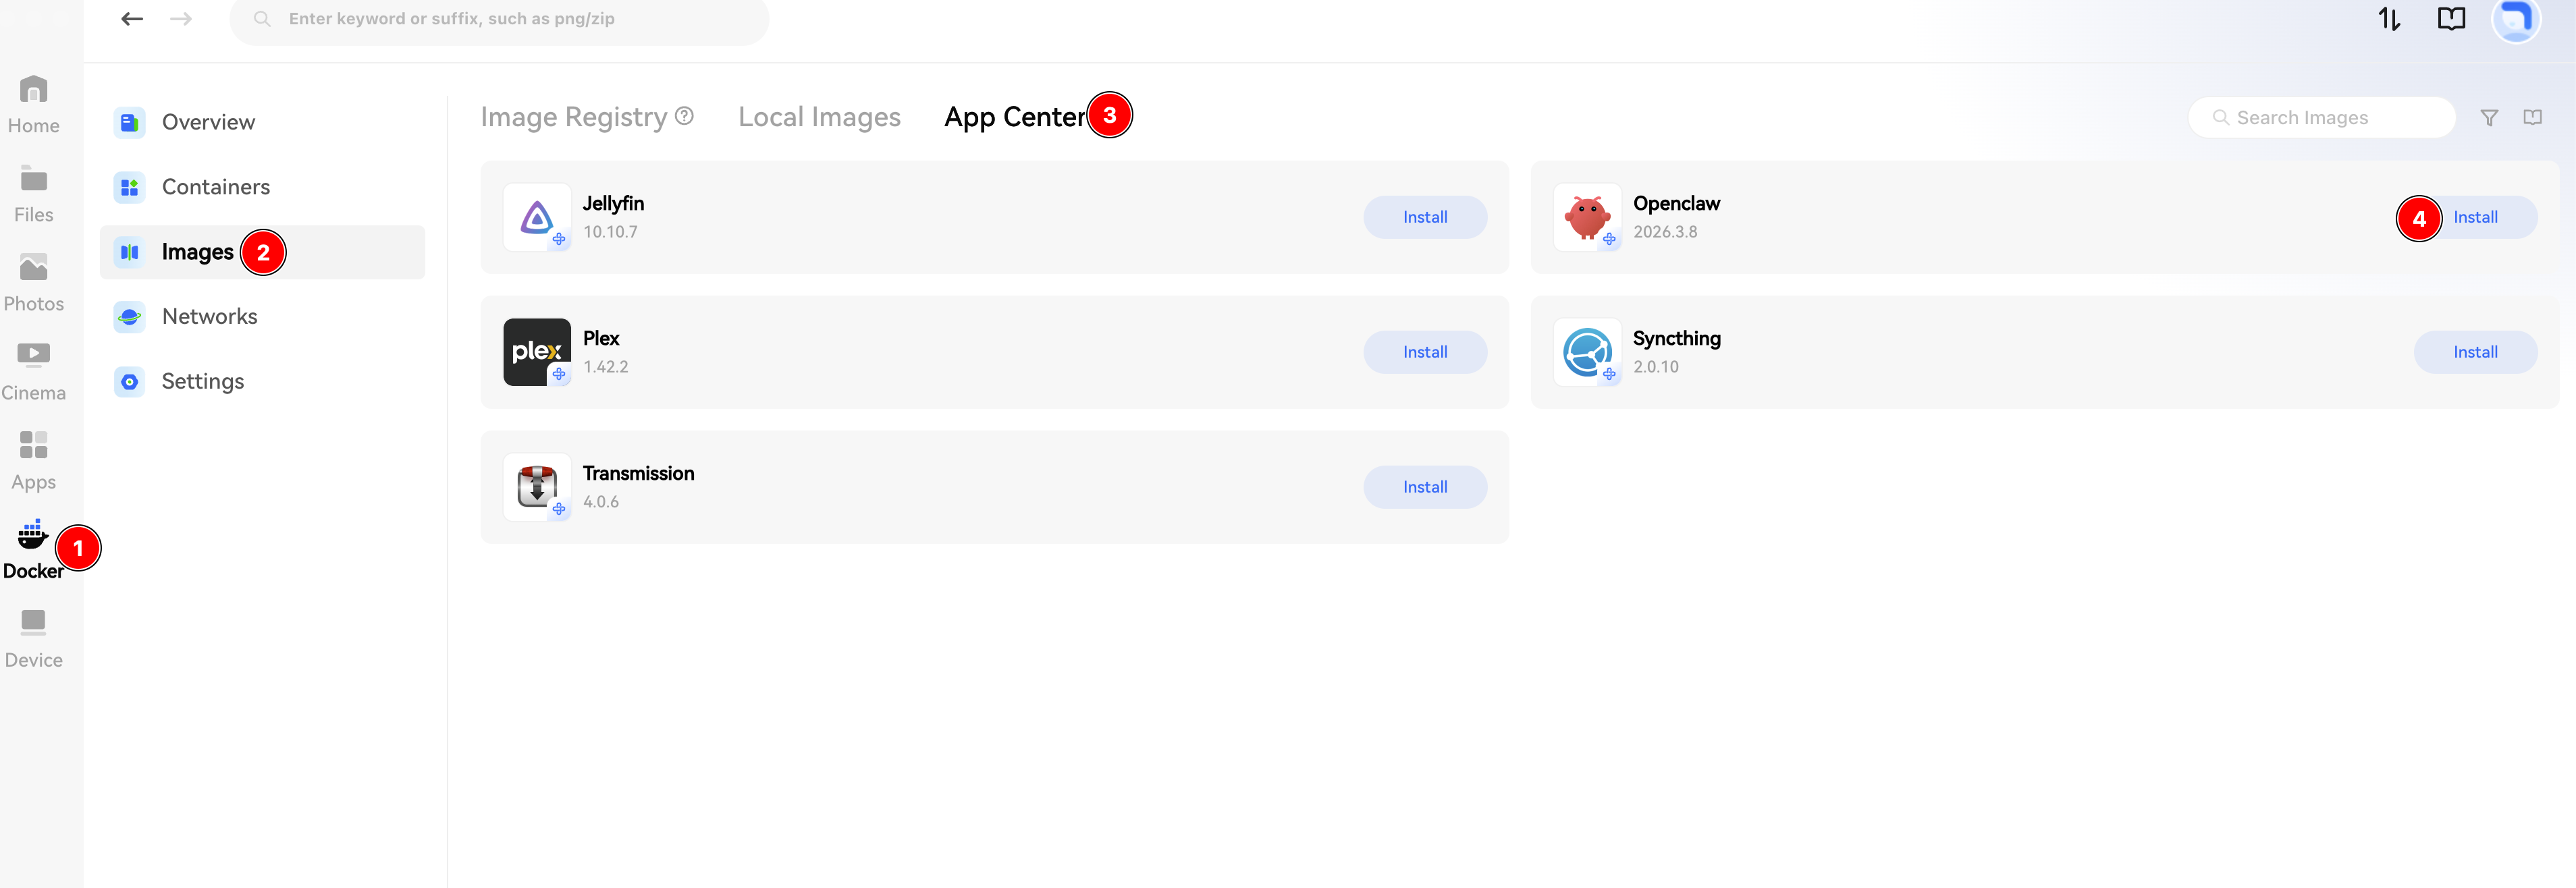
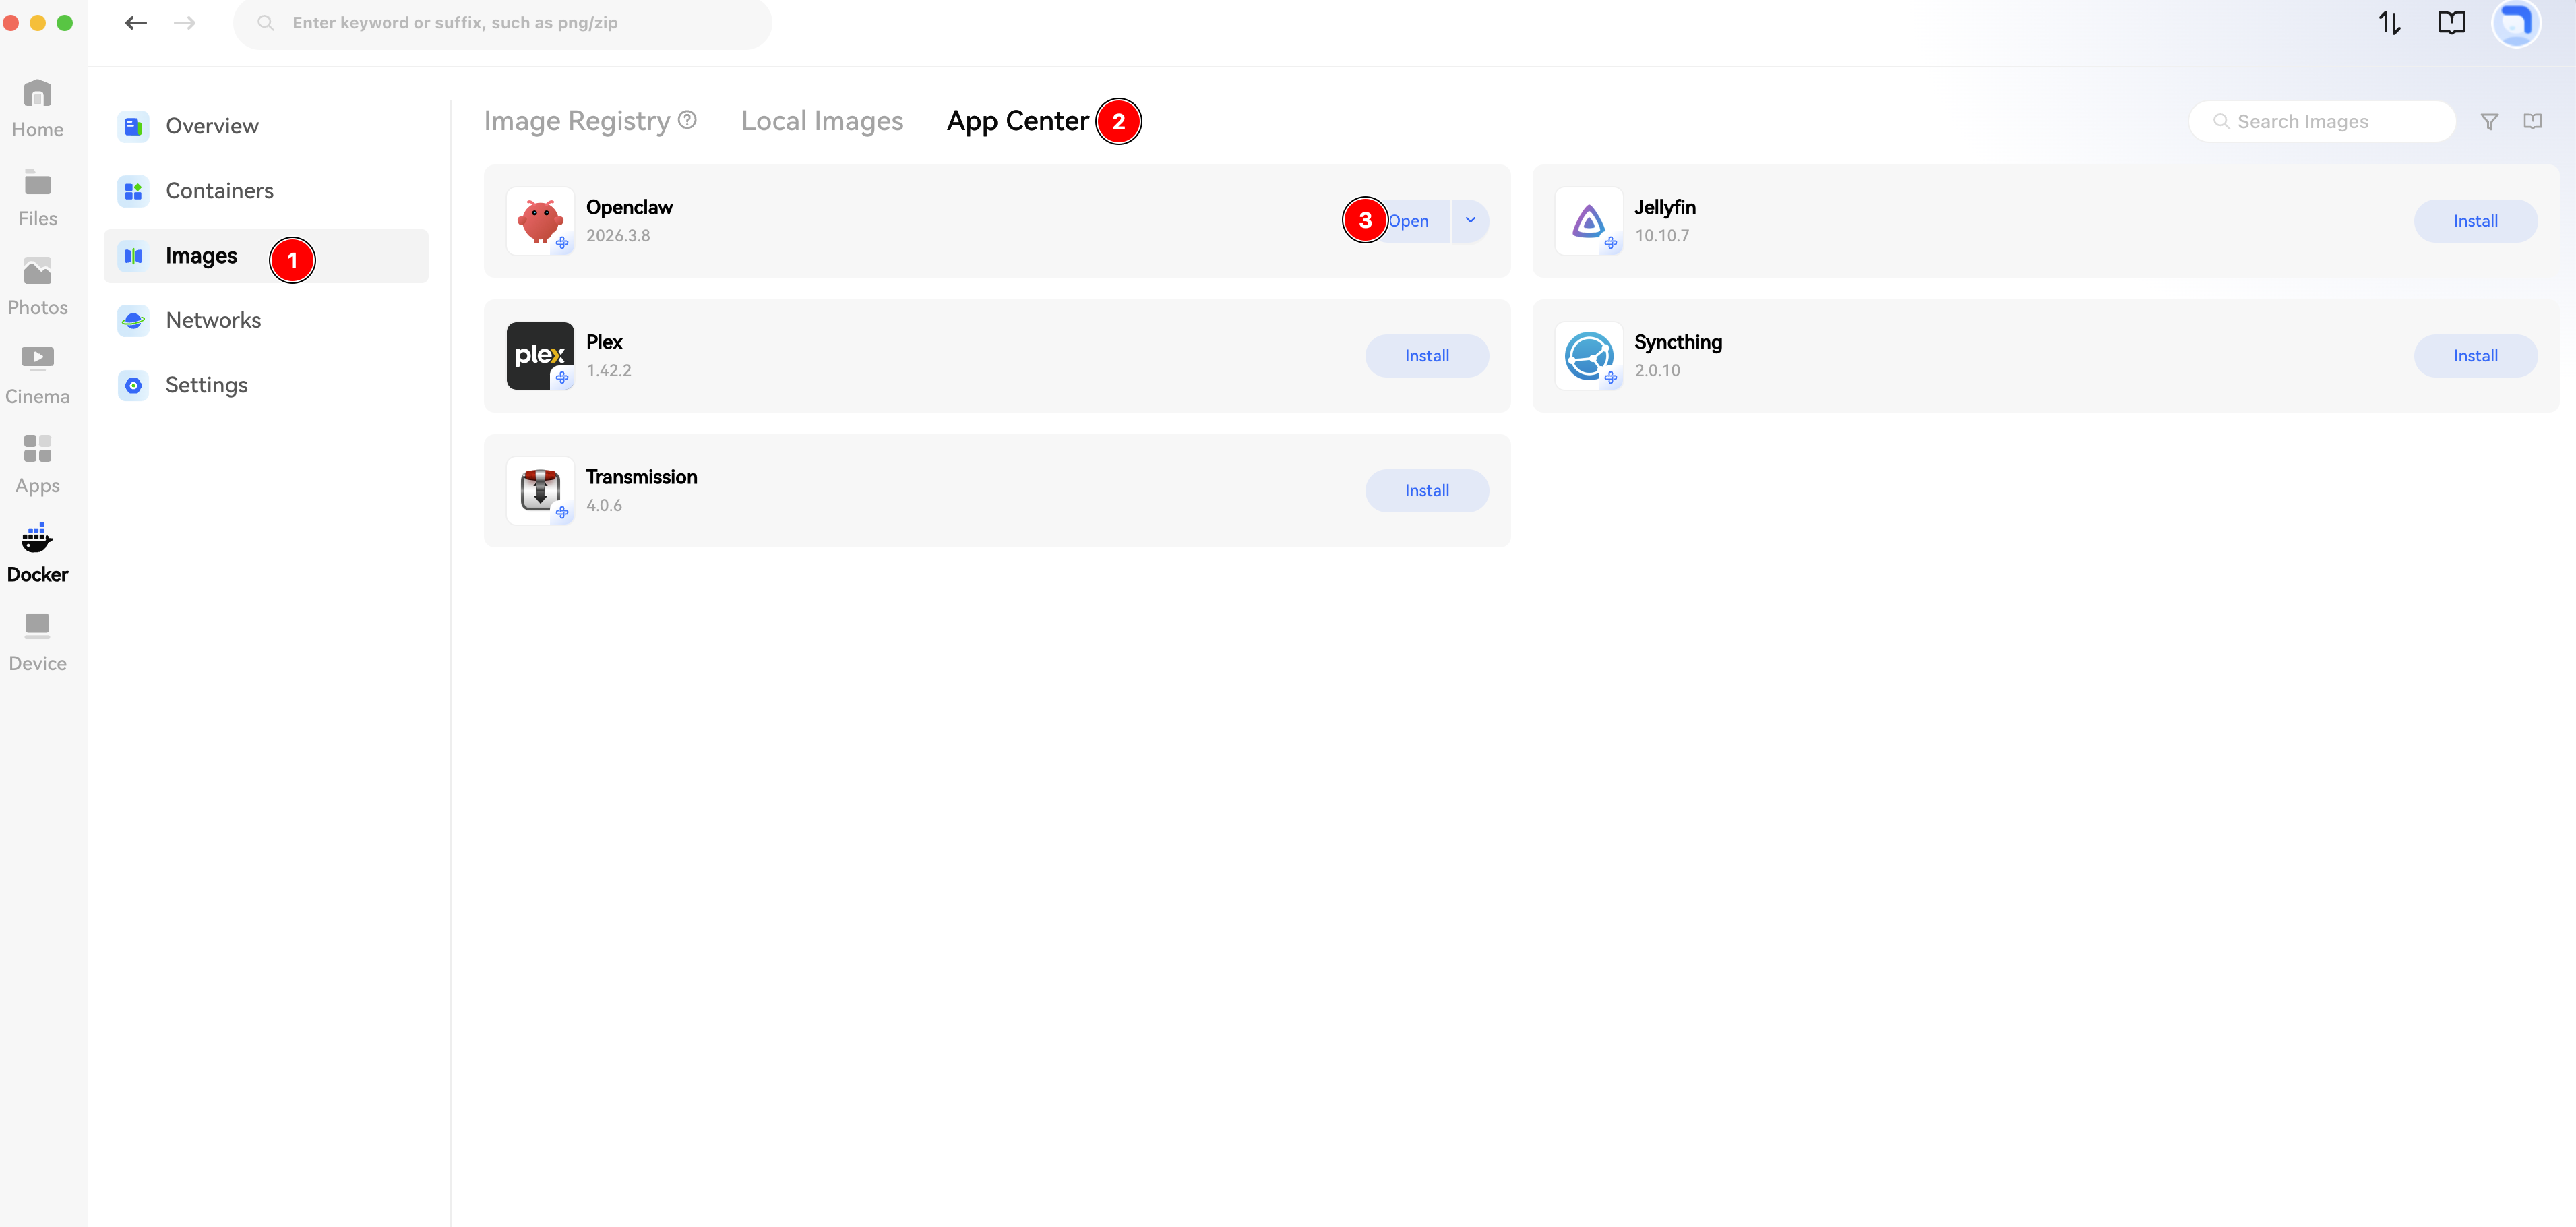
- Download Openclaw from the App Center.
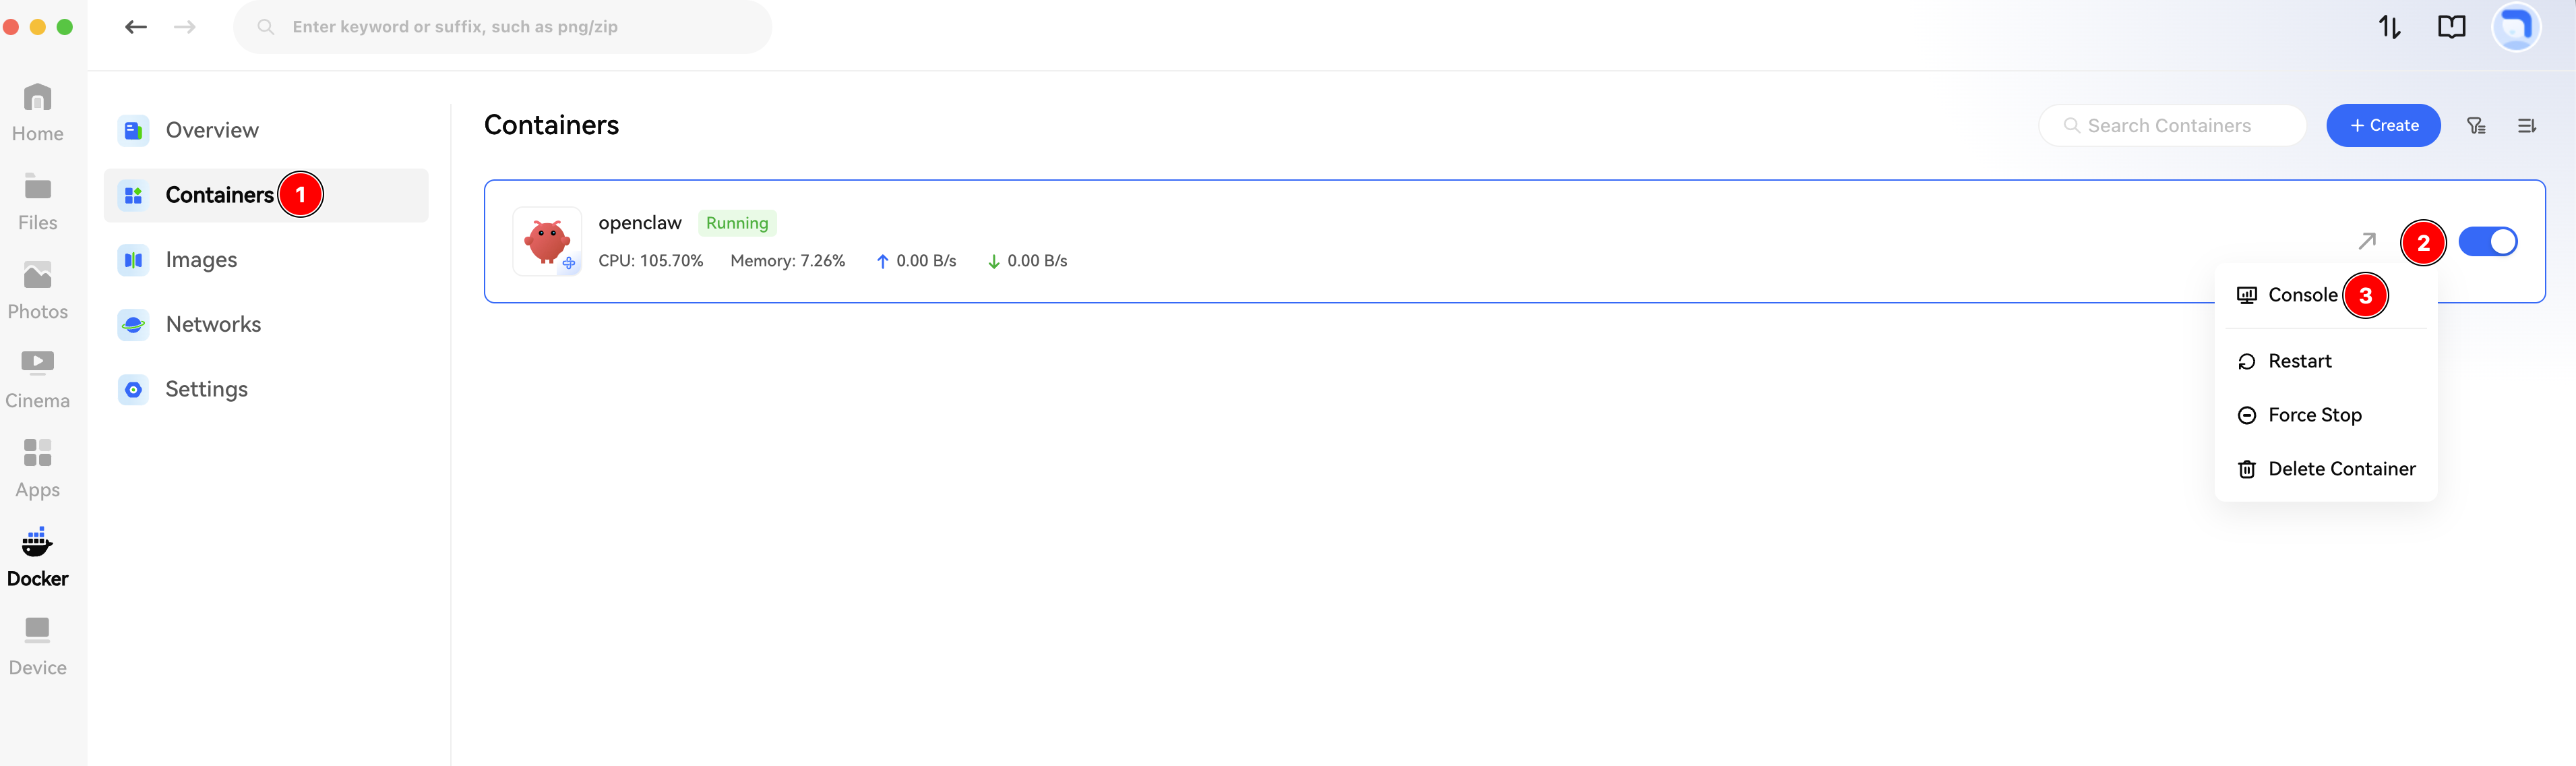
- Open the Console of the Openclaw container.
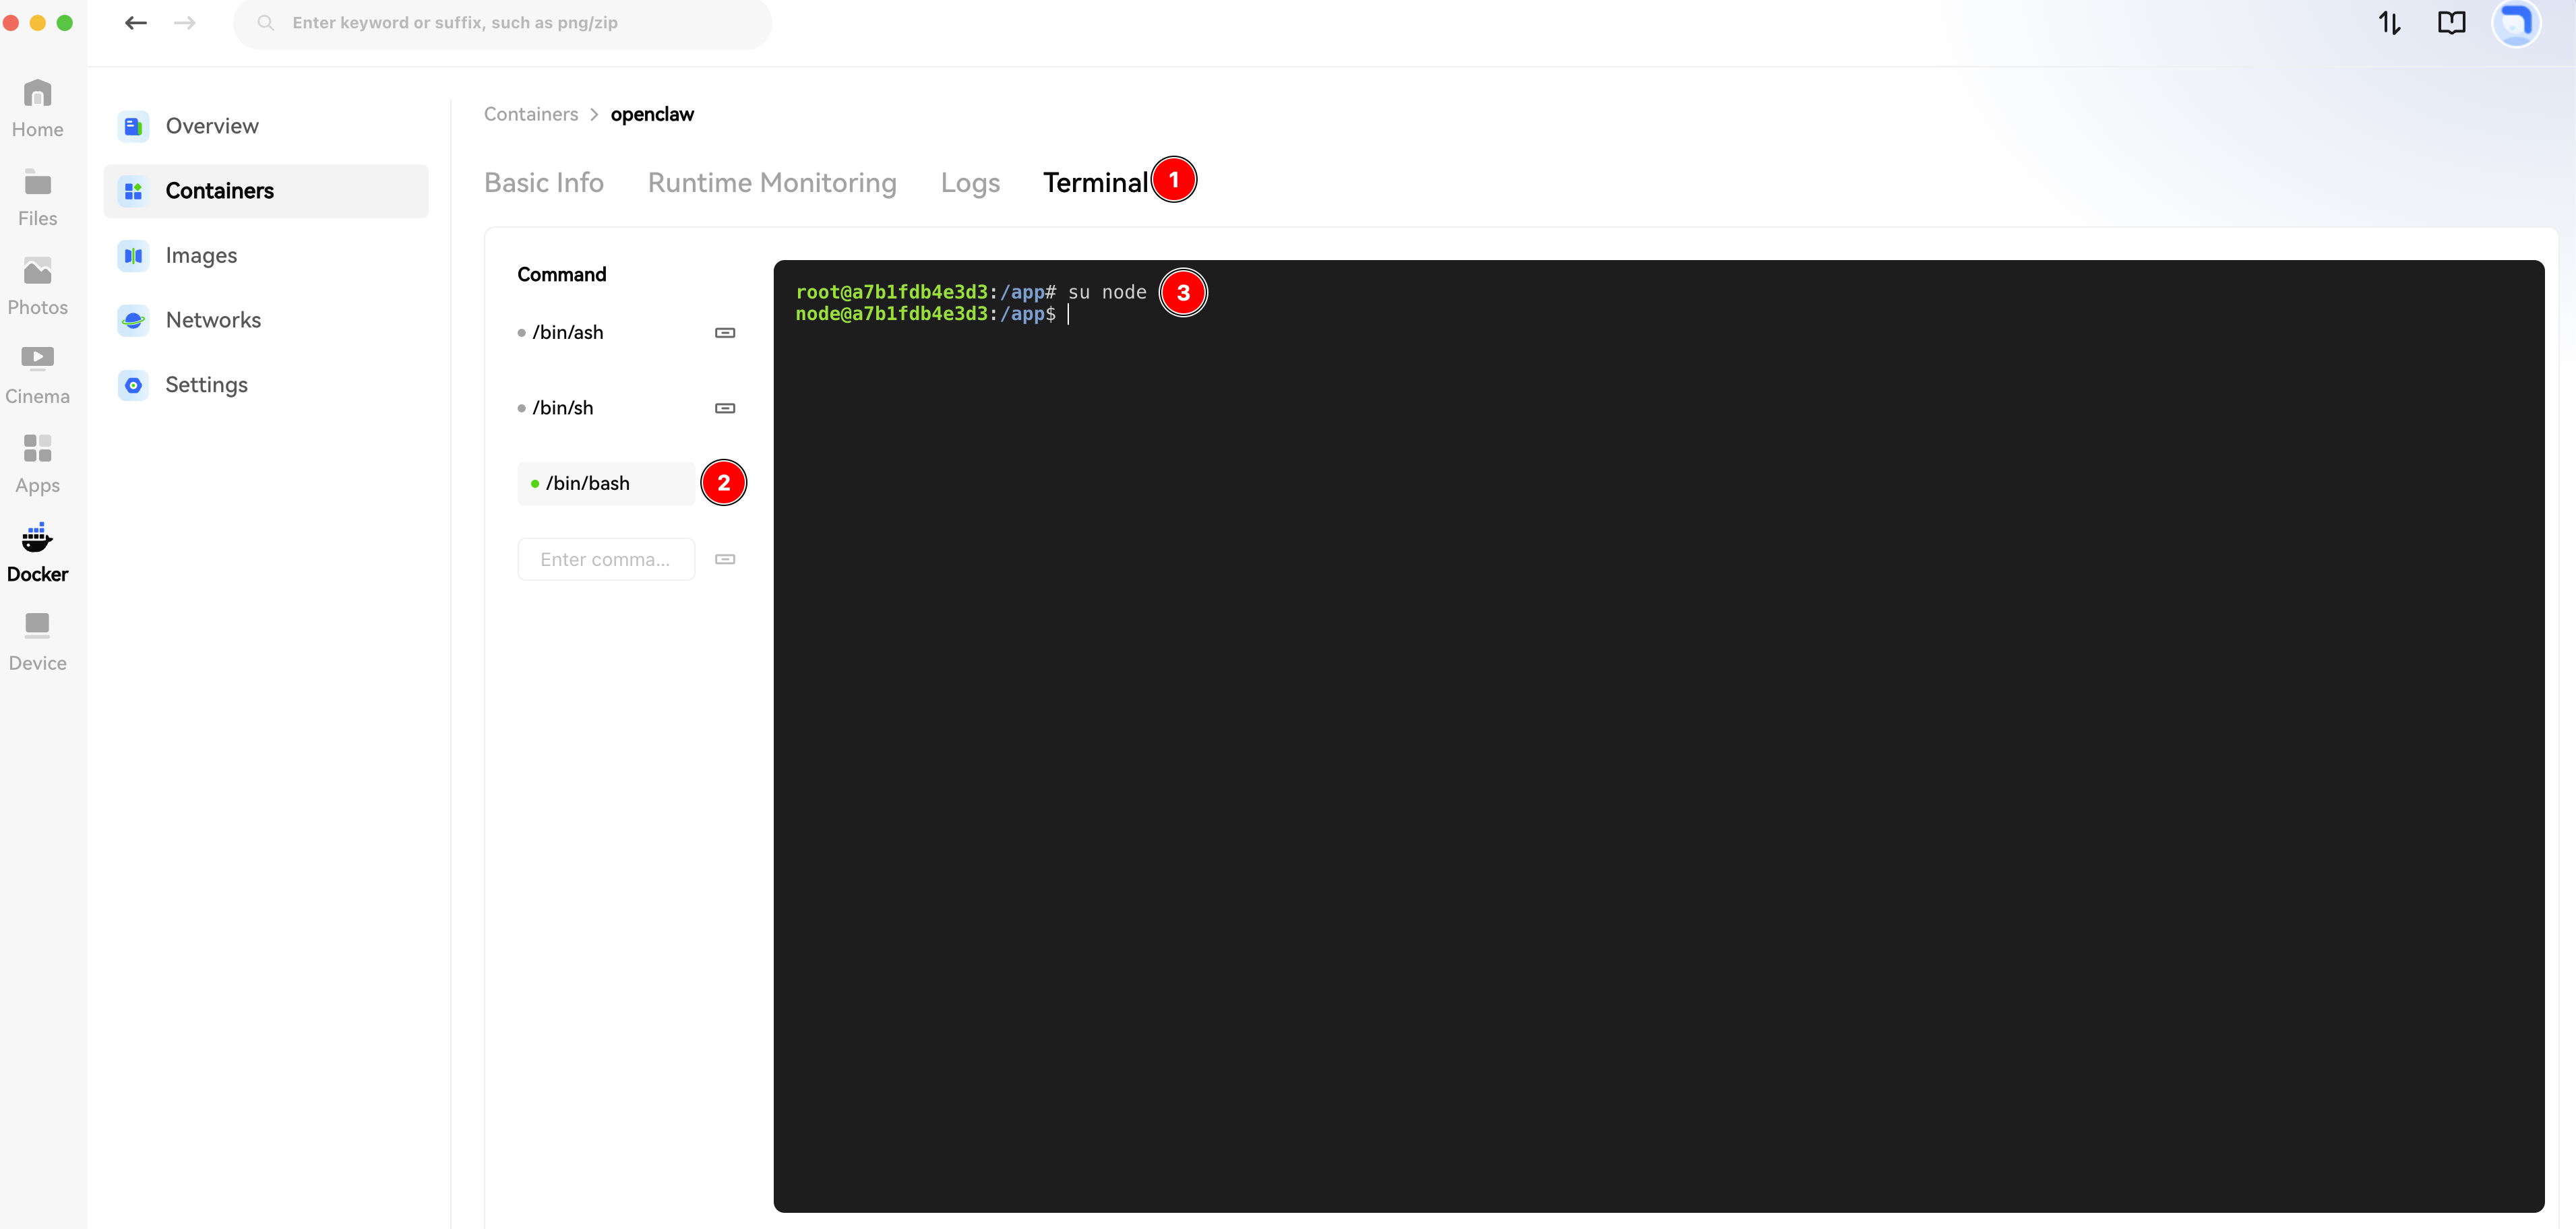
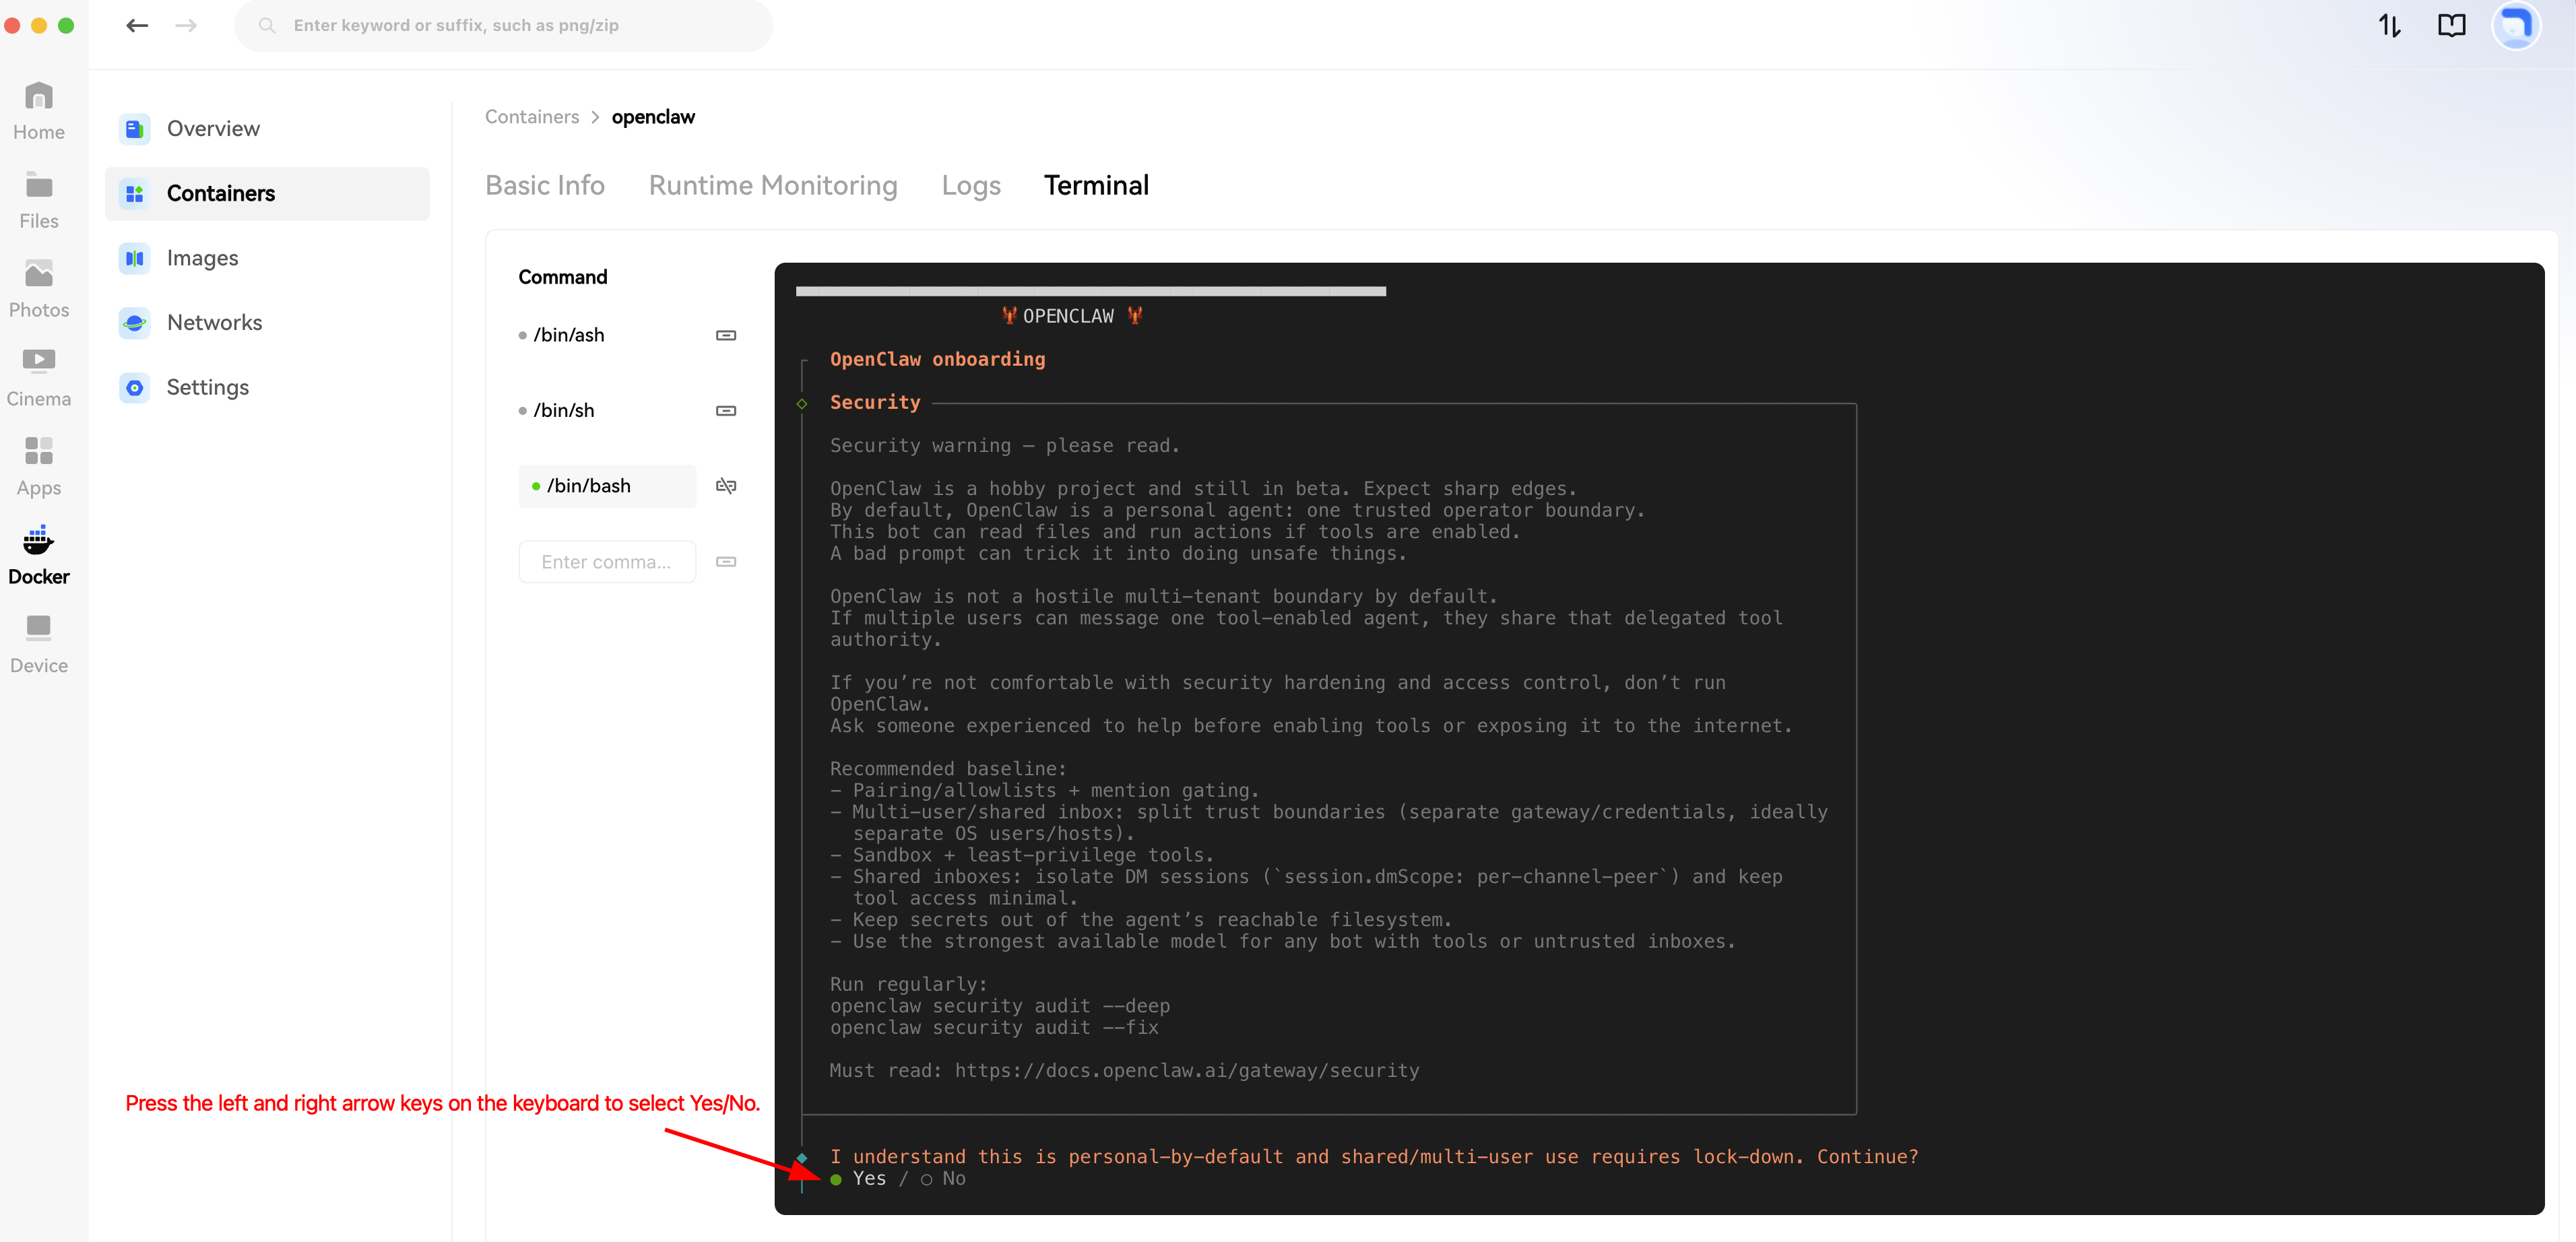
- In the terminal, type the command su node and press Enter.
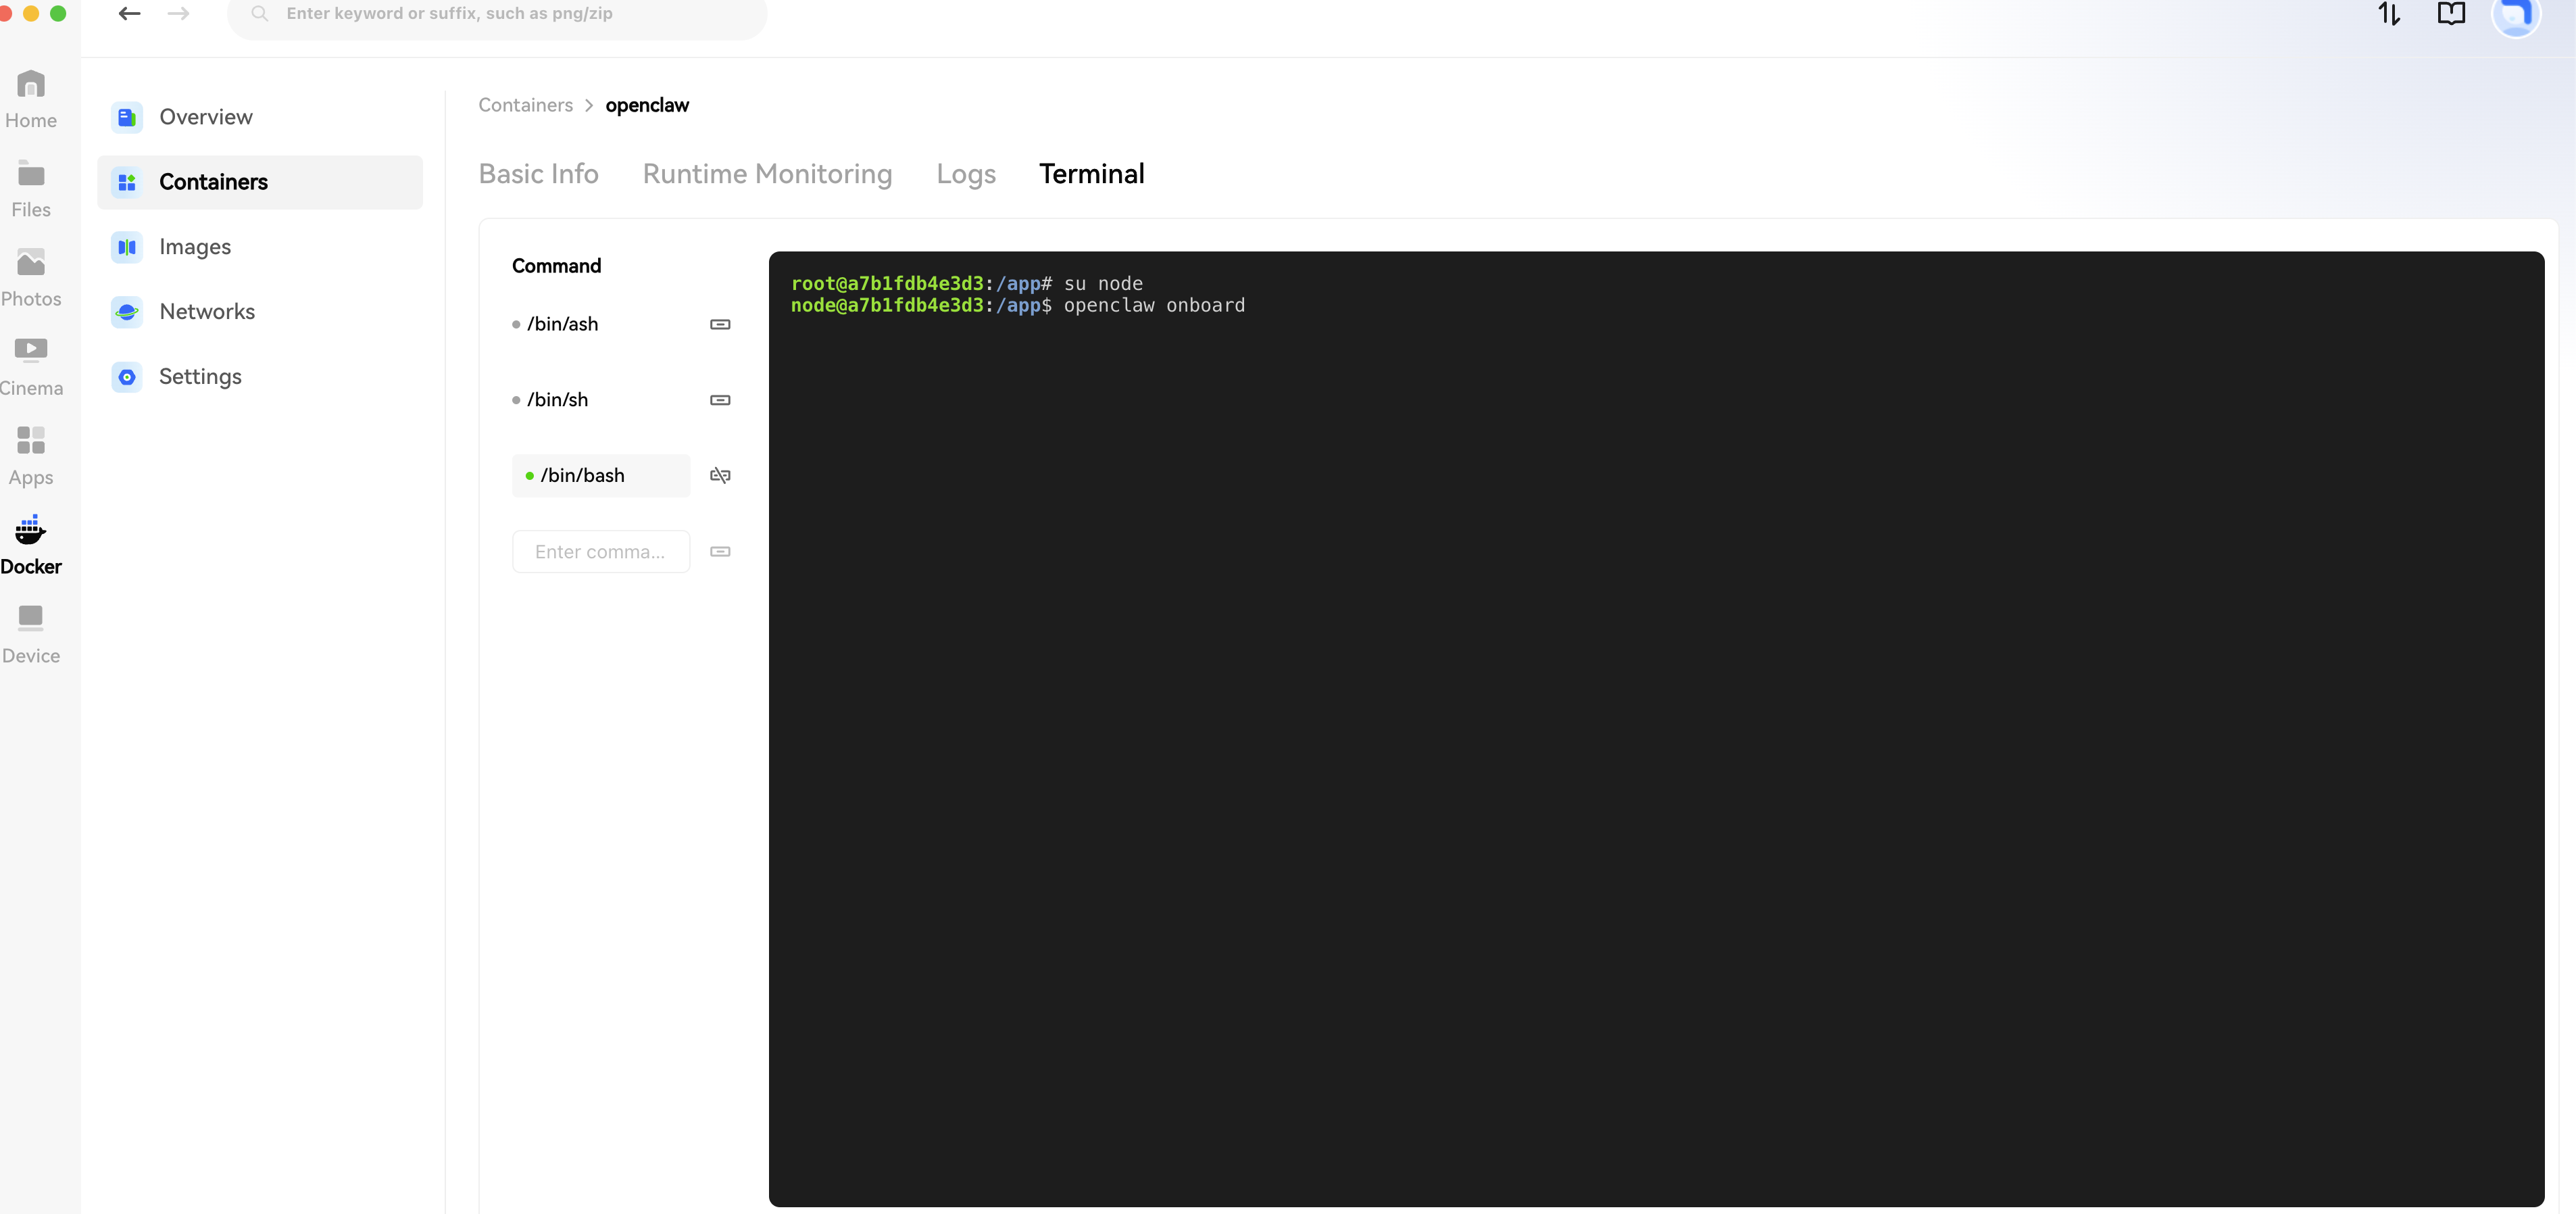
- Type the command openclaw onboard and press Enter.
- Wait a moment for the "Openclaw Configuration Safety Notice" to appear. Select Yes and press Enter to confirm.
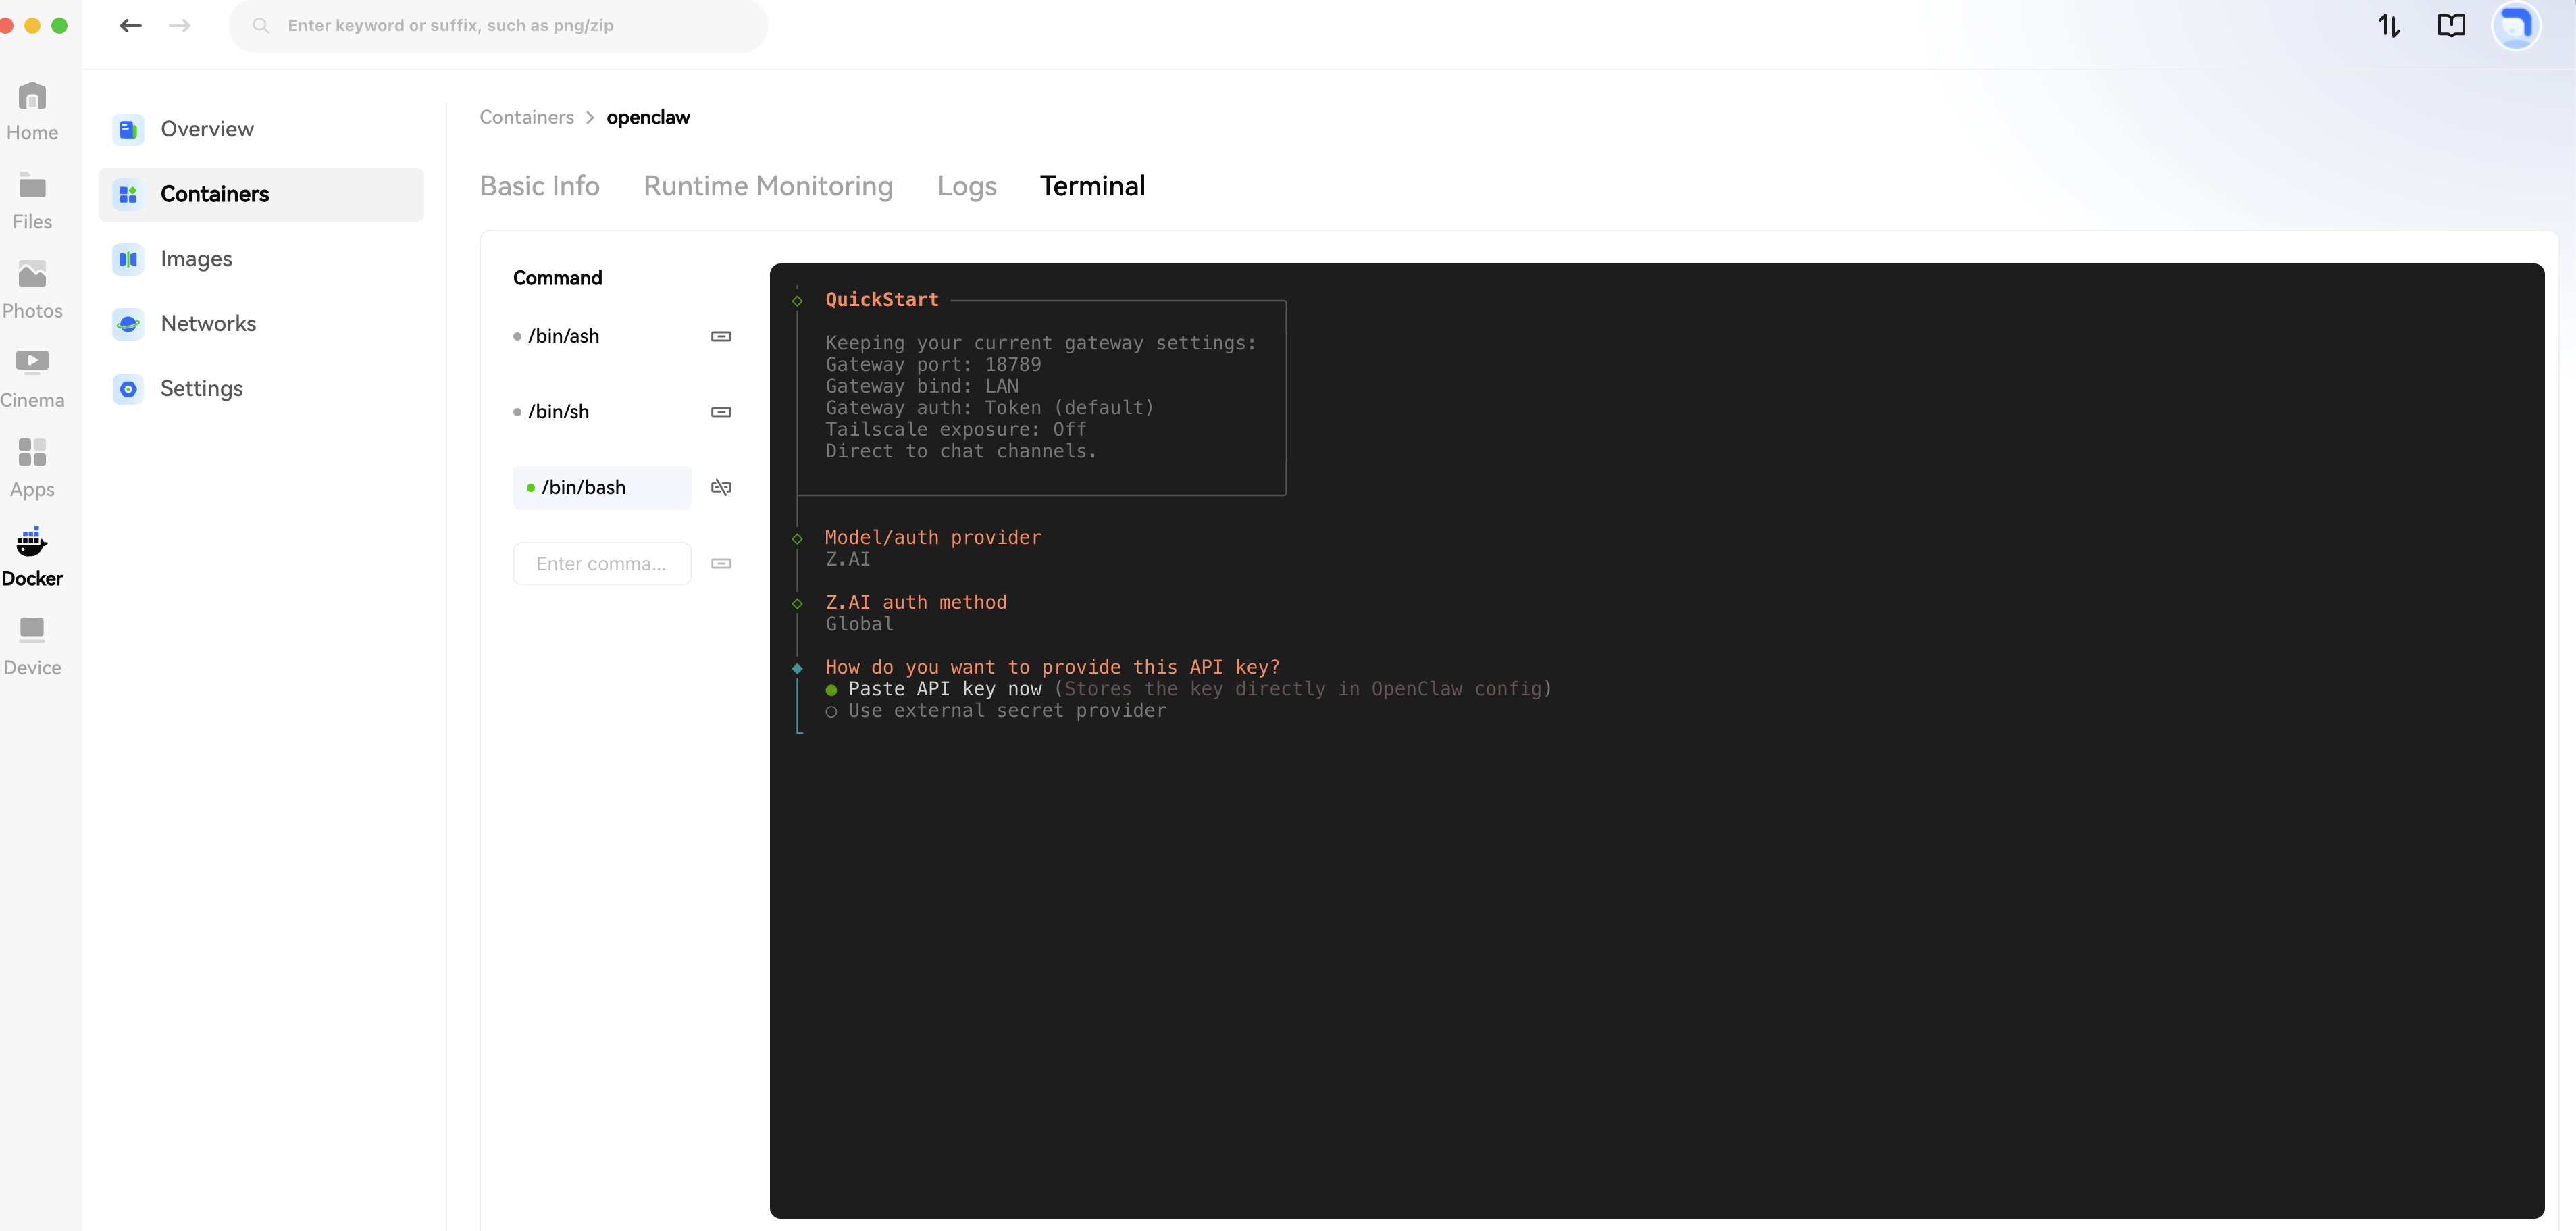
- Select QuickStart (use the arrow keys to navigate).
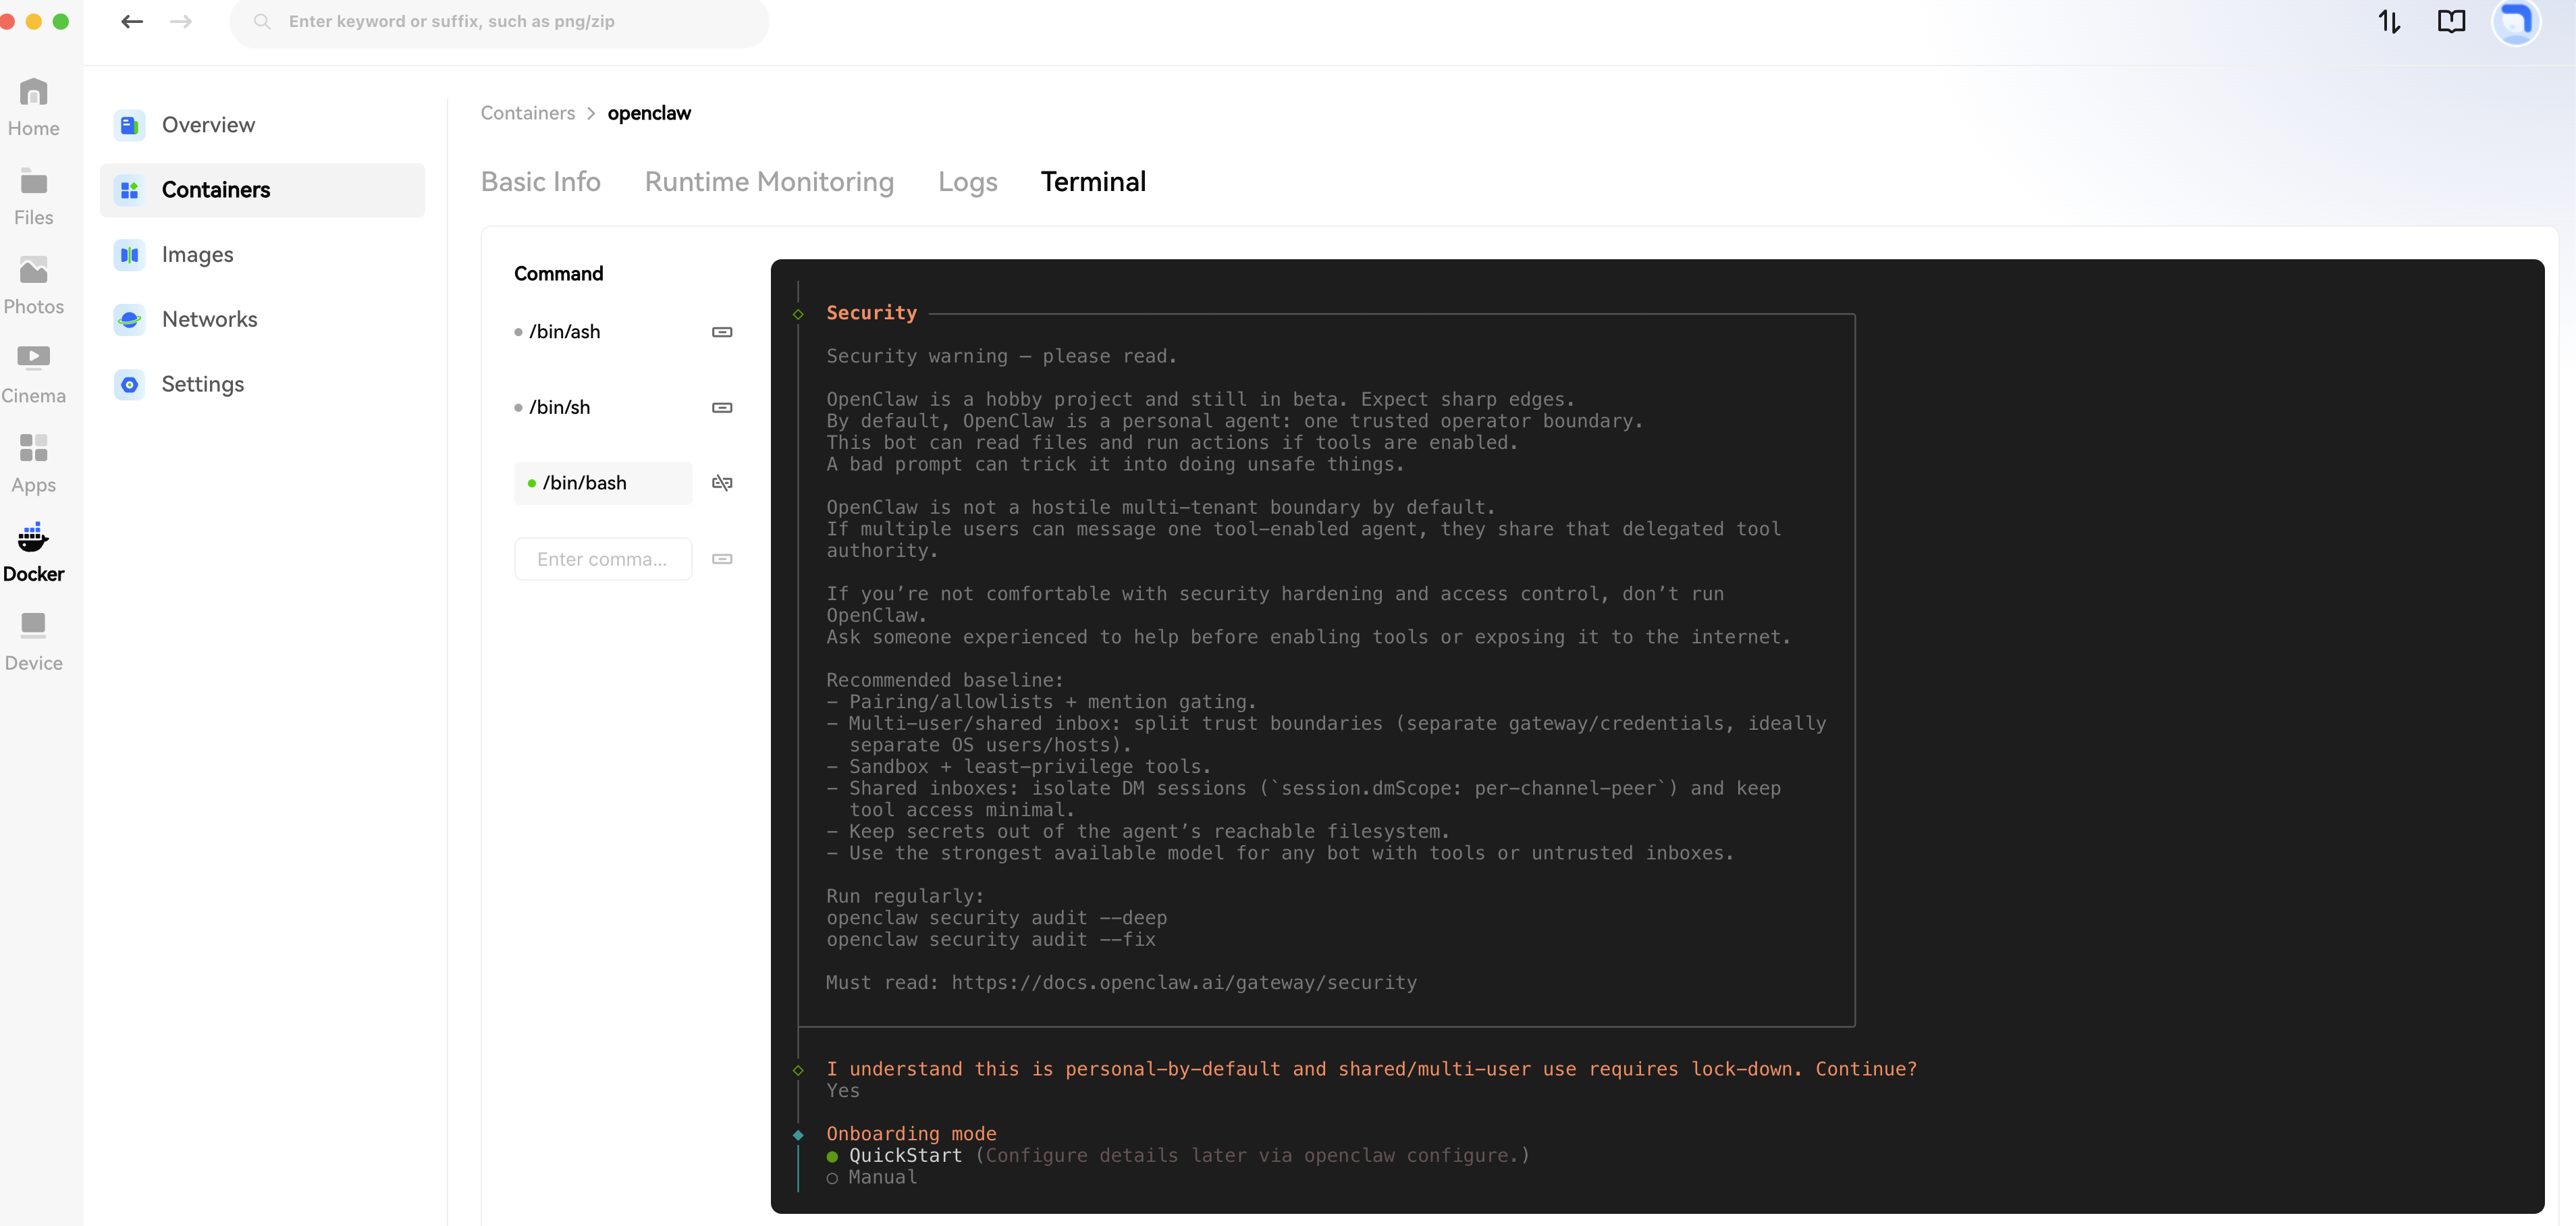
- Select Use existing values.

- Select your model provider based on the API Key you prepared.
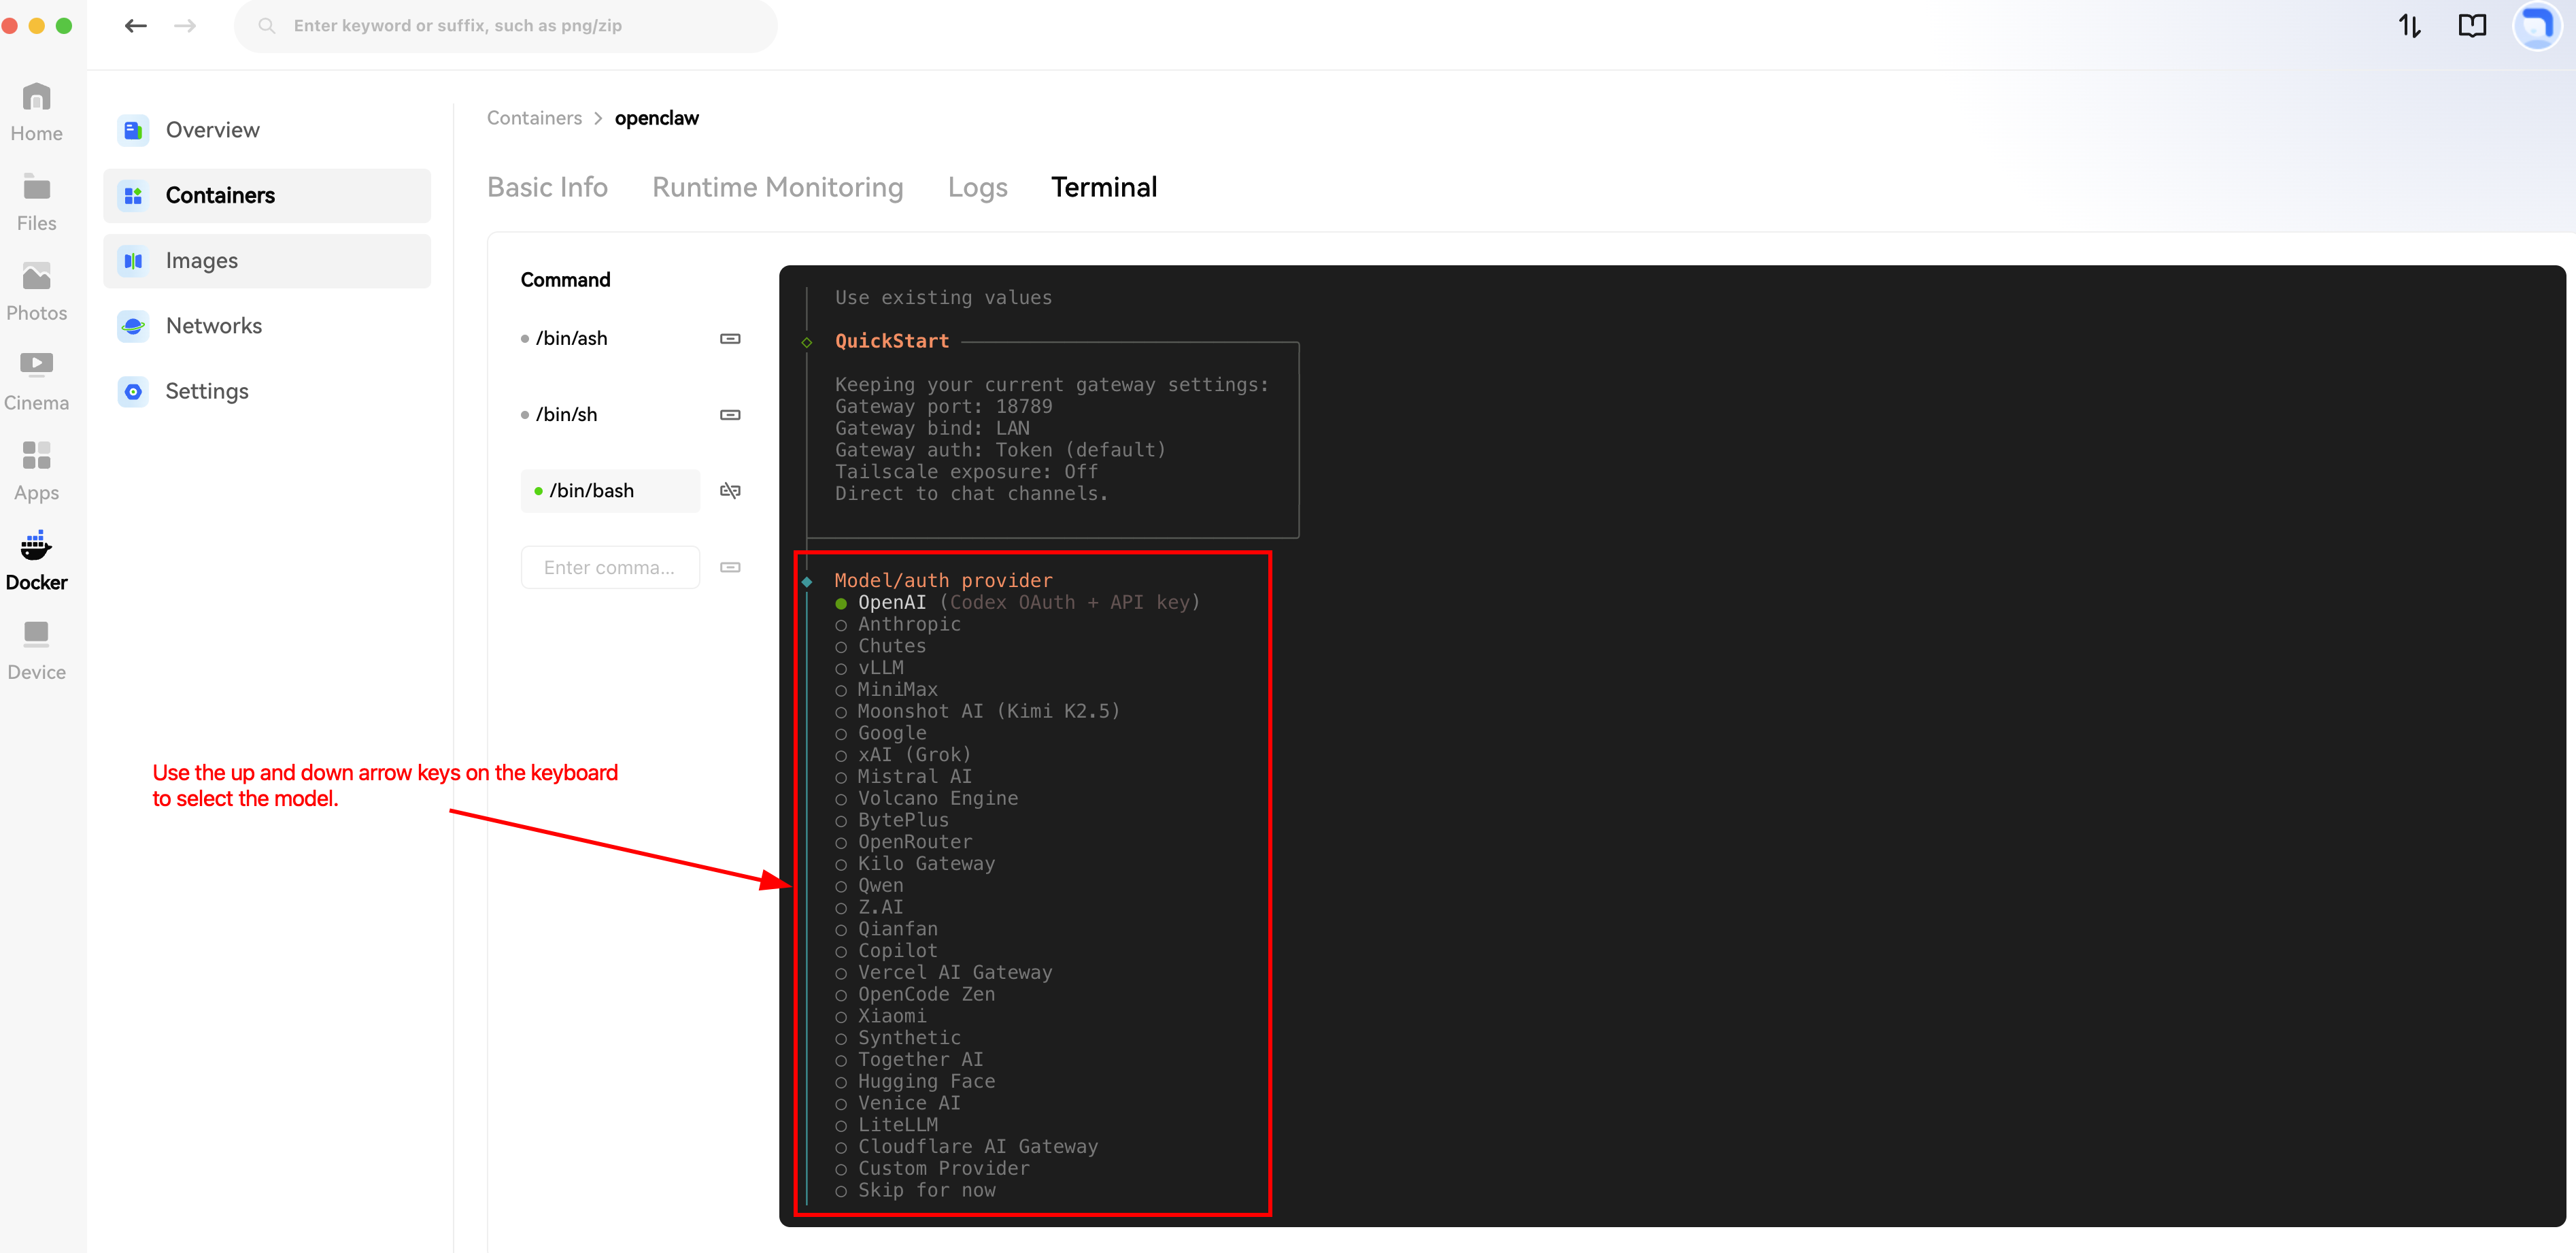
- Here, we use Z.AI as an example.
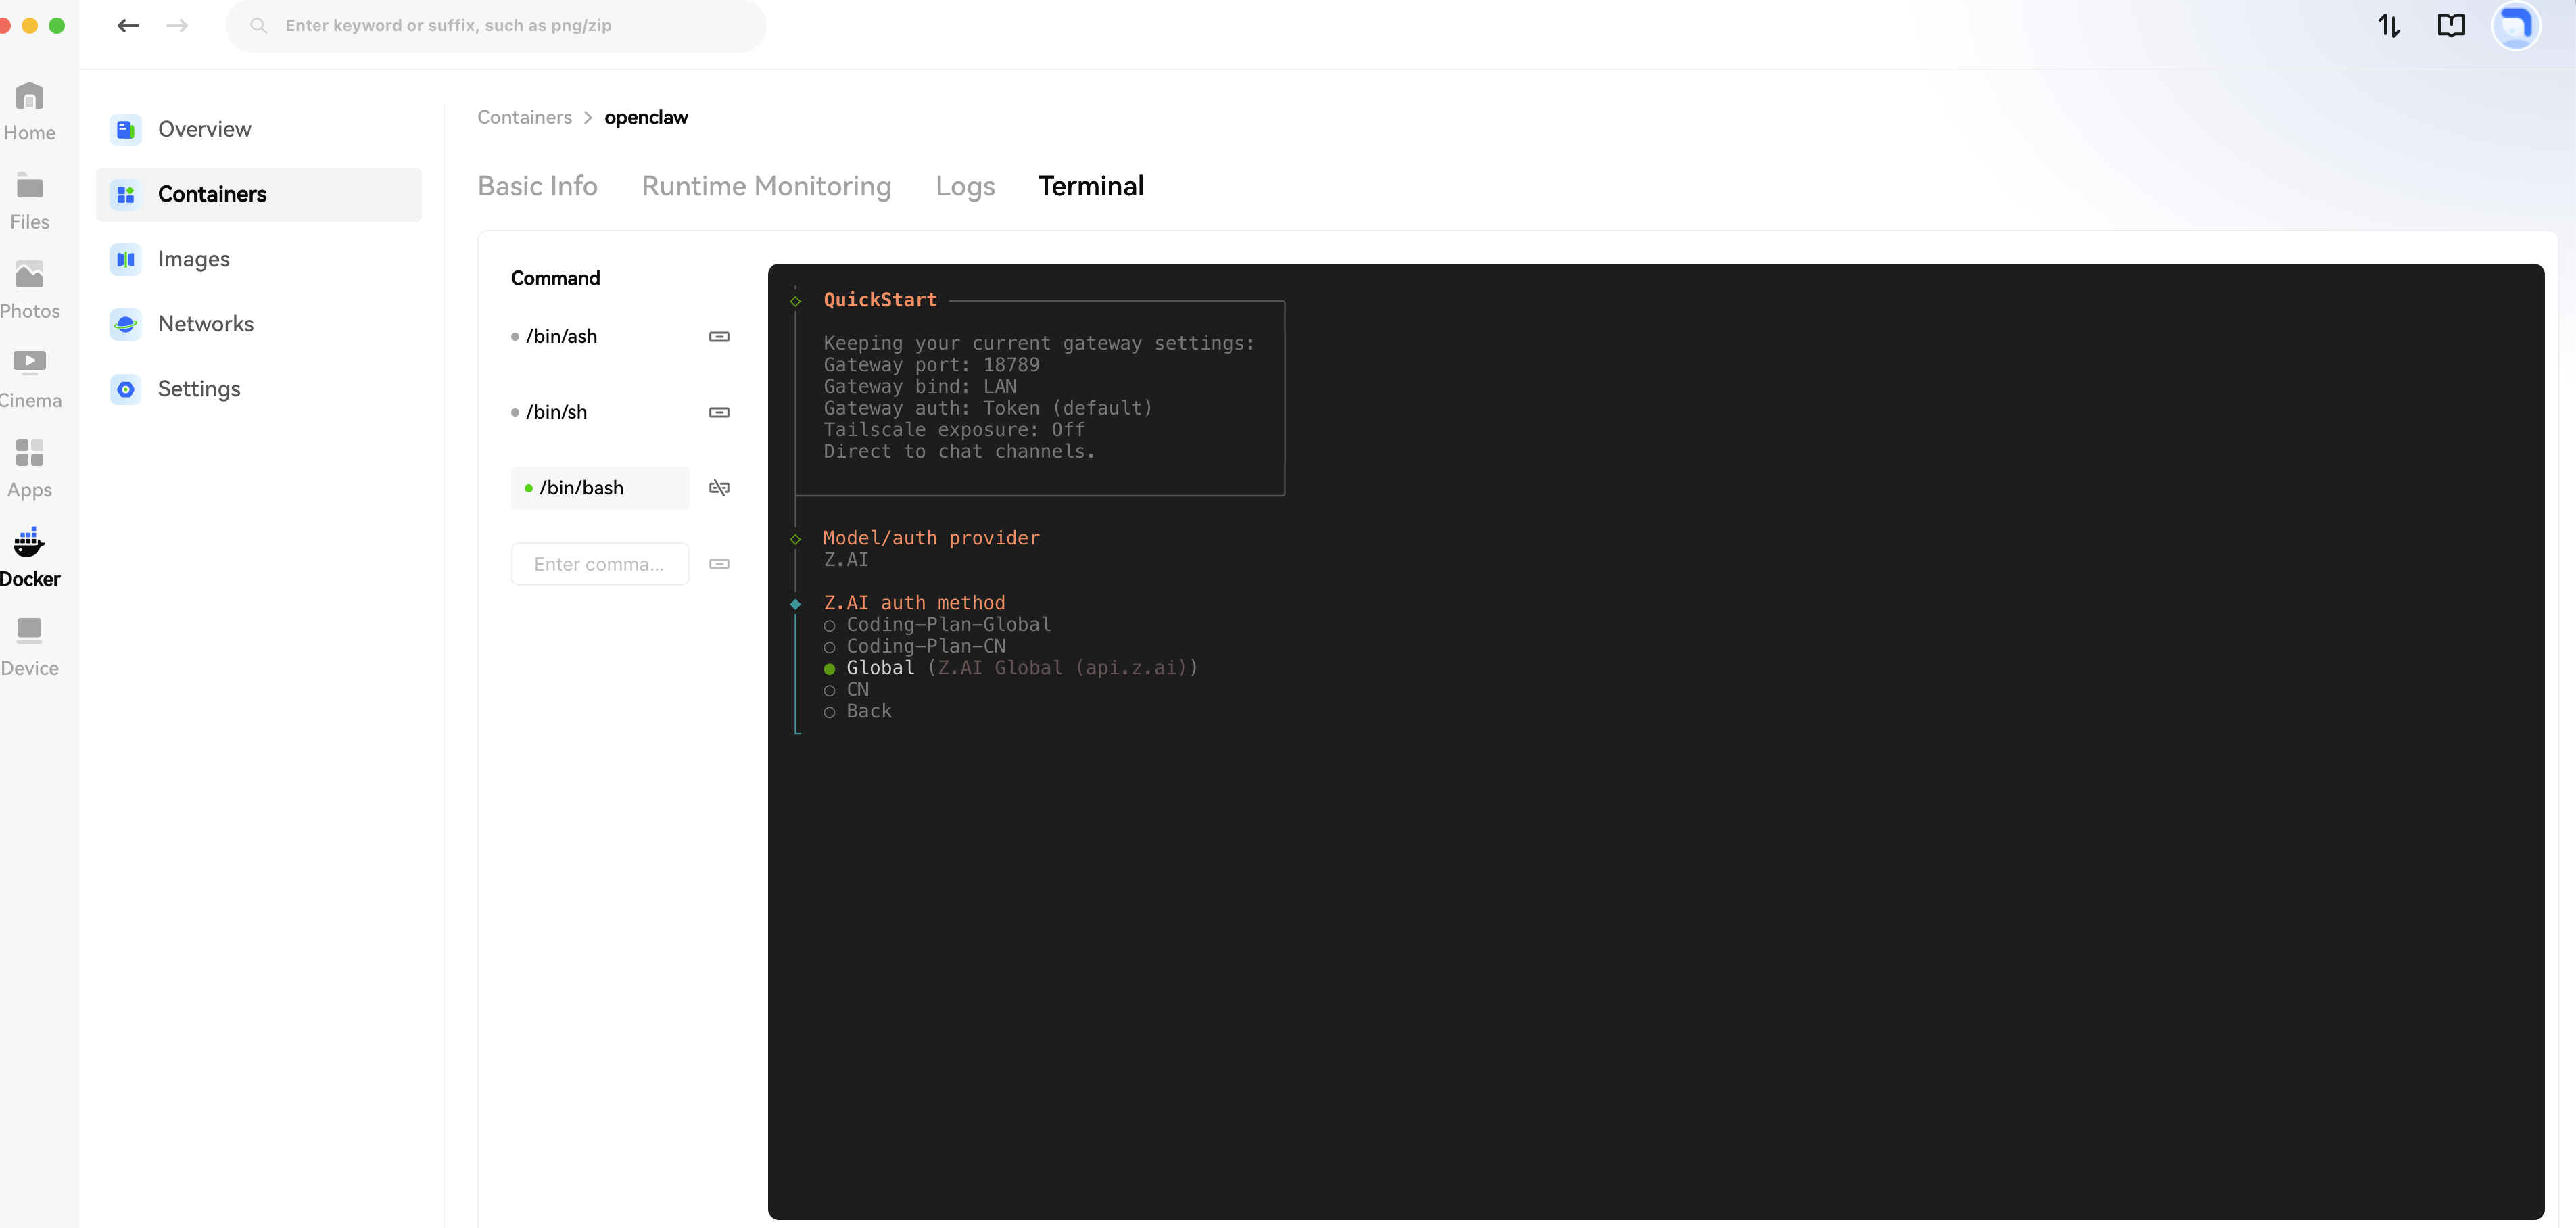
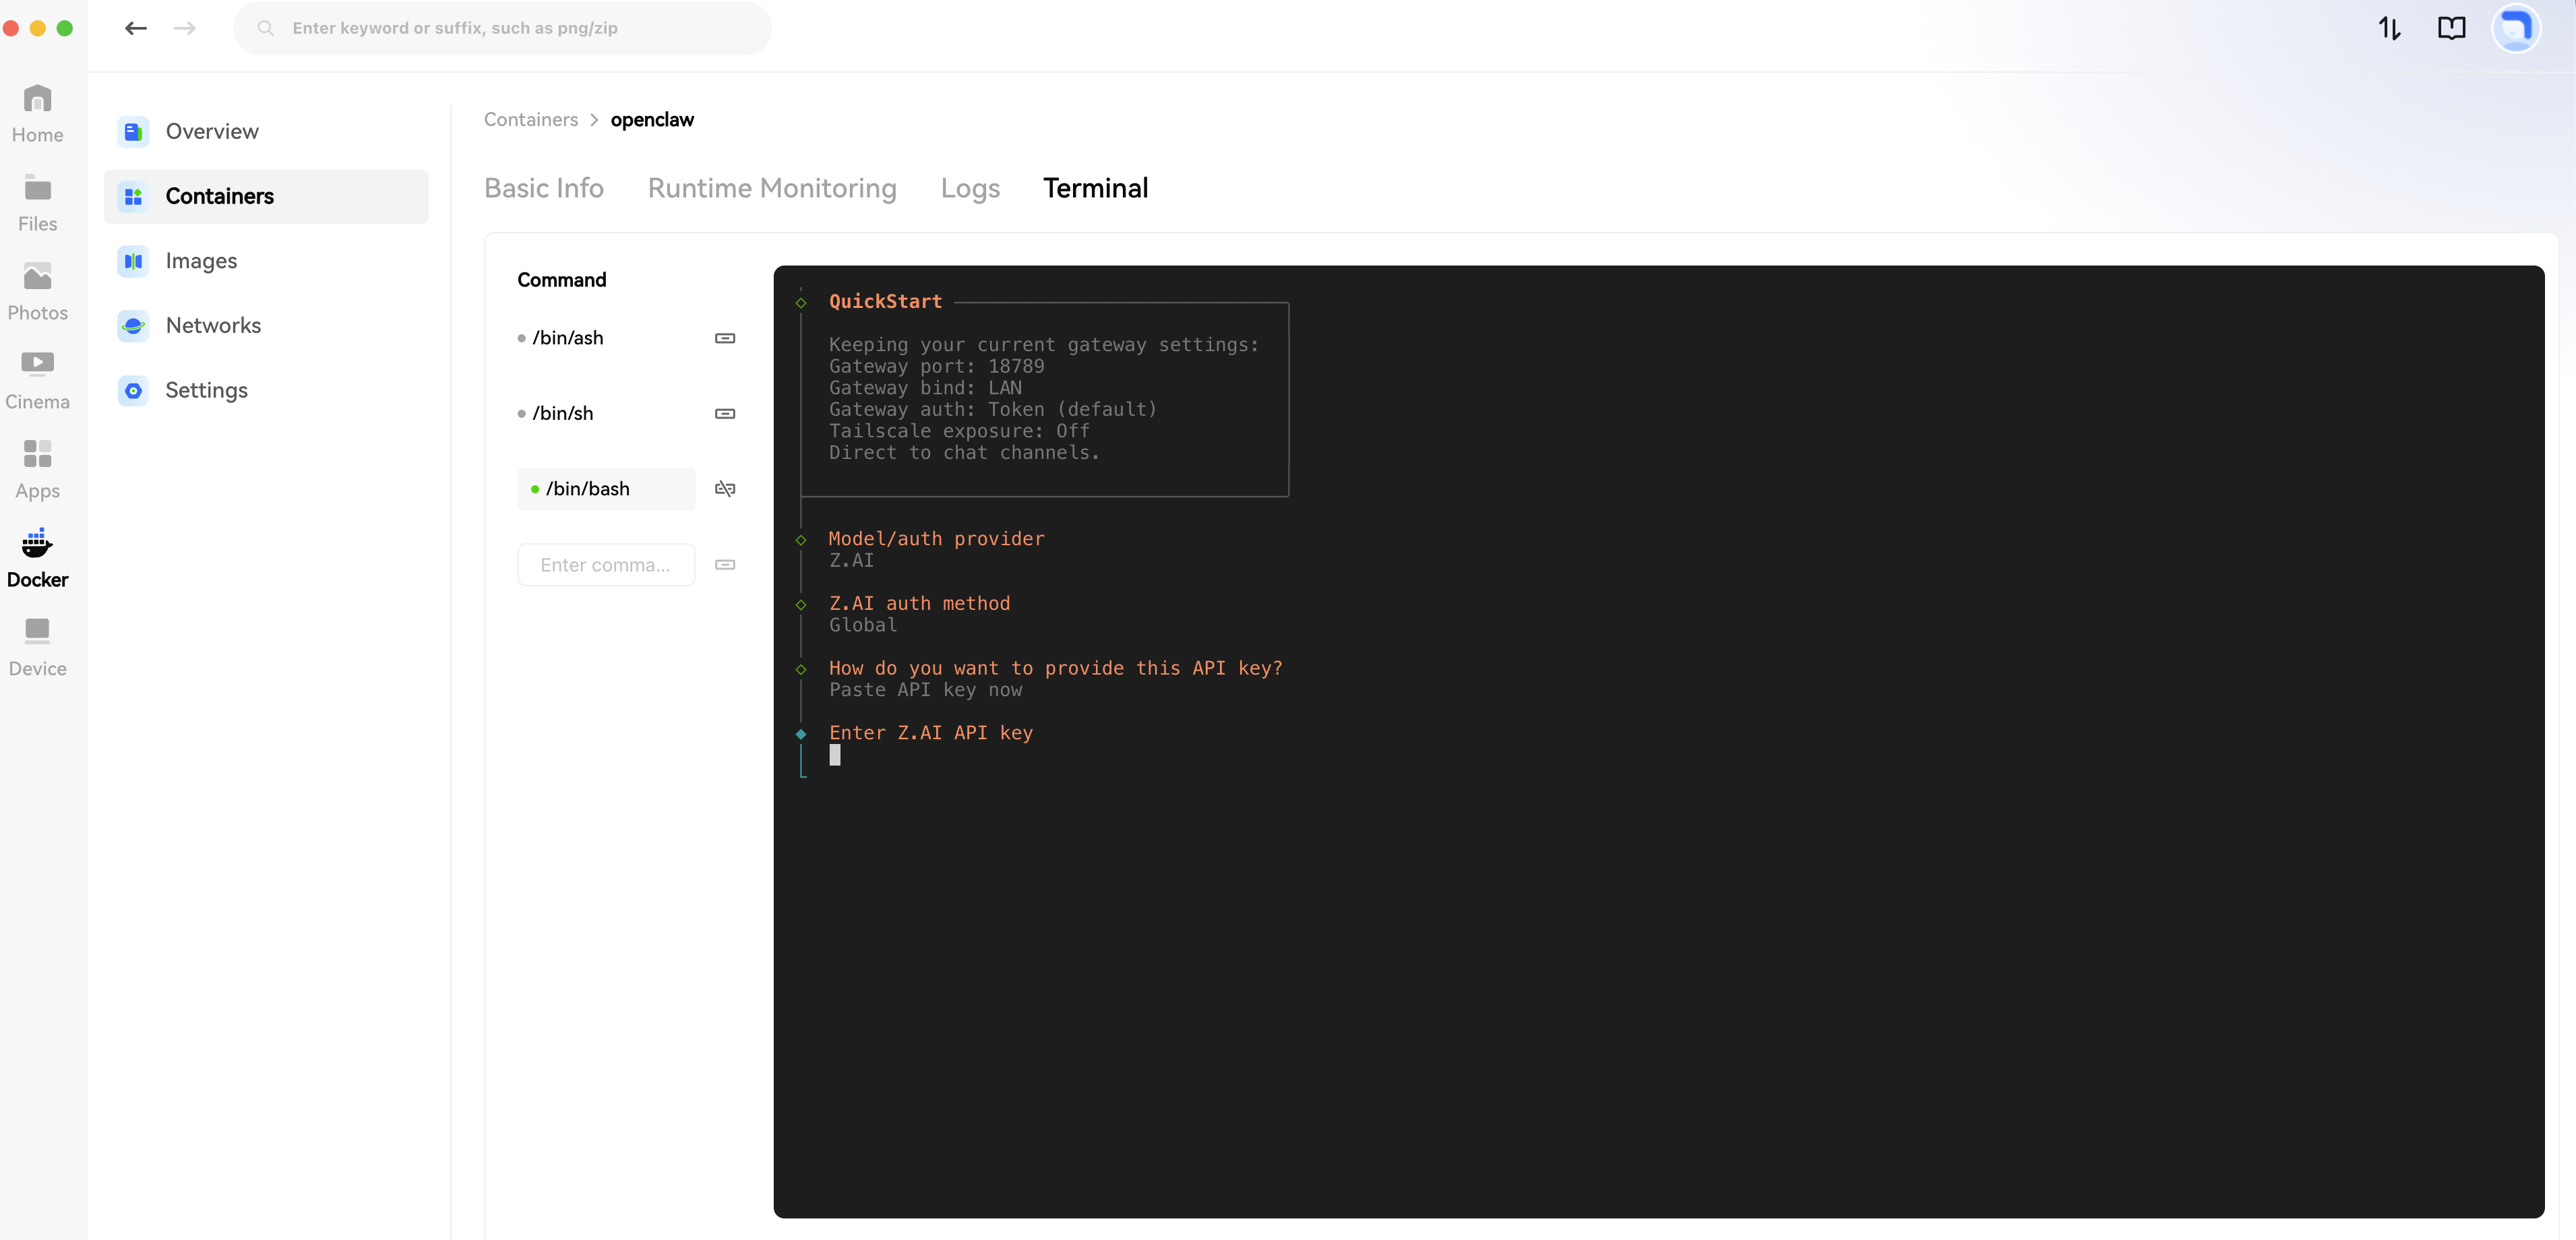
- Select Paste API key now.
- Enter your API Key.
- Select the default model; generally, choose
Keep current.

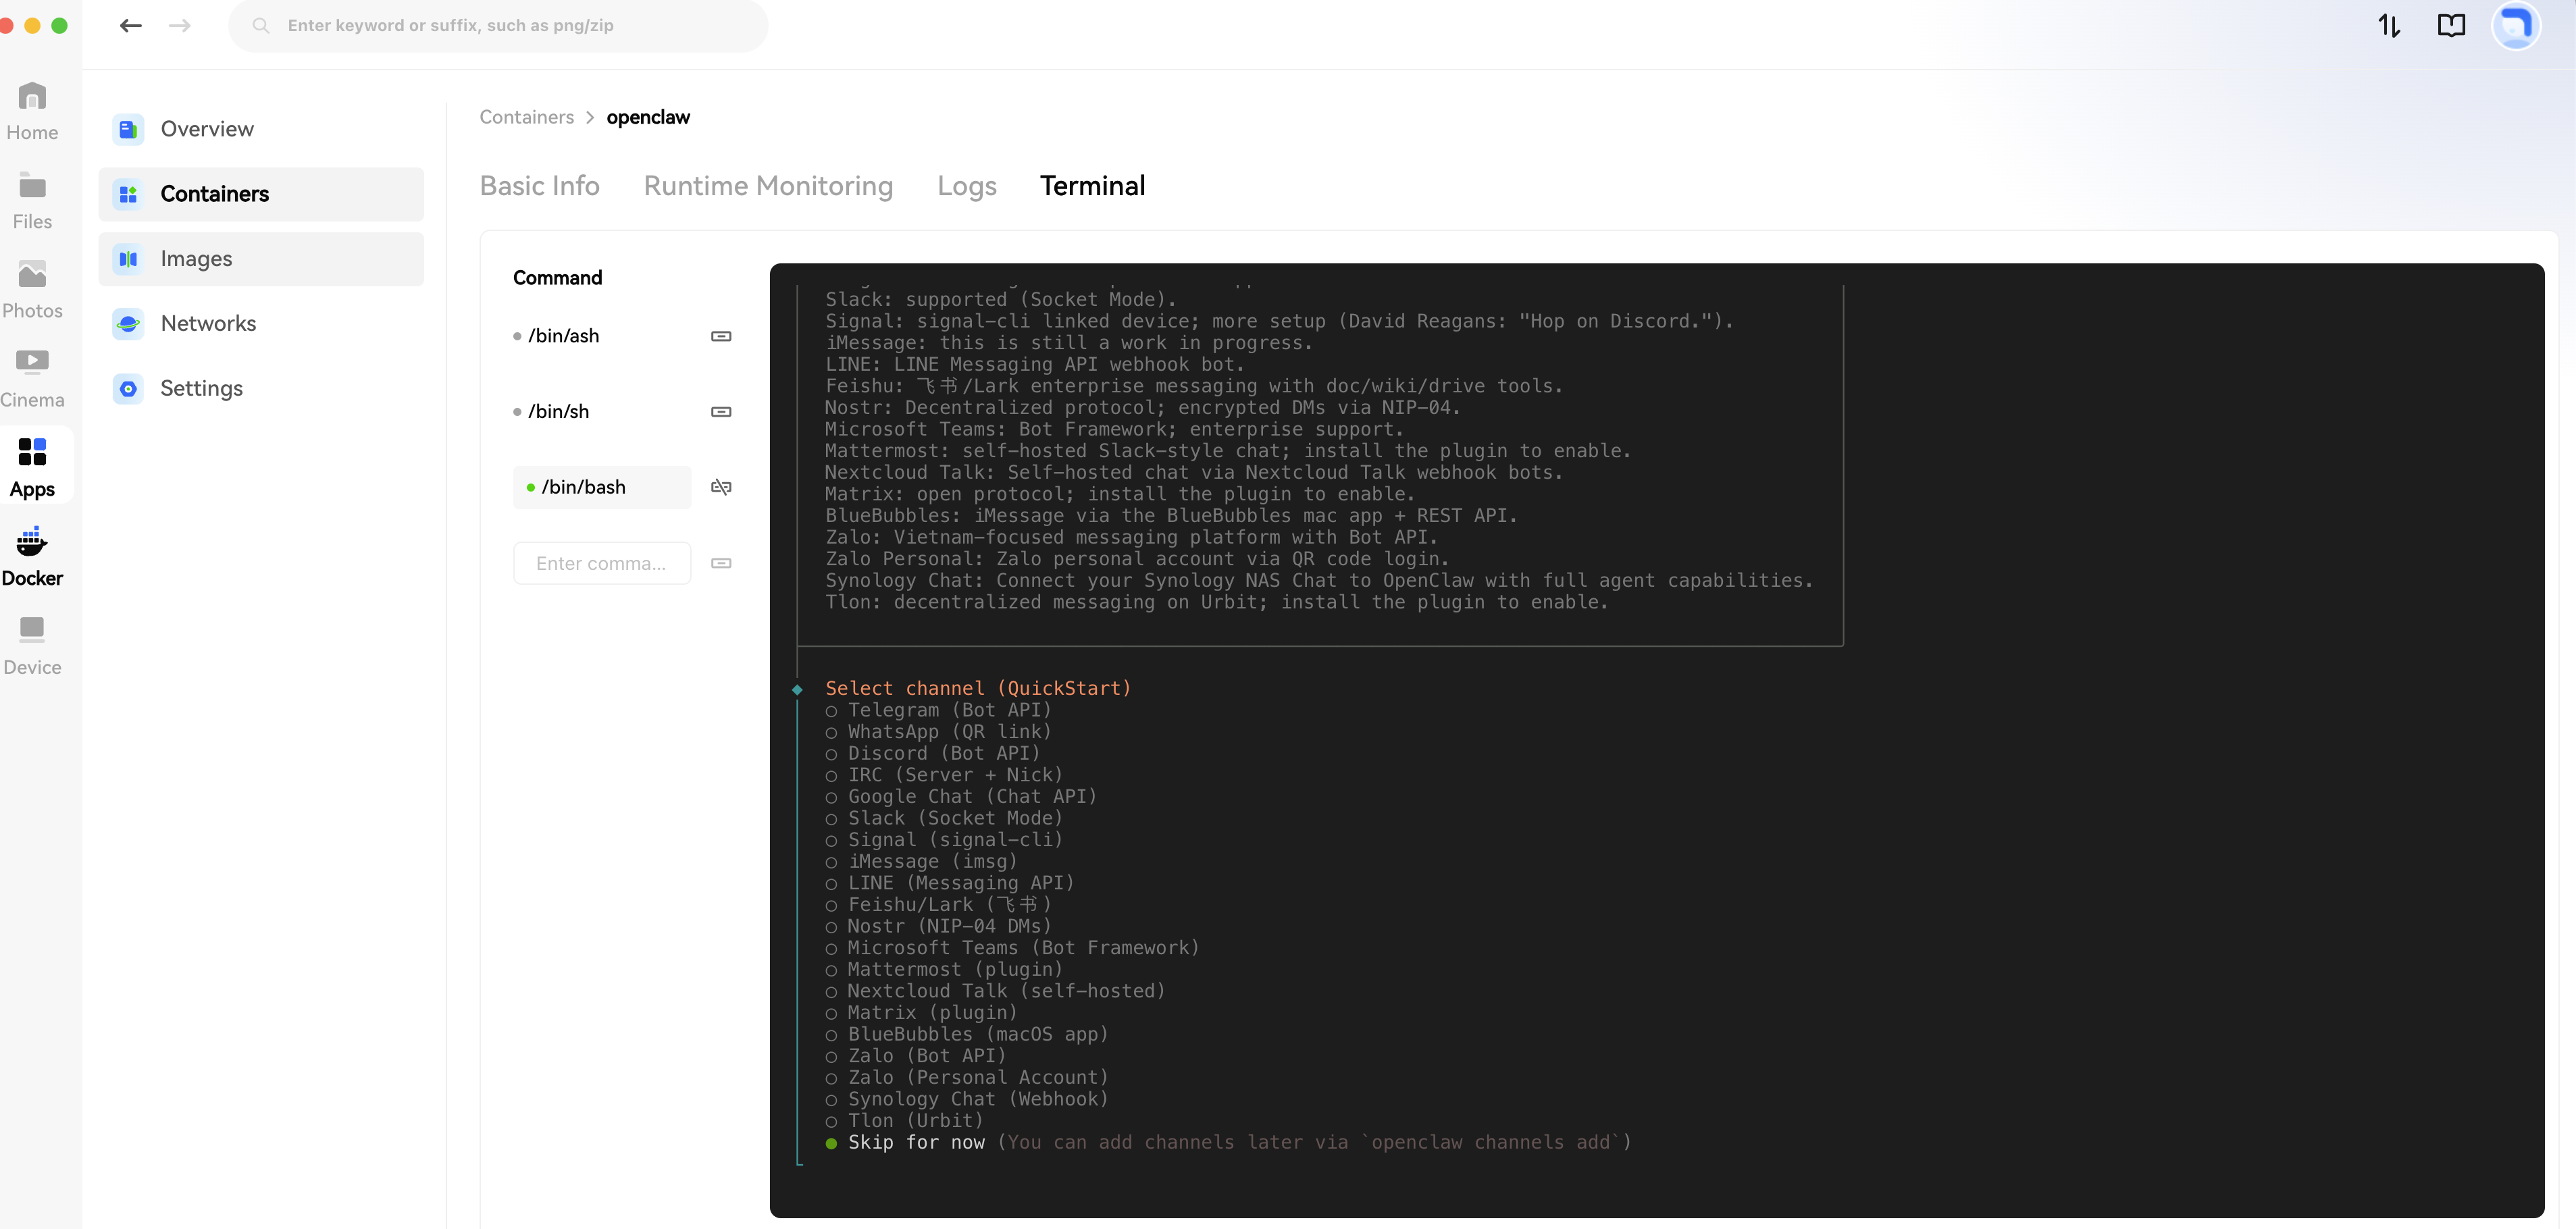
- Choose the interaction software; for now, select Skip for now.
- The setup is now complete. The application will restart. Go to the App Center and click Open.
- Once opened, you can start chatting with Openclaw.
¶ FAQ
- Q: Why does it show "Unable to Connect" after refreshing?
- A: OpenClaw uses a secure authentication mechanism between the frontend and backend. To resolve this:
Open the sidebar: Control → Overview, enter your Gateway Token, and click Connect to restore normal service.
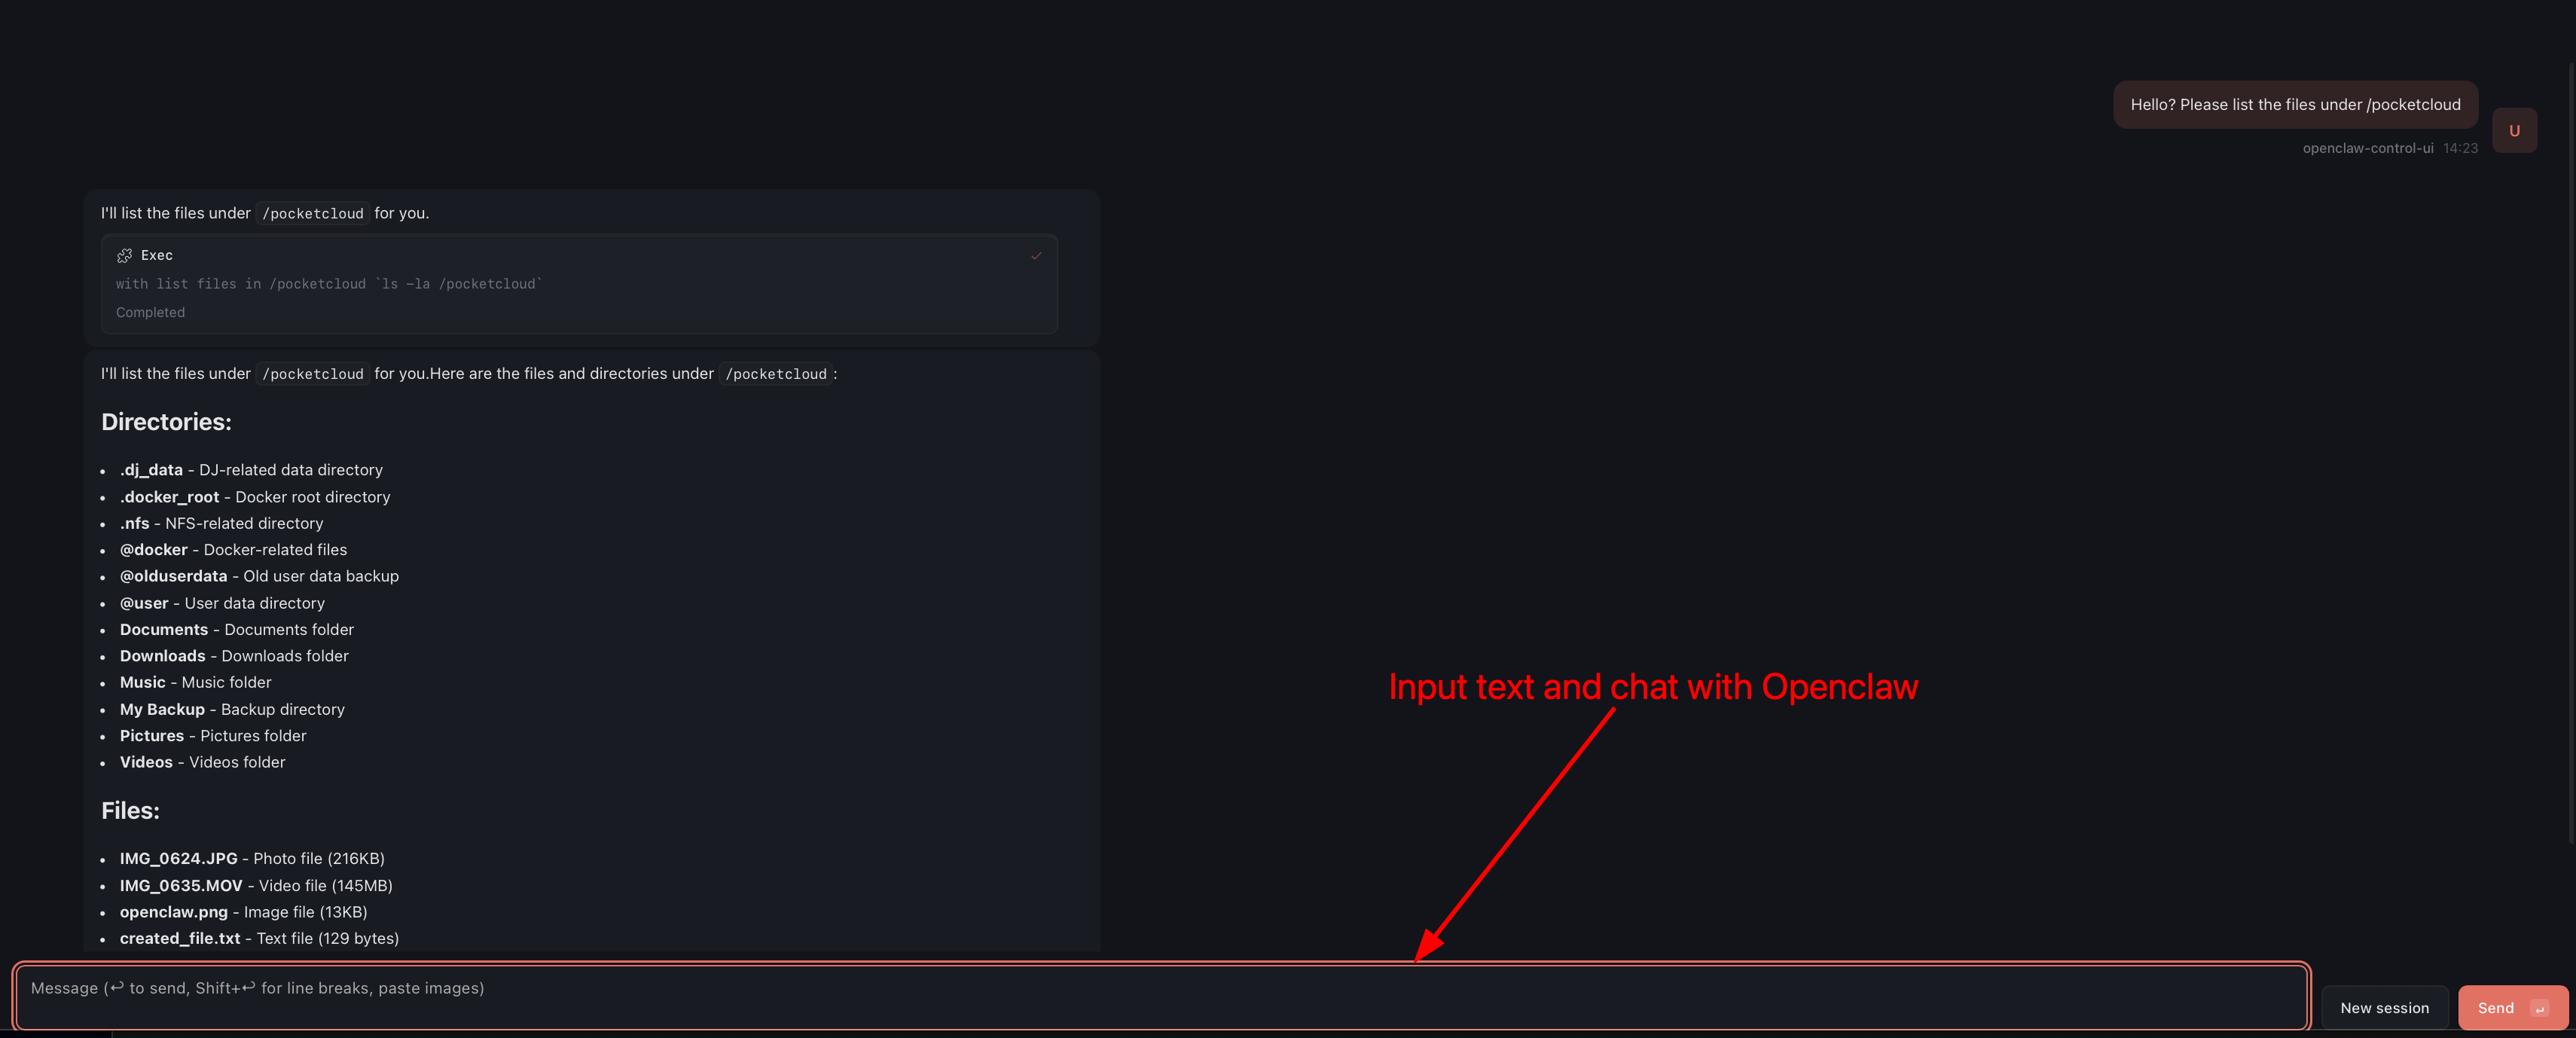
- Q: Which files can I interact with?
- A: The default mounted directory is
/pocketcloud. You can give direct commands to OpenClaw, for example:
"List all image files under /pocketcloud"
- Q: Don't want to type "/pocketcloud" every time?
- A: You can set an "Alias" to use more natural language, for example:
"Call /pocketcloud 'My Files'"