¶ How to Re-Index the Album?
When issues such as newly added photos not displaying, photo metadata (e.g., shooting time, location) being incorrect, or residual records remaining after photo deletion occur, you can re-index the album to sync the latest status, ensuring the album function can accurately recognize and display photo content.
Note:
- After adding, deleting, or modifying album files via USB mode, you need to manually re-index the album to sync the changes.
¶ How to Manually Re-Index the Album?
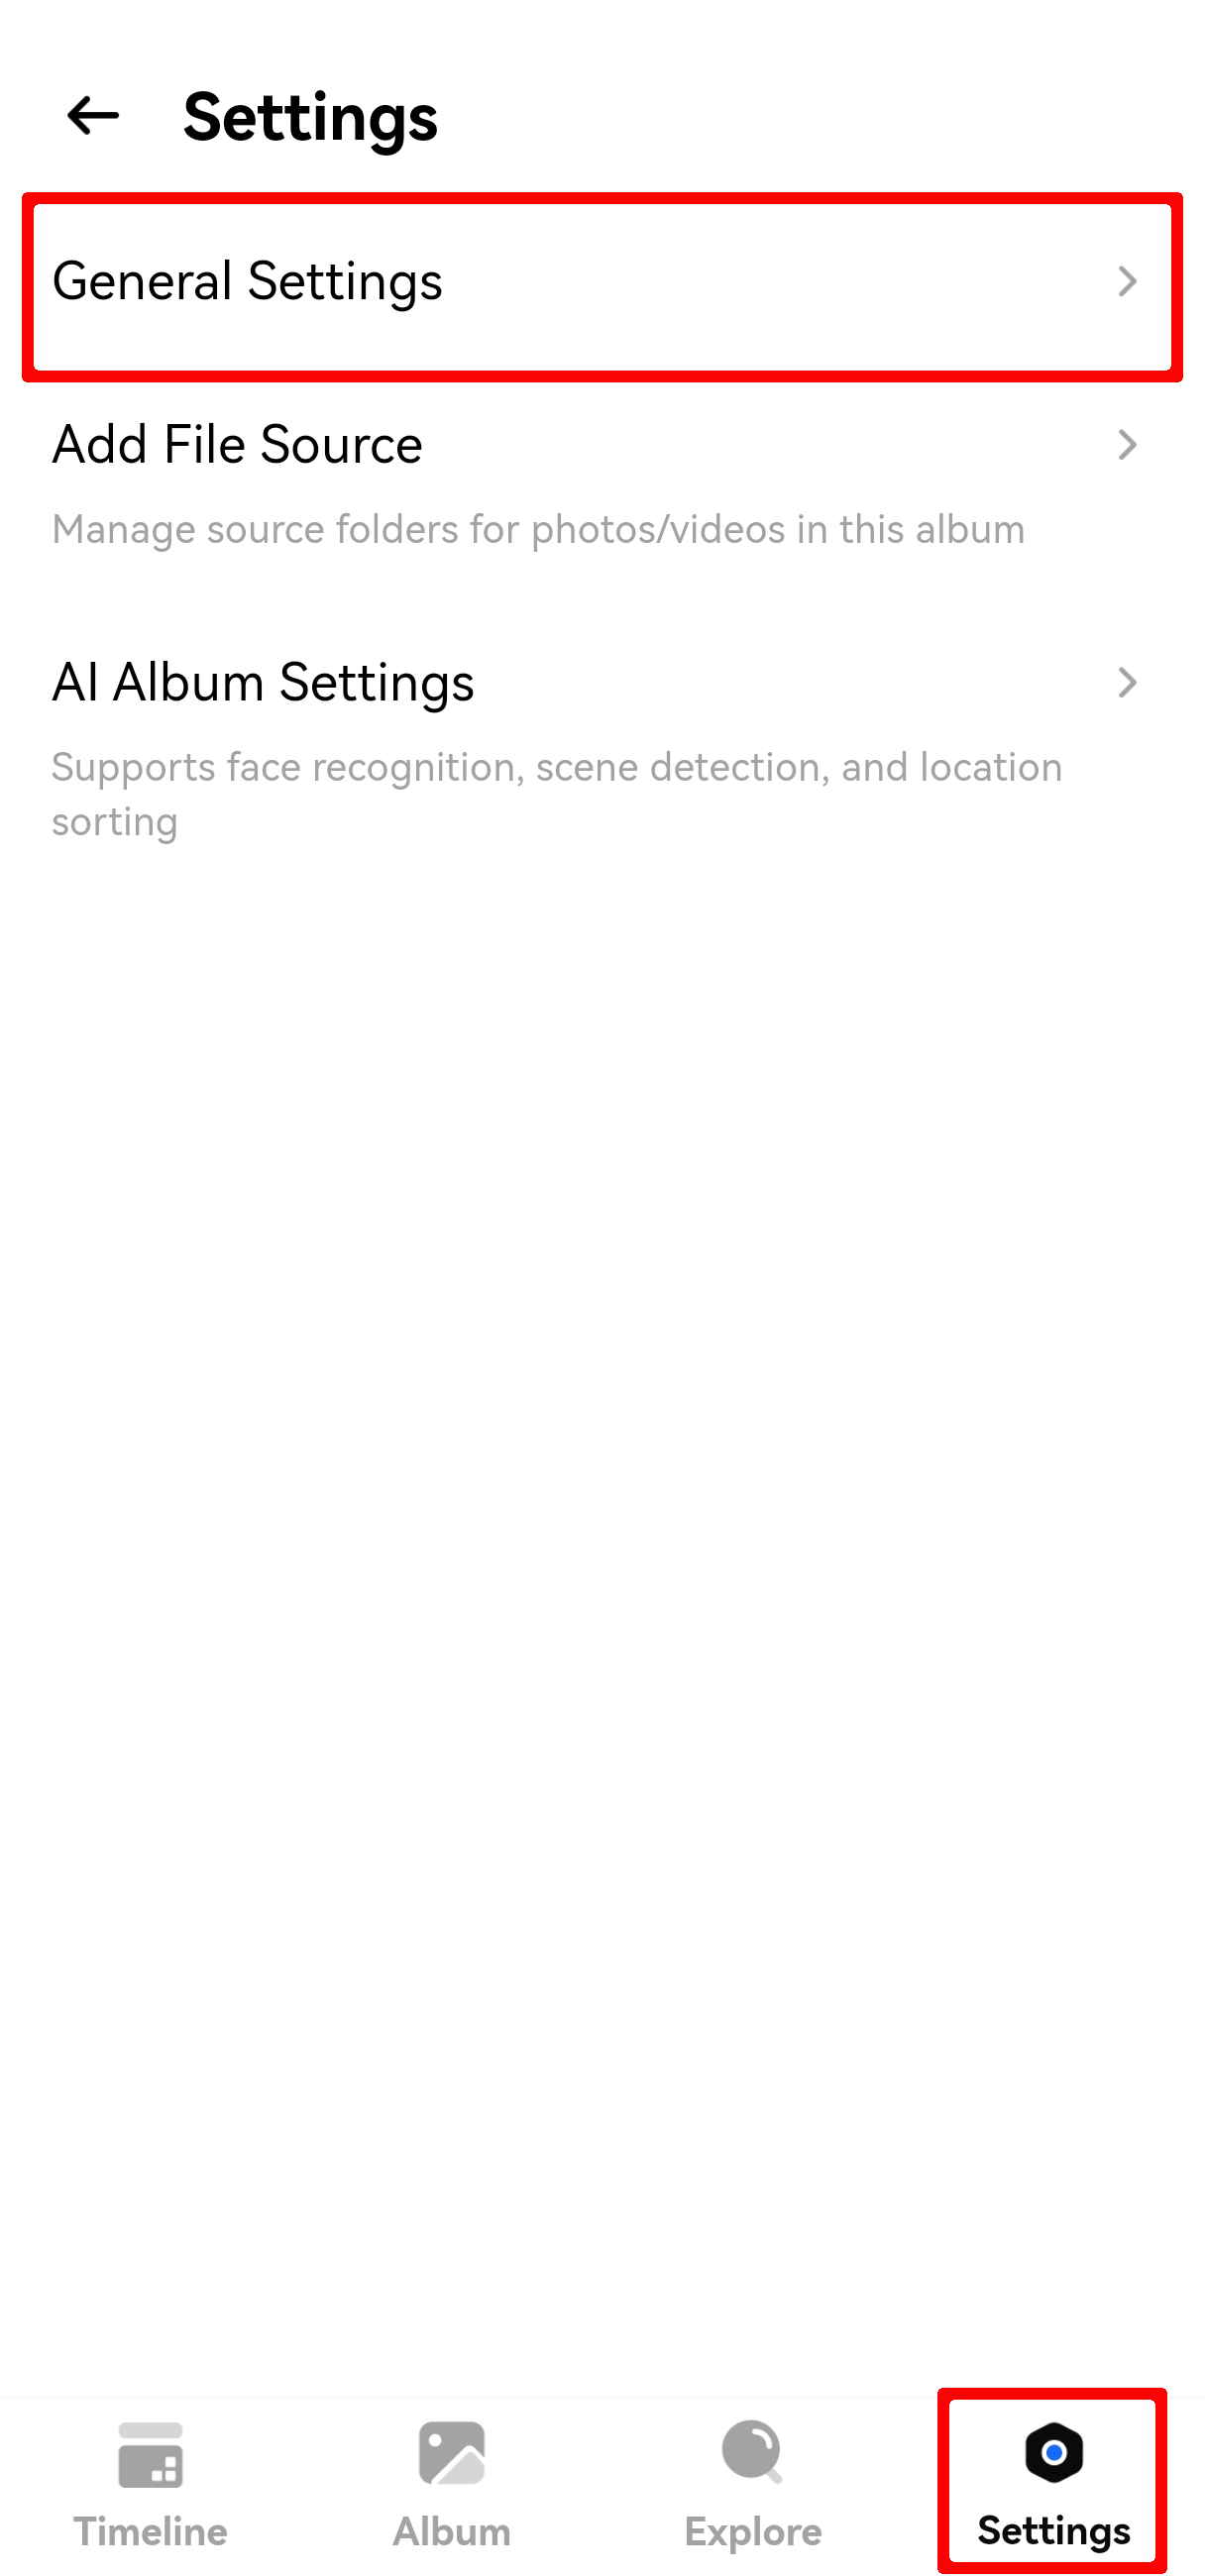
- Open the client and enter the Album module;
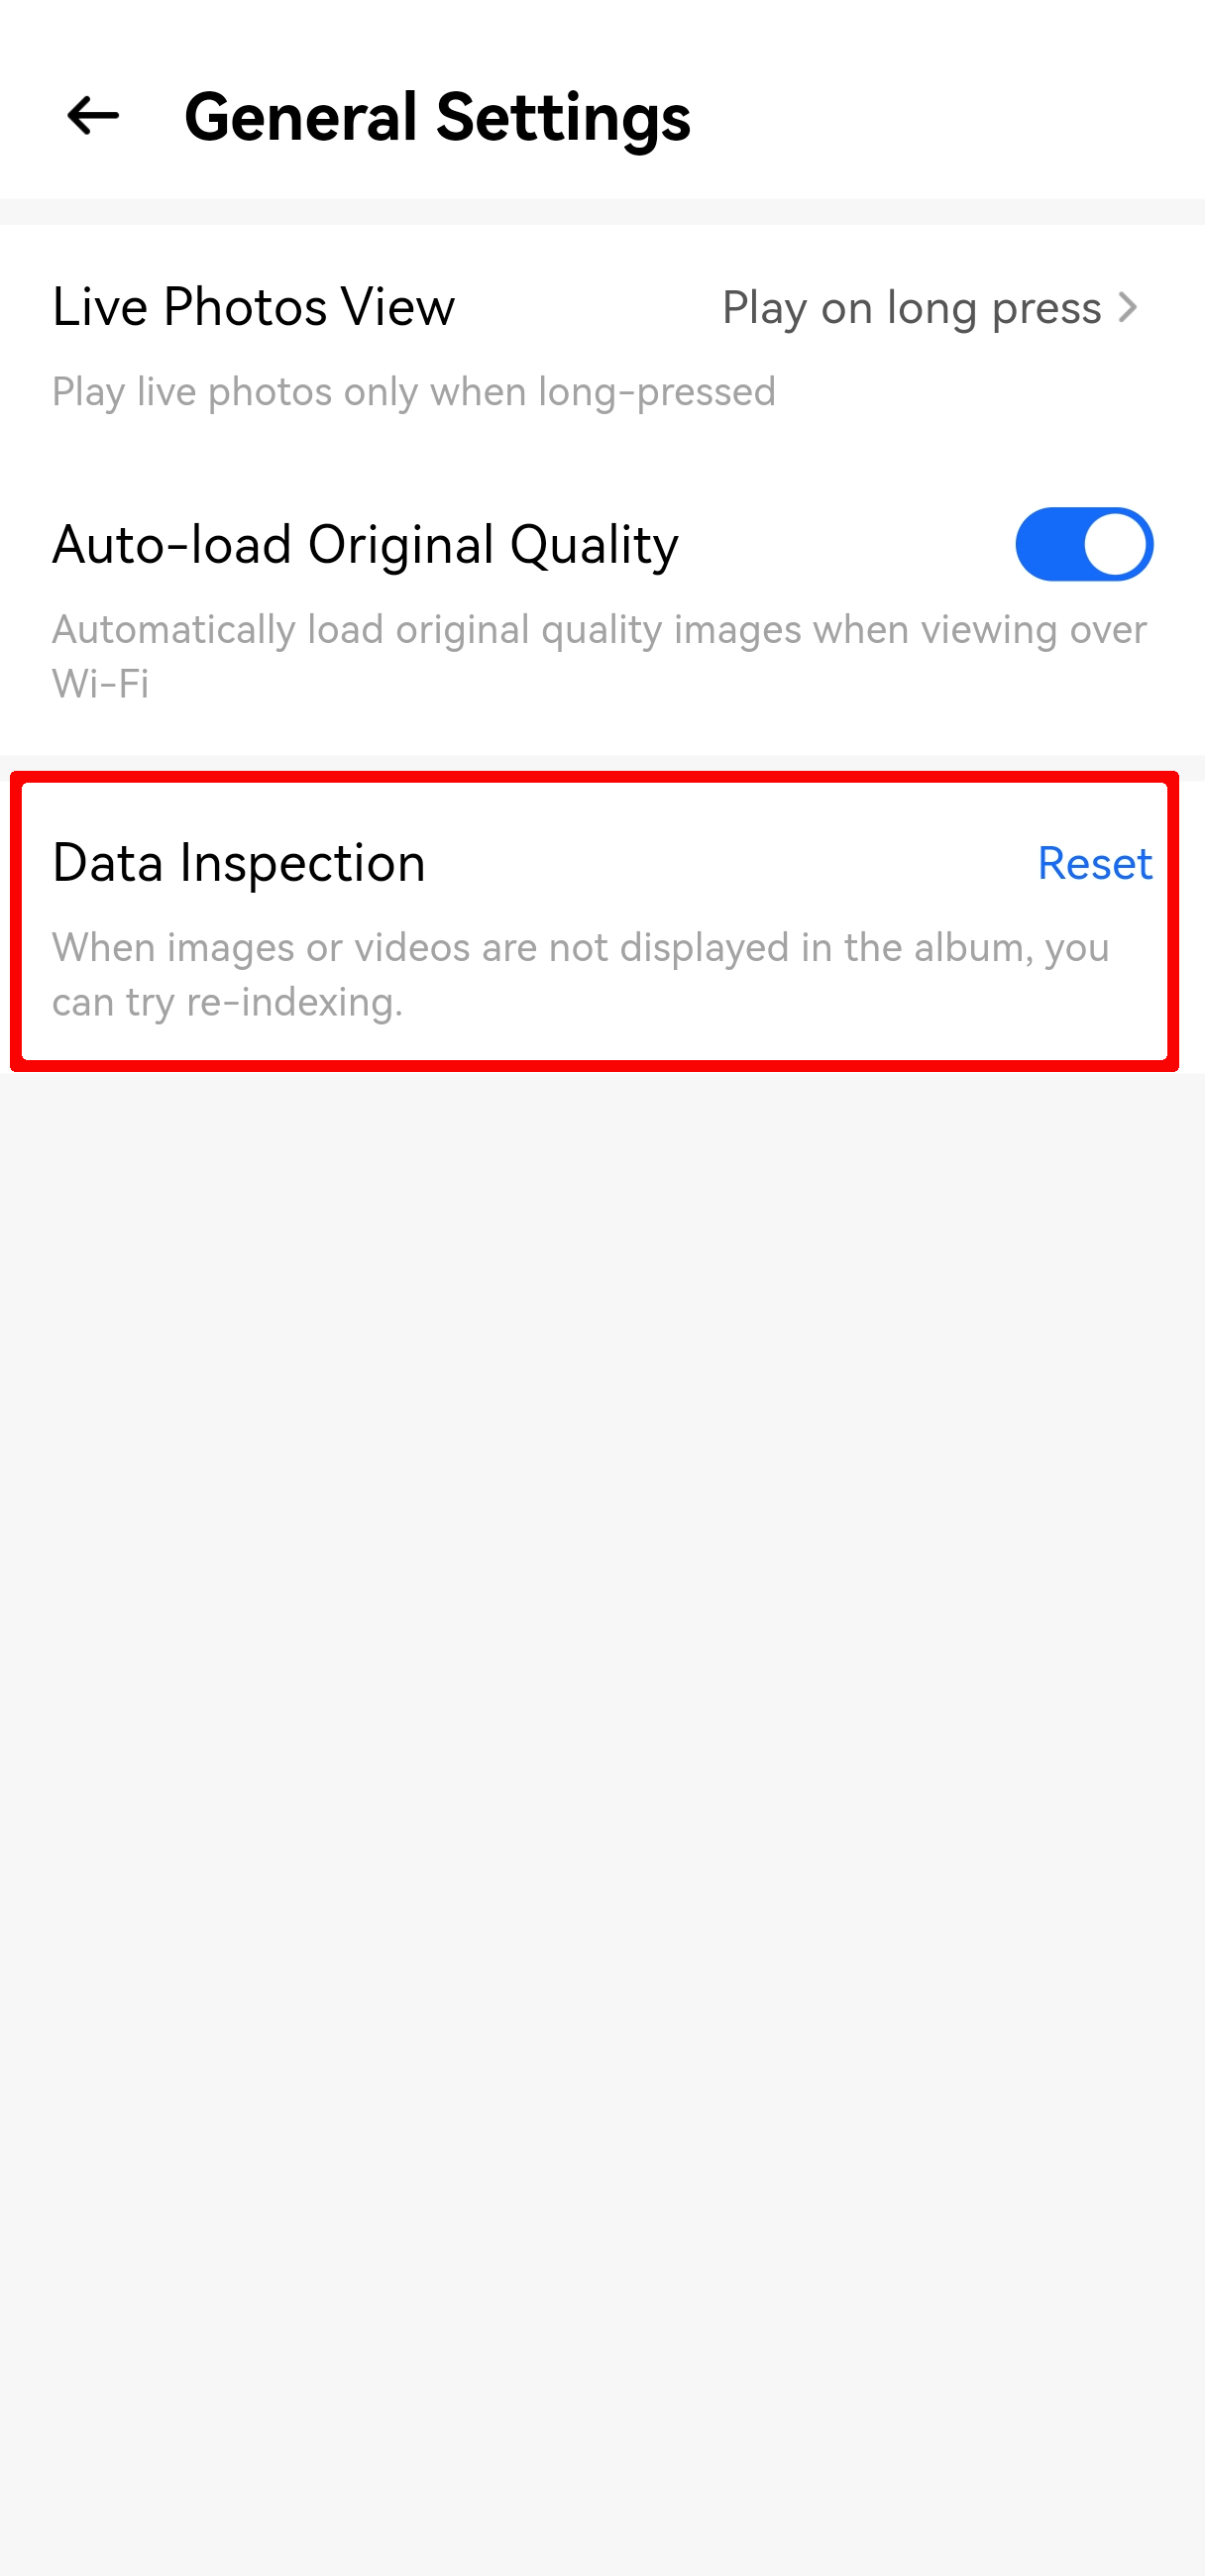
- Navigate to the Settings > General Settings page;
- Click Re-Index—the system will automatically start scanning all files in the album.
¶ Notes on Re-Indexing the Album
- Auto Re-Index Mechanism: When you upload new photos to the folder corresponding to the album via the computer/mobile client, the system will trigger "auto re-index" by default, so manual operation is usually not required. Only when auto-sync fails (e.g., upload via USB mode), you need to perform a manual re-index;
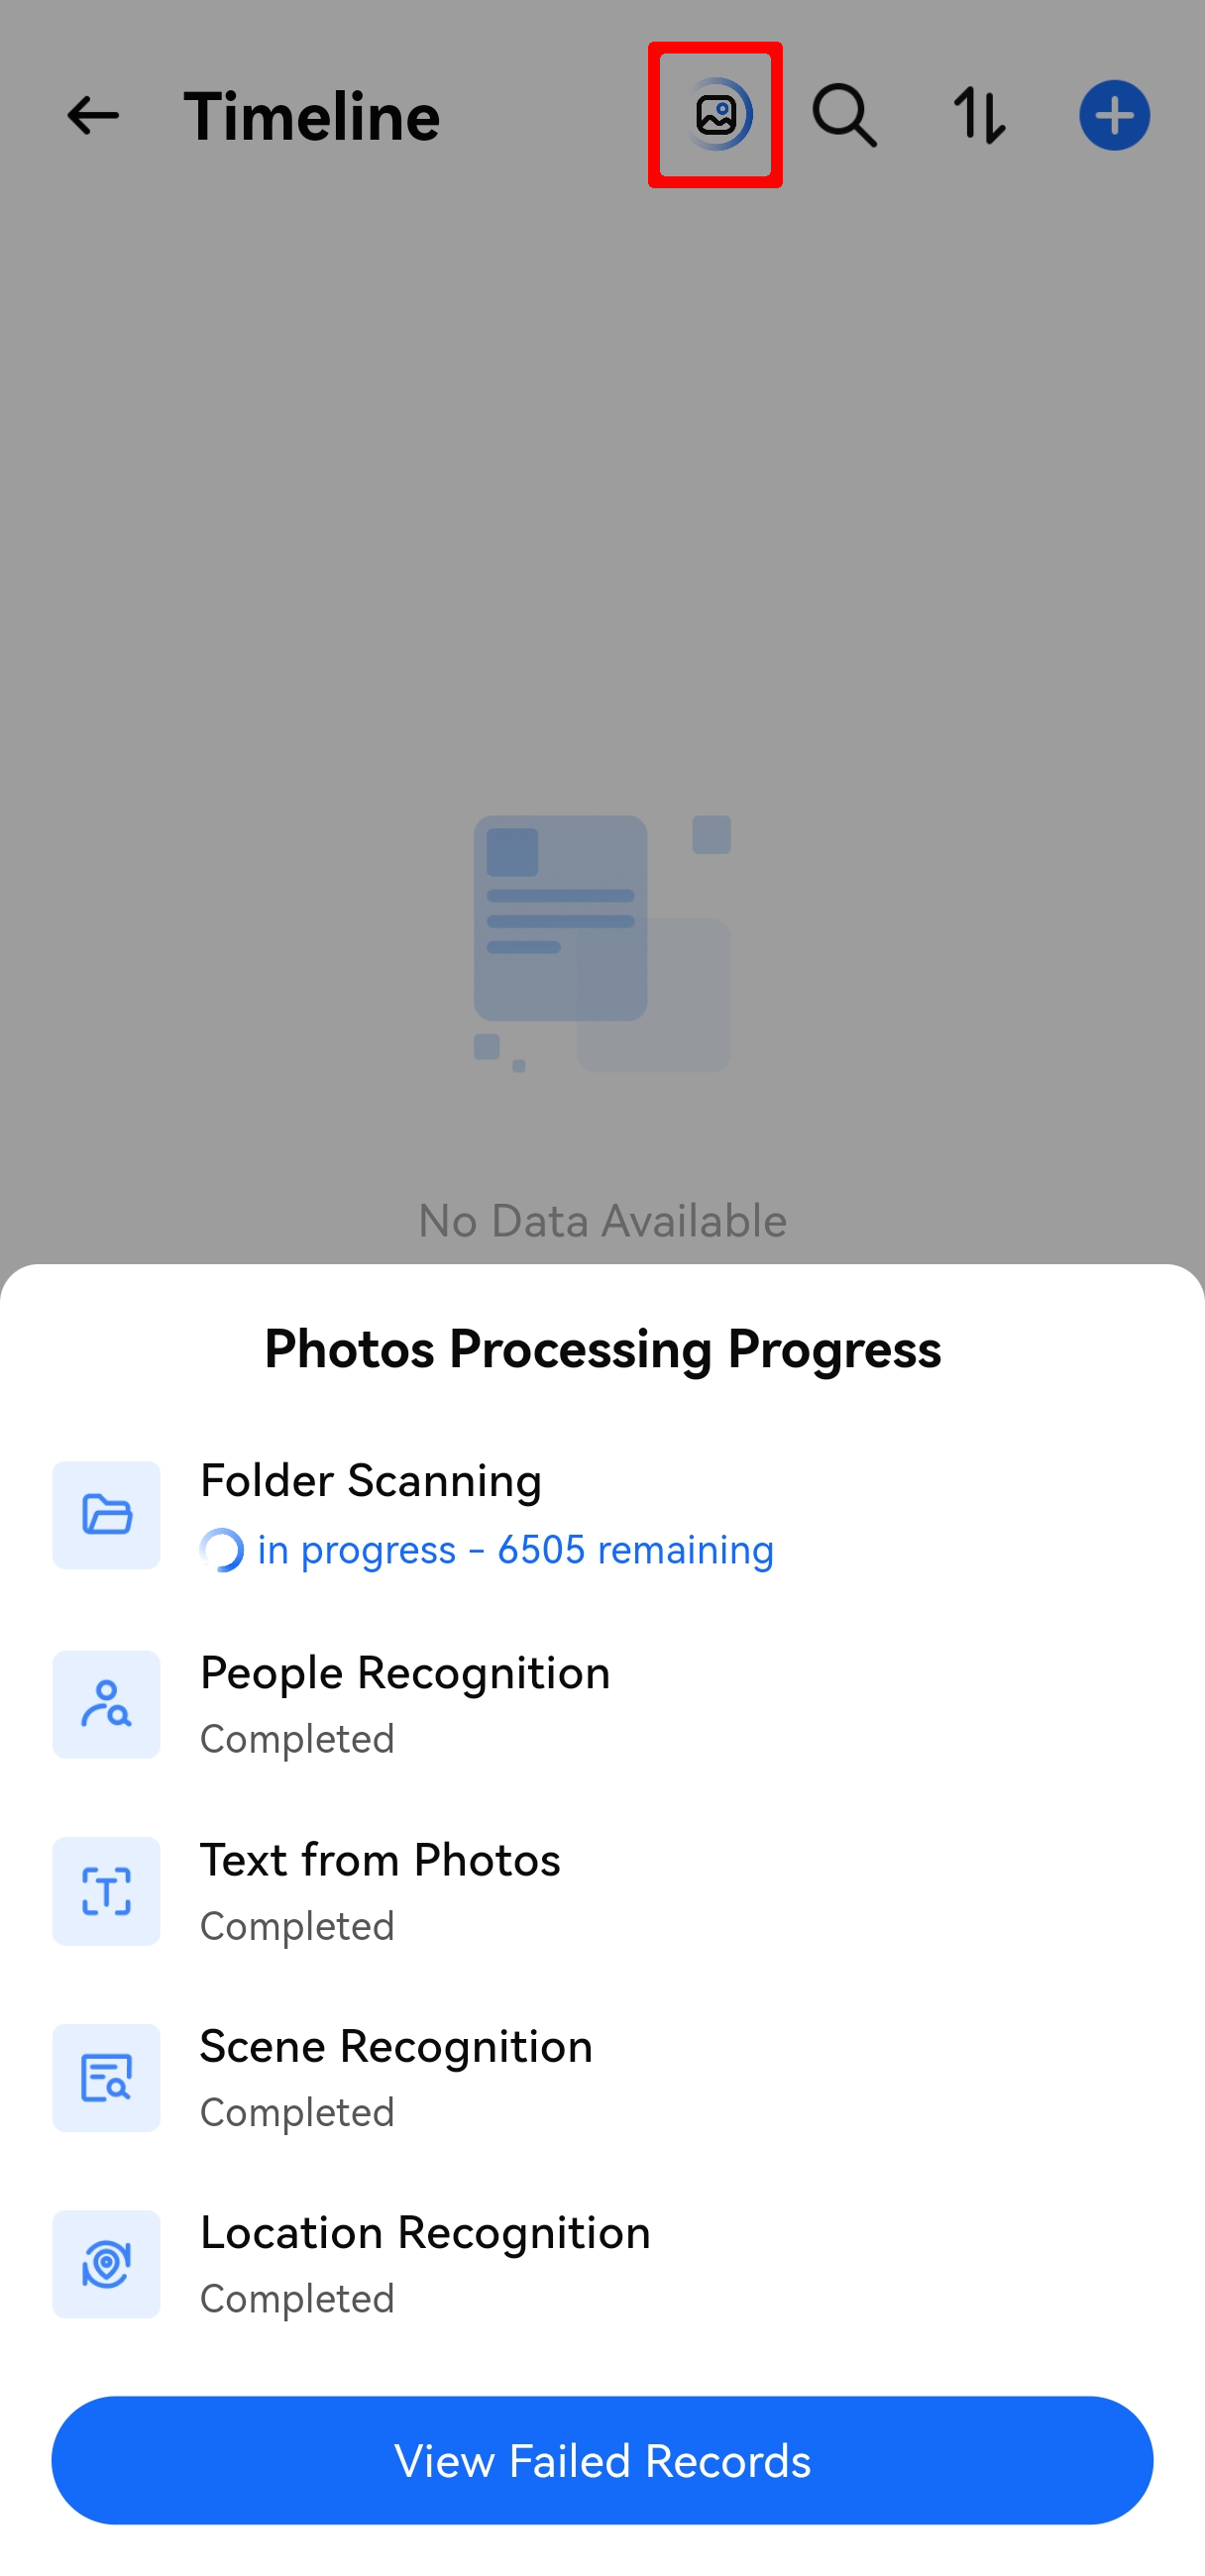
- Re-Index Duration and Photo Scale: The scanning process will continue in the background. The duration depends on the number of photos (the more photos there are, the longer the re-index takes). To check the progress, you can click to view the processing status via Album Homepage > Top Menu.