¶ Container Apps
To simplify the deployment and usage process of Docker containers, users don’t need to independently research complex Docker image selection, configuration, or compatibility testing. Through the App Center, you can quickly access compatible container apps and easily complete deployment and usage, significantly lowering the barrier to using Docker applications.
Note: Container apps can only be opened in a local area network (LAN) environment. Ensure your PocketCloud and client device are on the same LAN.
¶ Installing Container Apps
¶ Pre-Installation Preparation
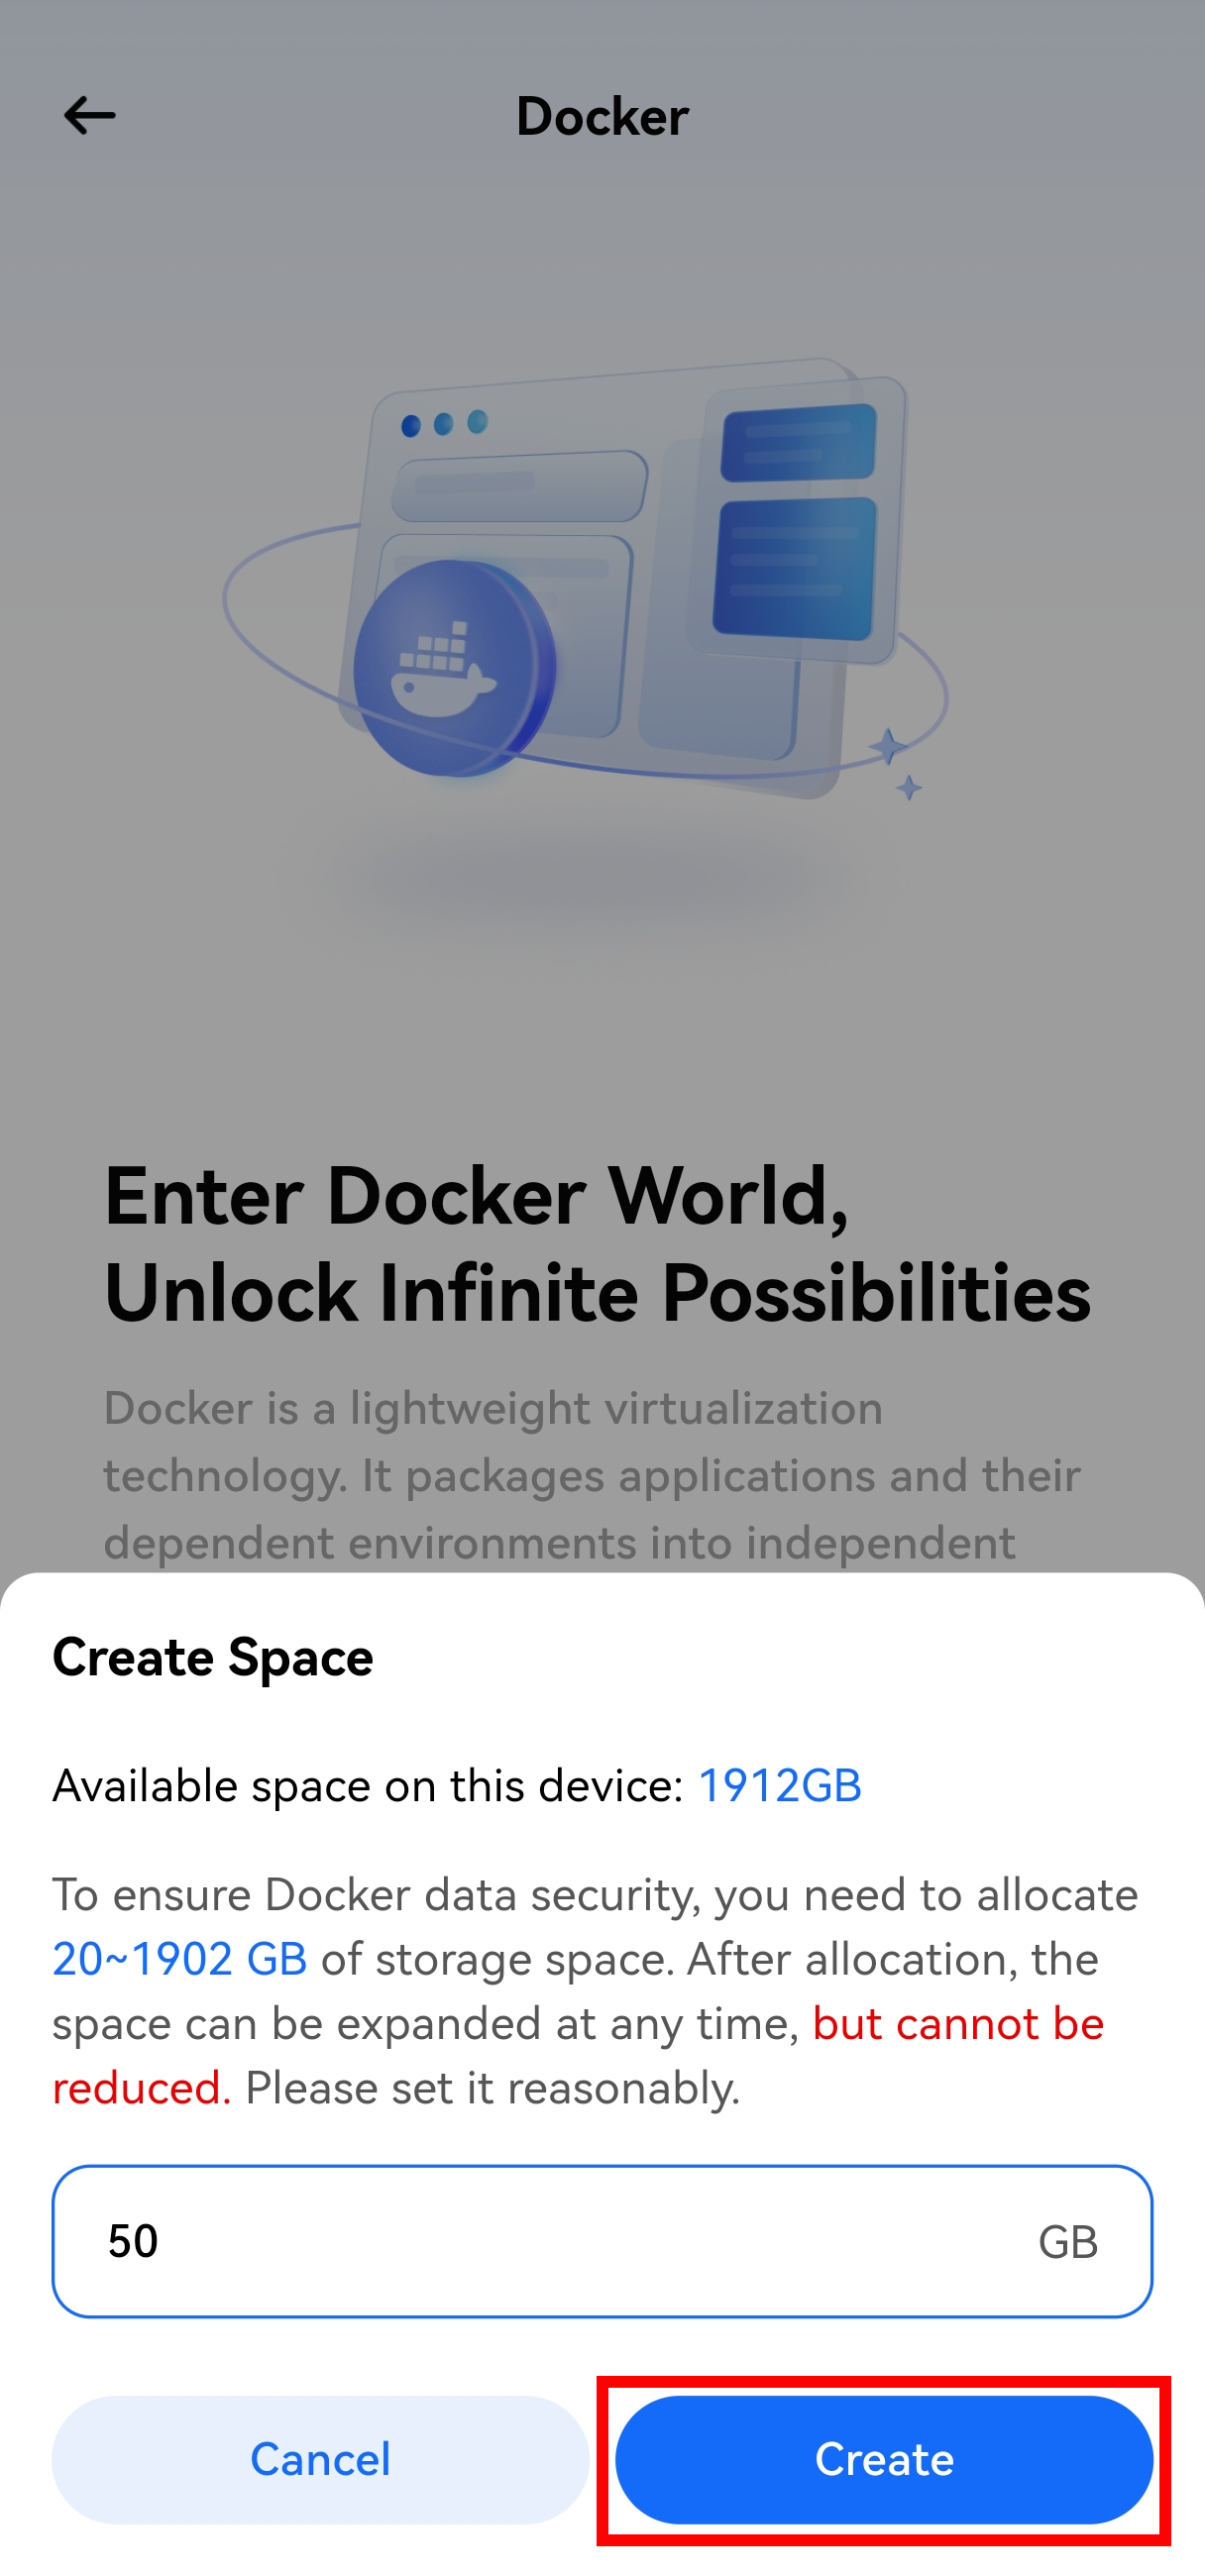
To install a container app for the first time, you need to initialize Docker-related settings and allocate storage space.
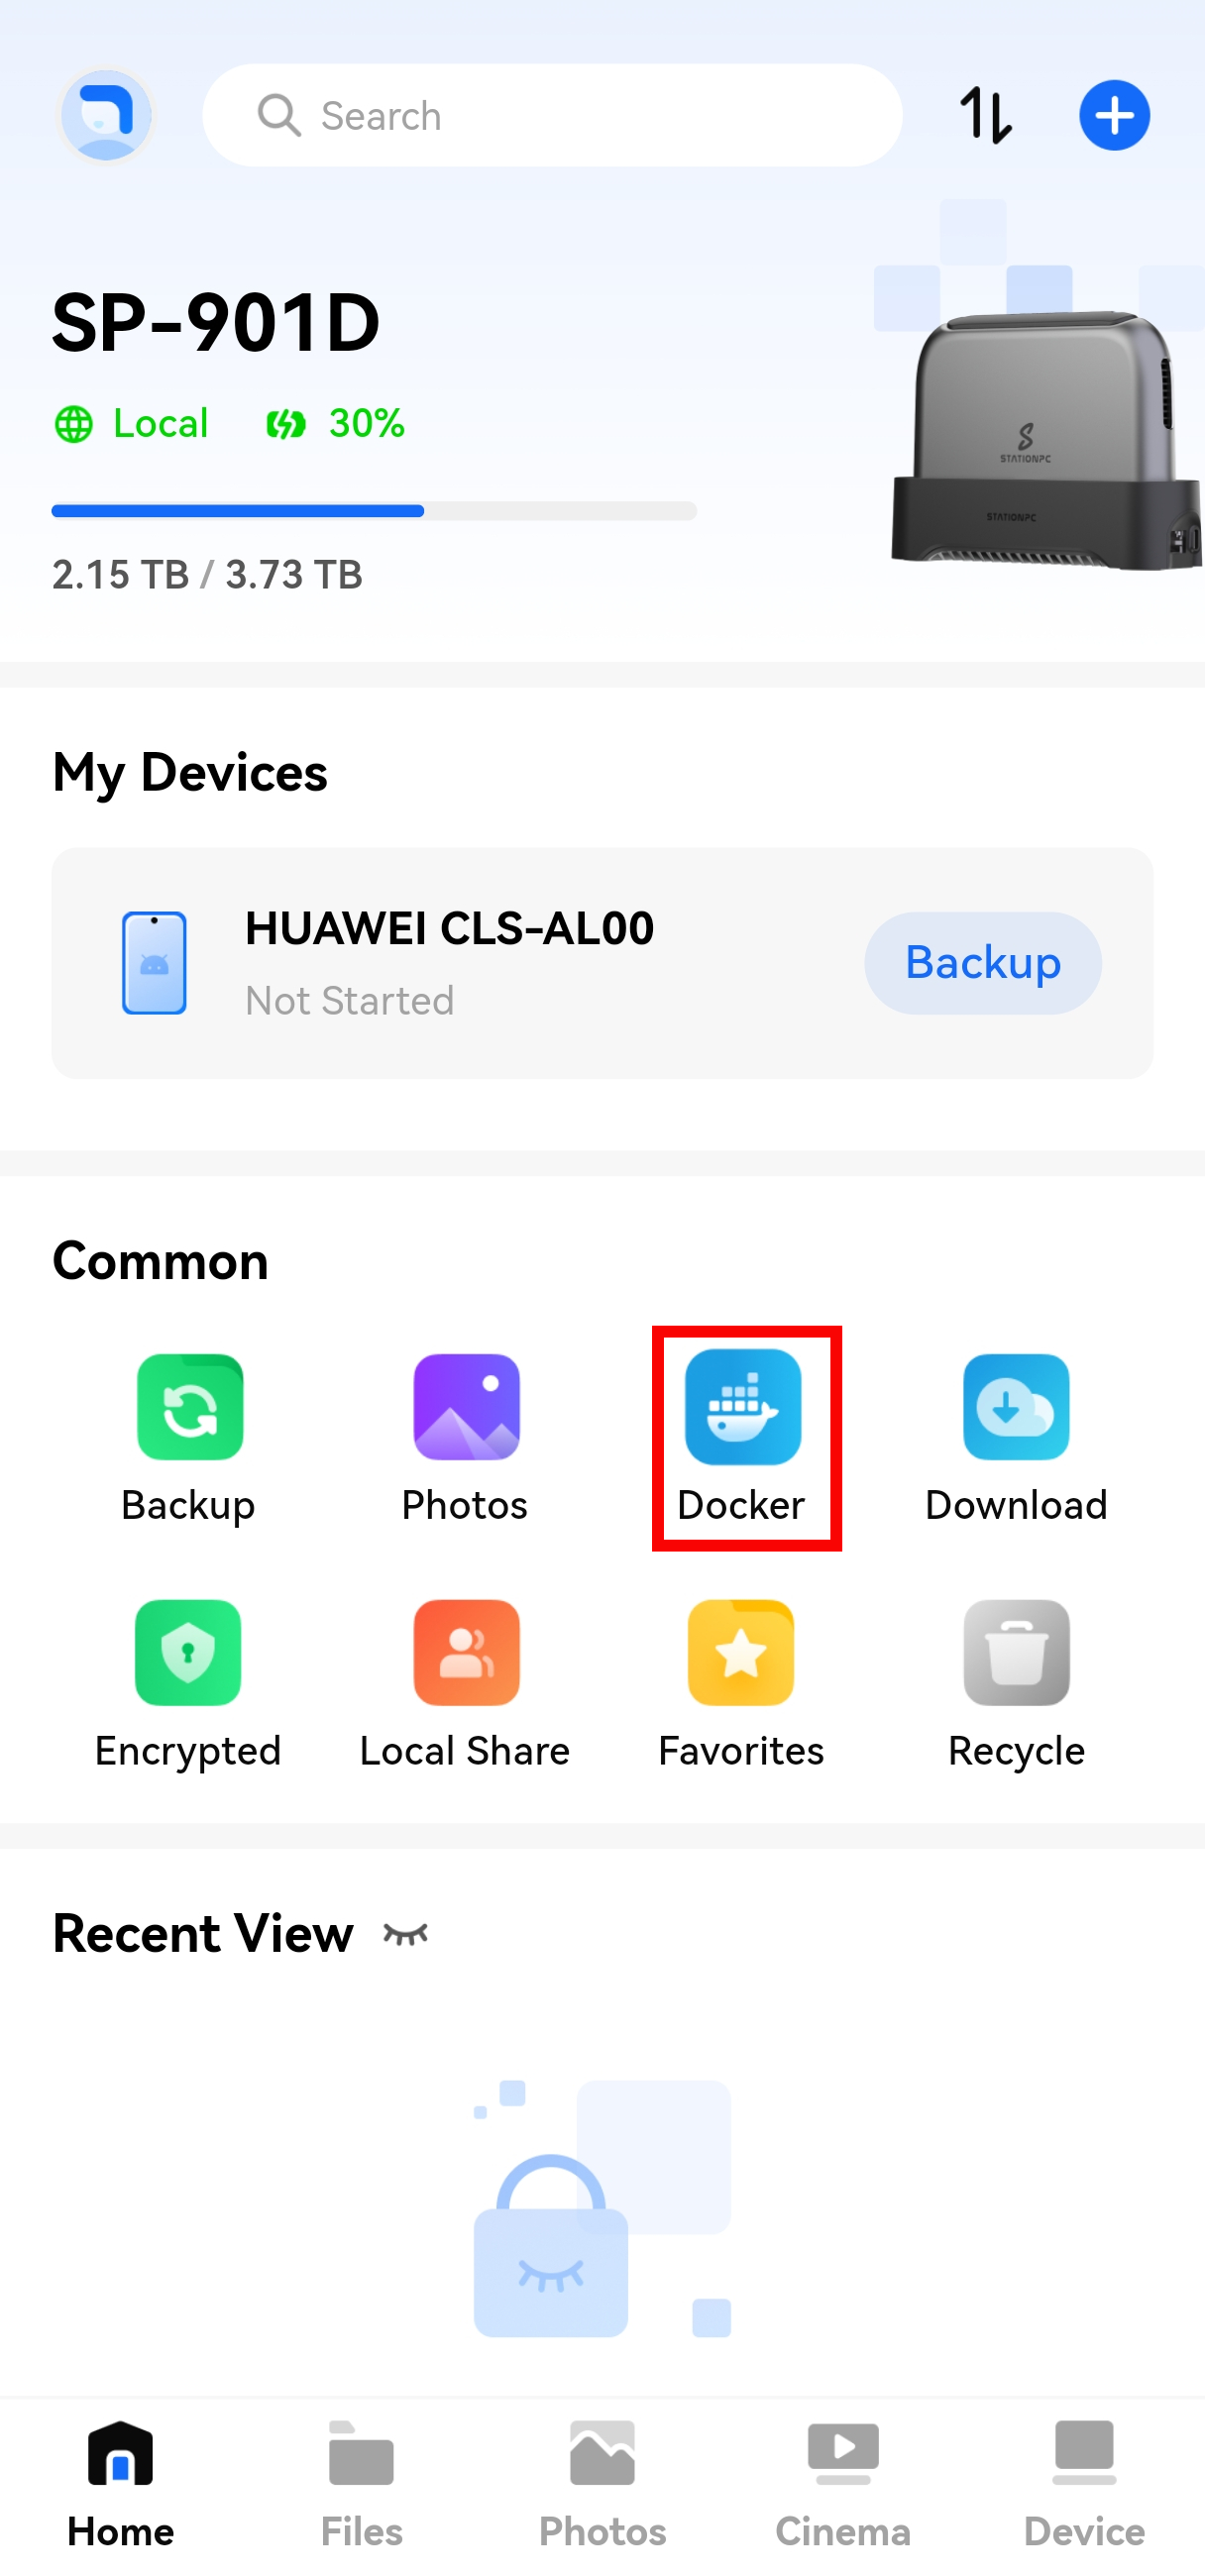
- Open the app and go to Home > Common > Docker;
- Follow the prompts to allocate storage space.
Note:
- Available storage space must be greater than 20GB. Installation cannot be completed if the space is insufficient;
- Allocated storage space can only be expanded, not reduced. It is recommended to allocate it reasonably according to actual usage needs and reserve redundant space;
- The storage allocation process takes a long time. Please be patient. If you need to handle other matters temporarily, you can exit the allocation interface, and the allocation will continue in the background.

¶ Installing Apps
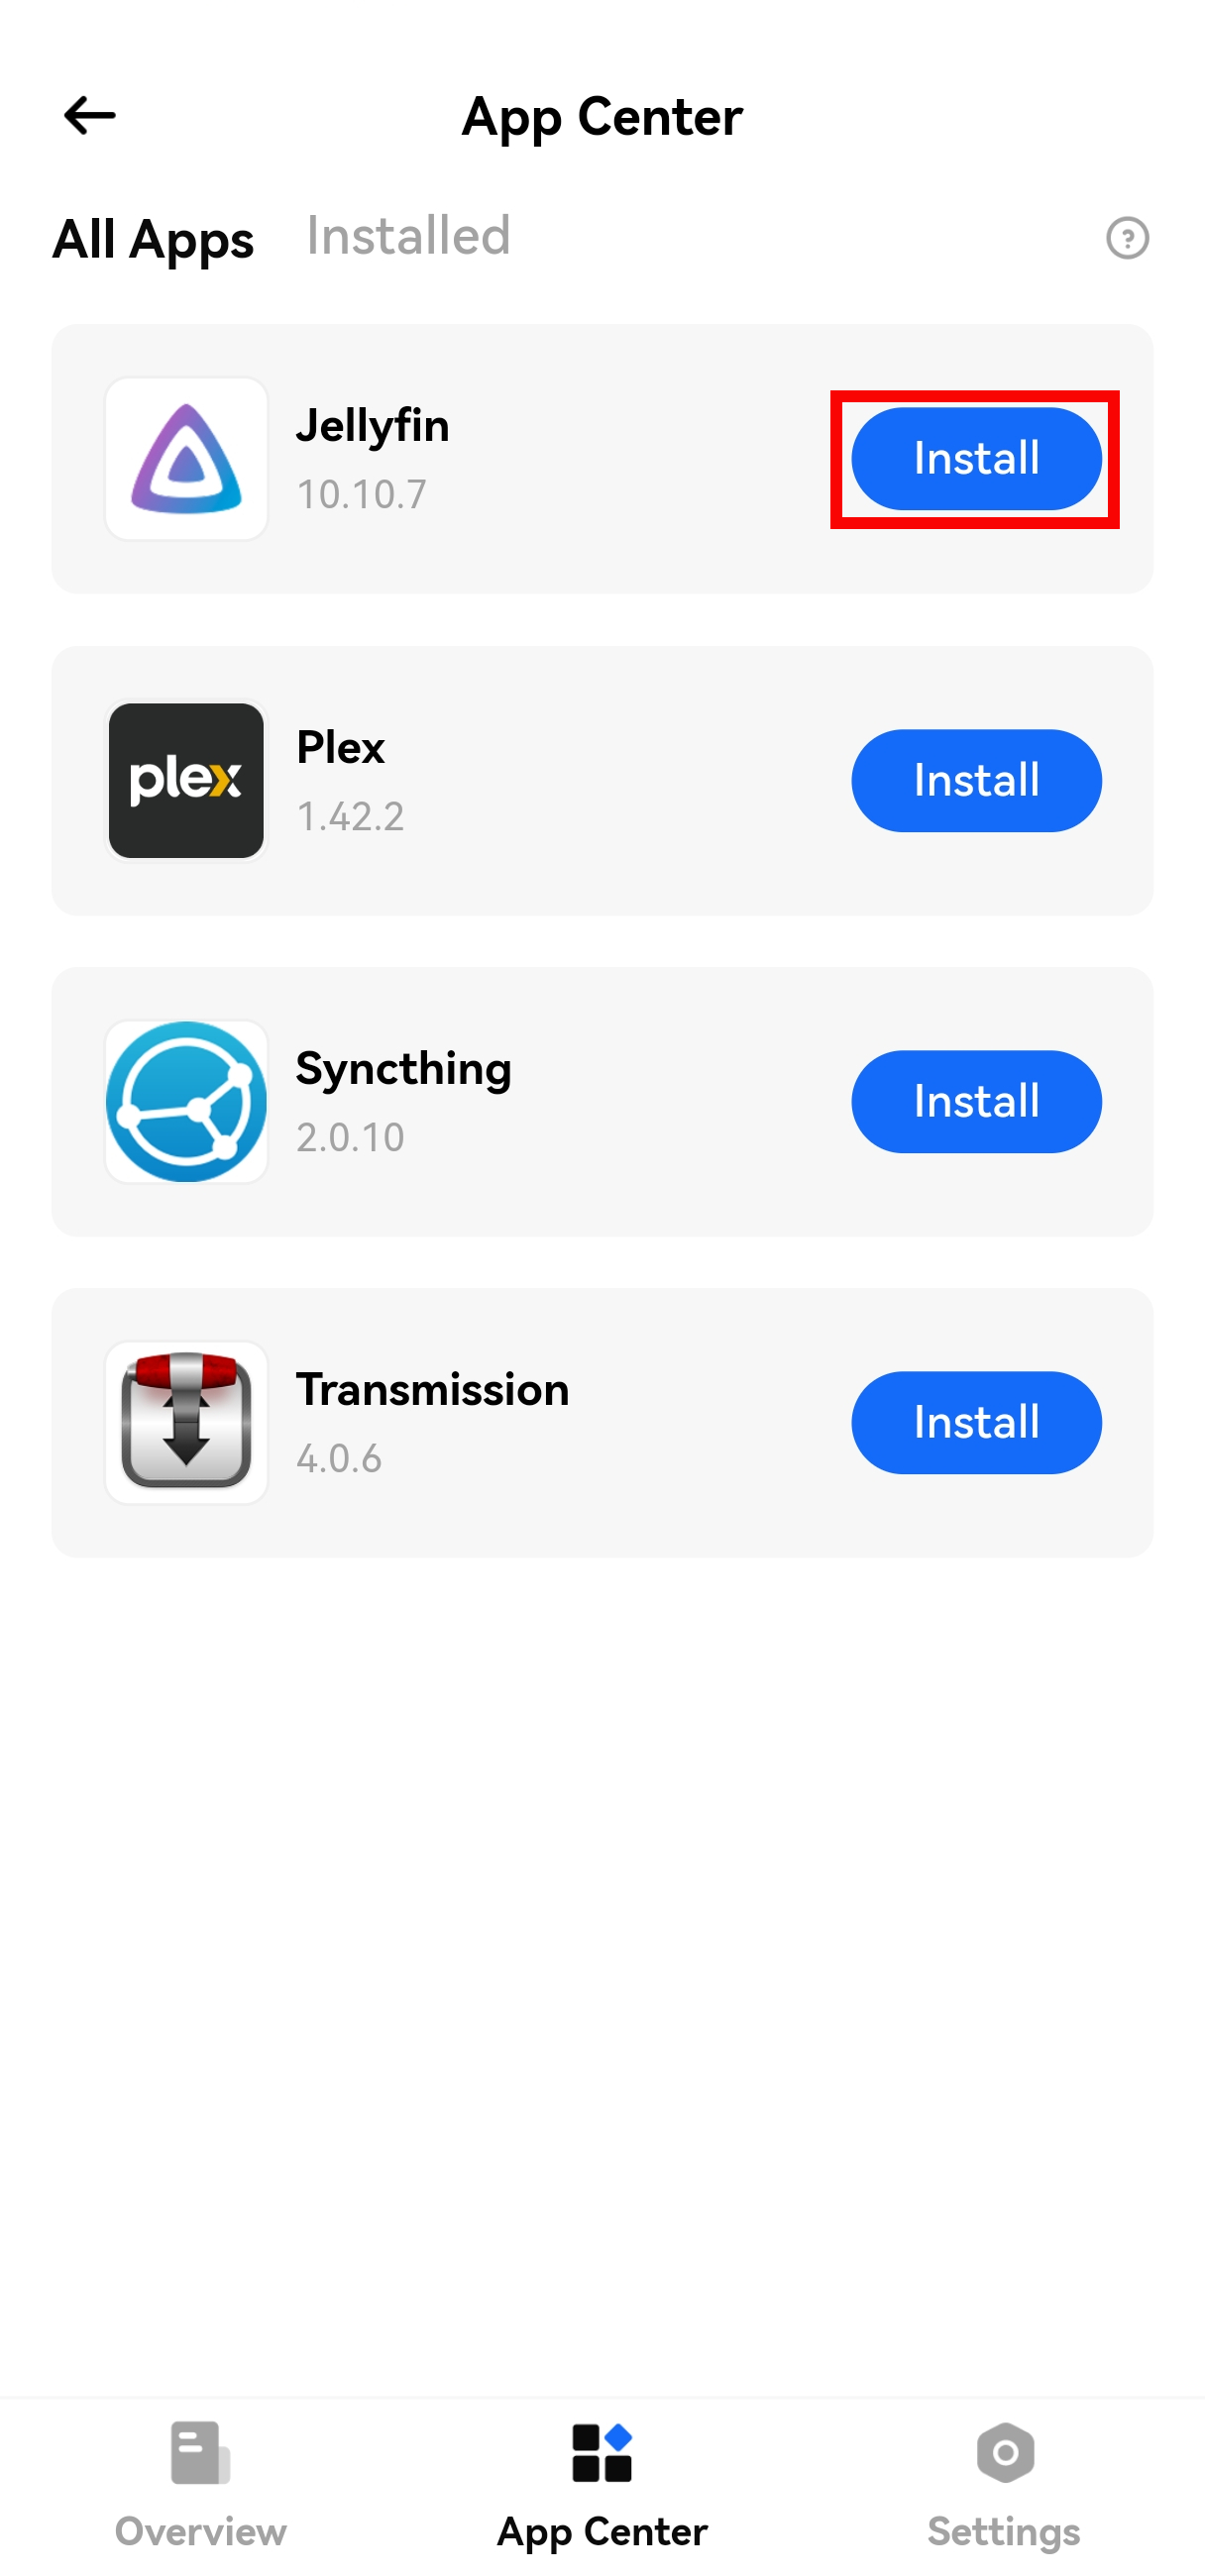
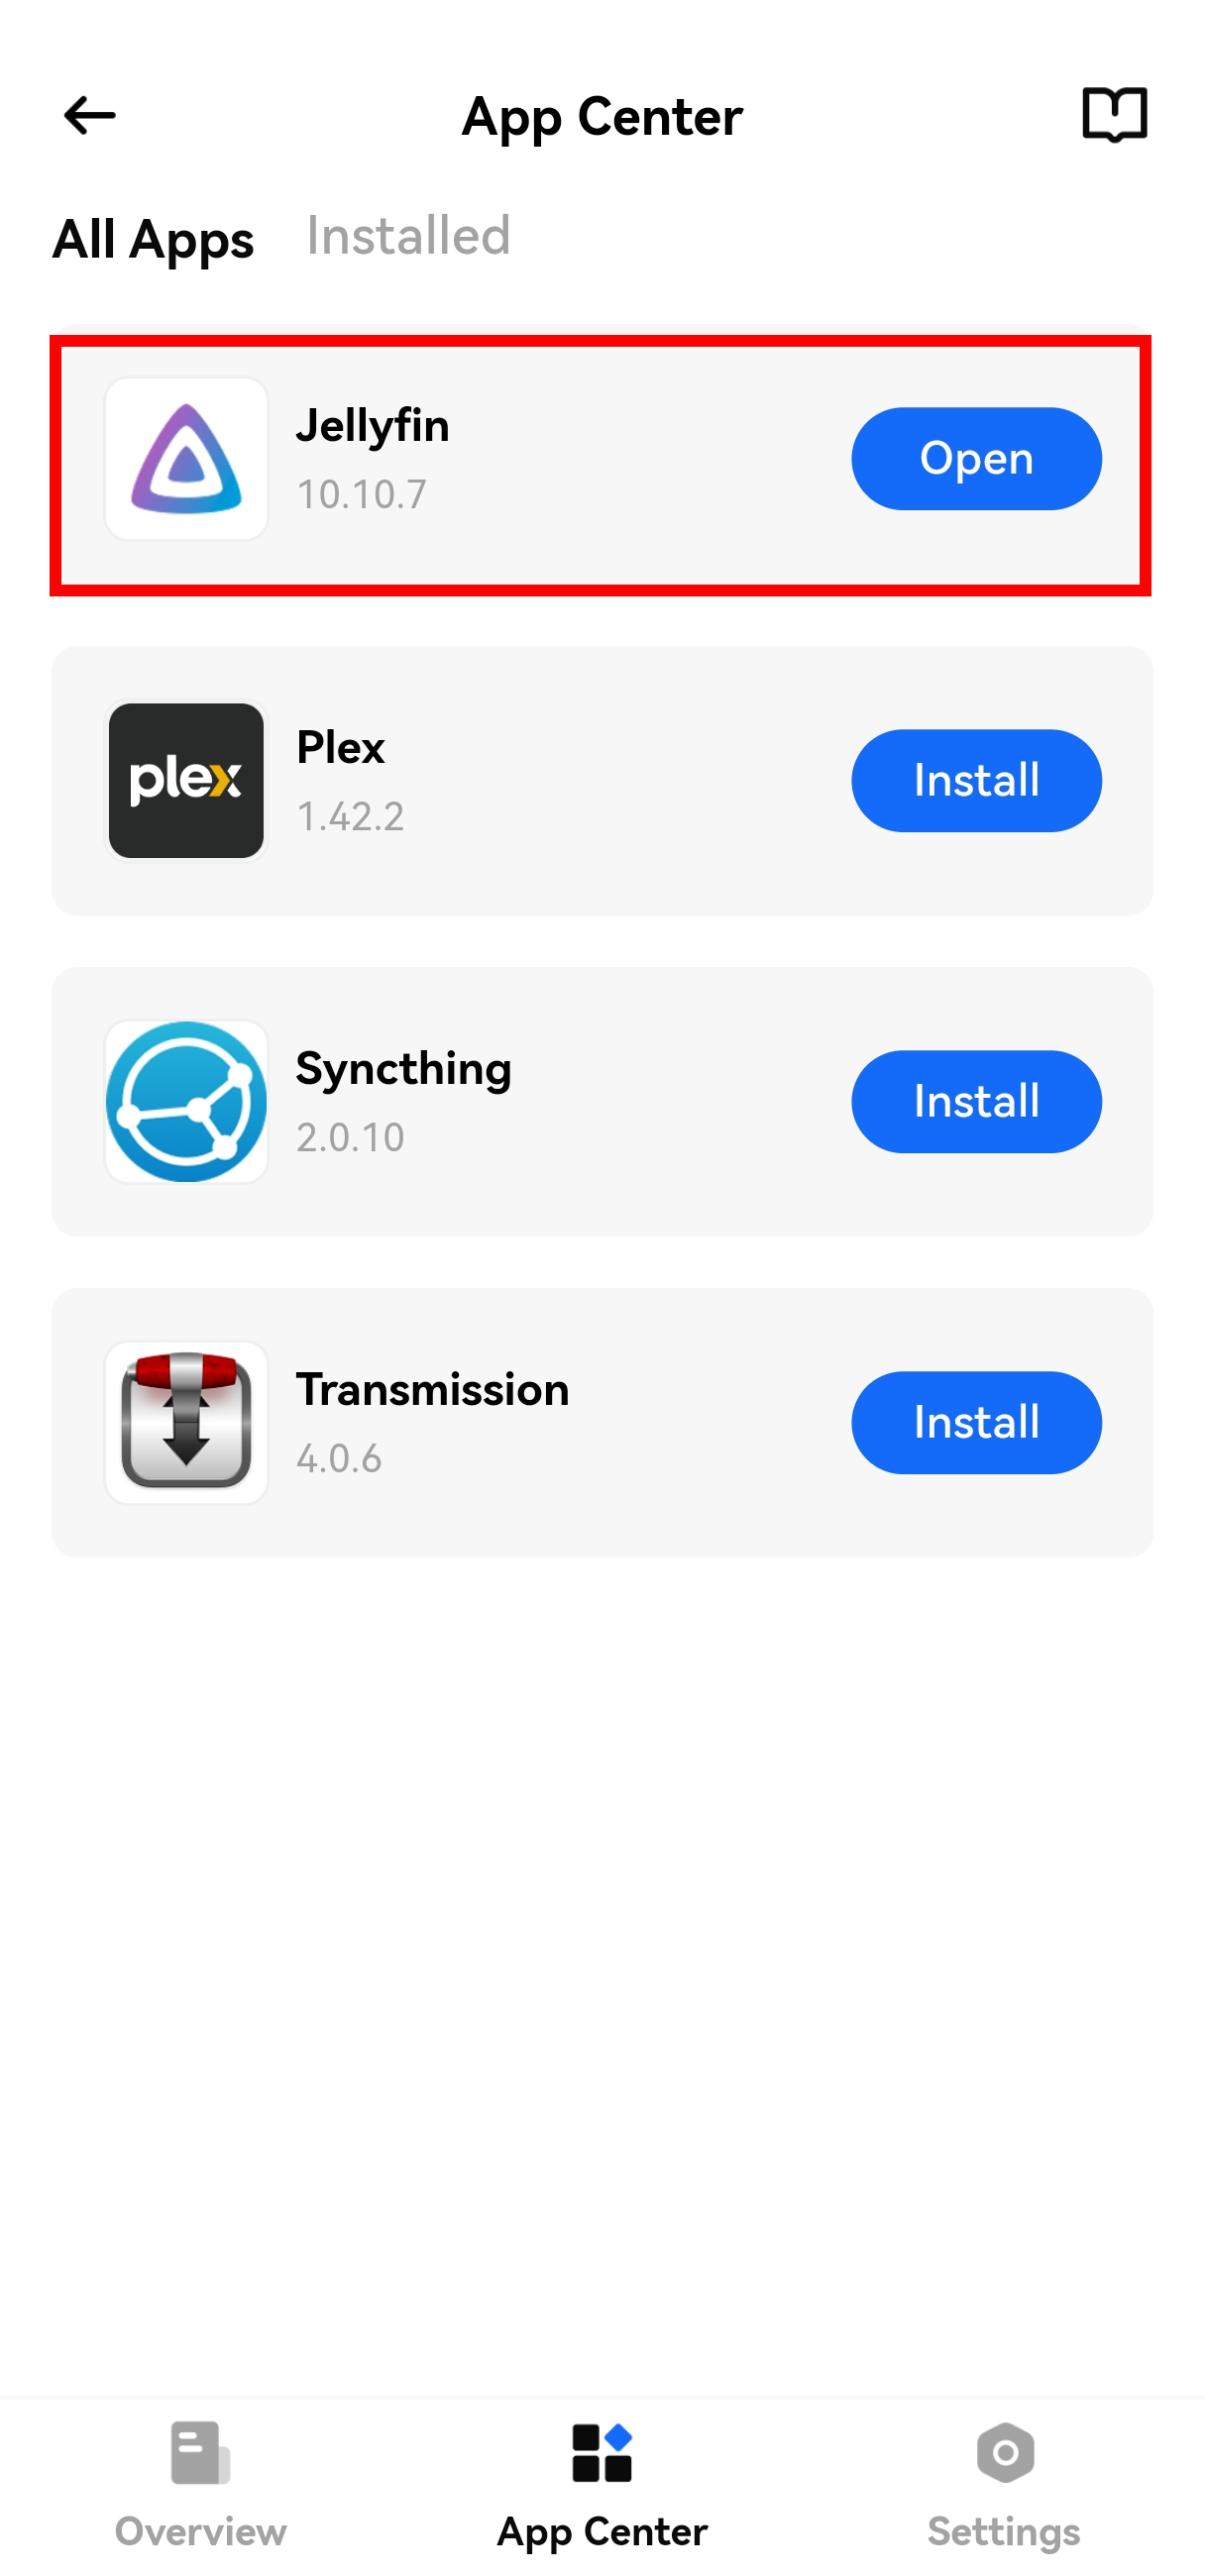
- Access the App Center;
- Find the container app you want to install;
- Click "Install" and wait for the system to automatically complete installation and deployment. After installation, the container app will generate a corresponding container in Docker.


¶ Accessing Container Apps
¶ Access Methods
- Via Client: Container apps can be accessed through the App Center;
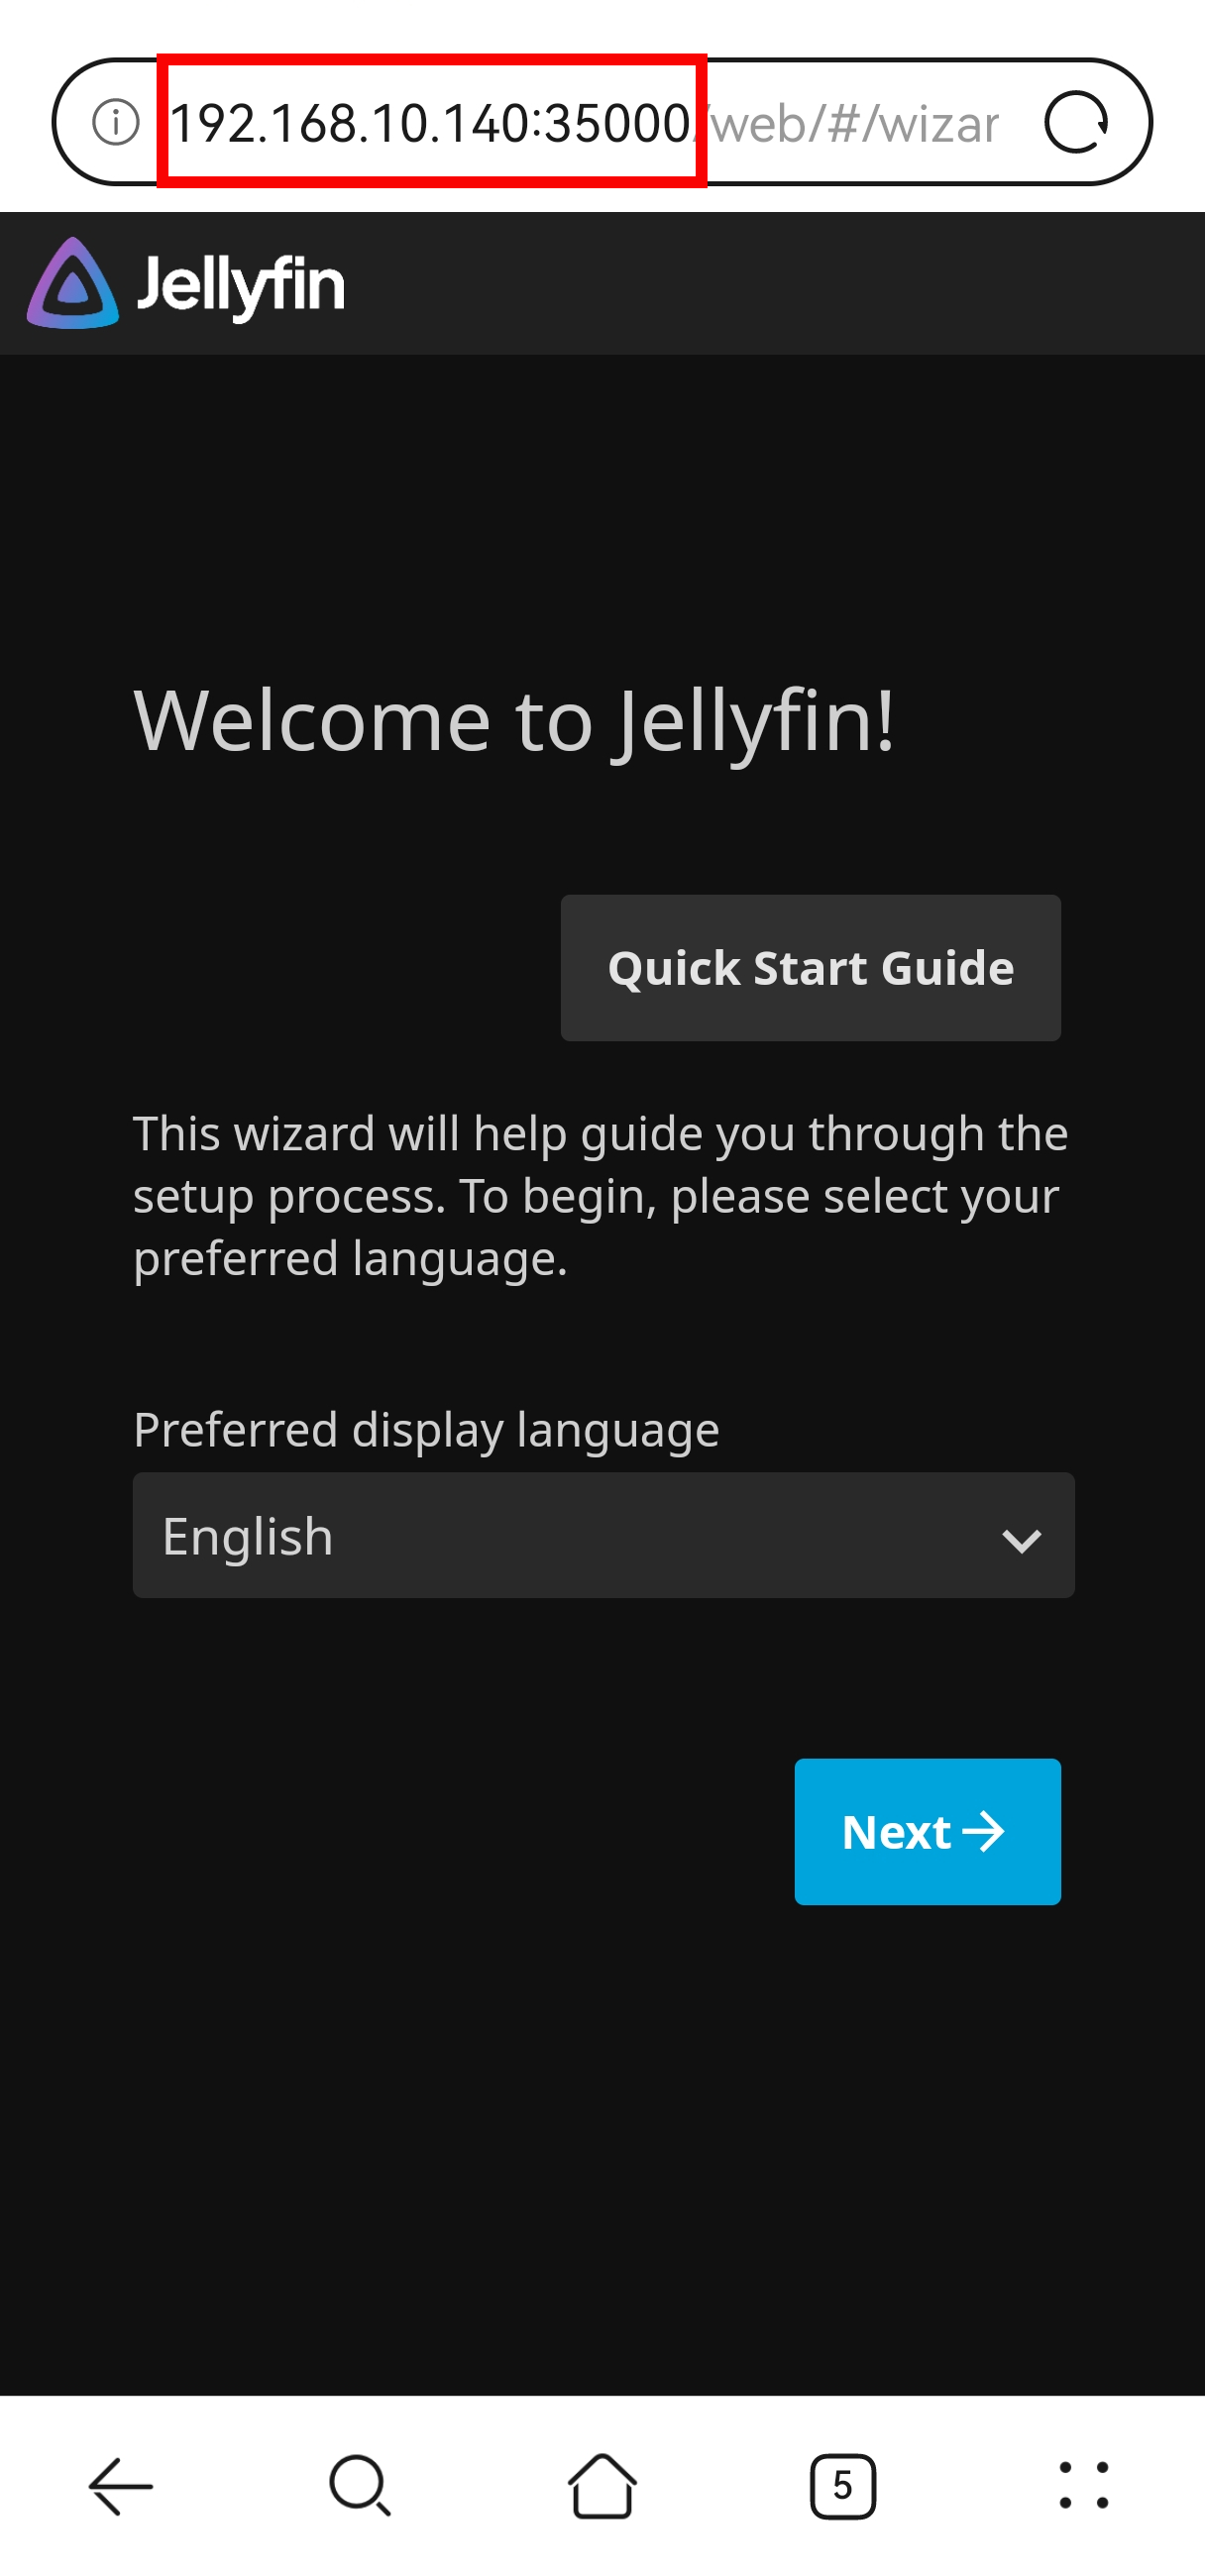
- Via Web: Within the same LAN, access is available through the device’s IP address and the app’s port number.
Note:
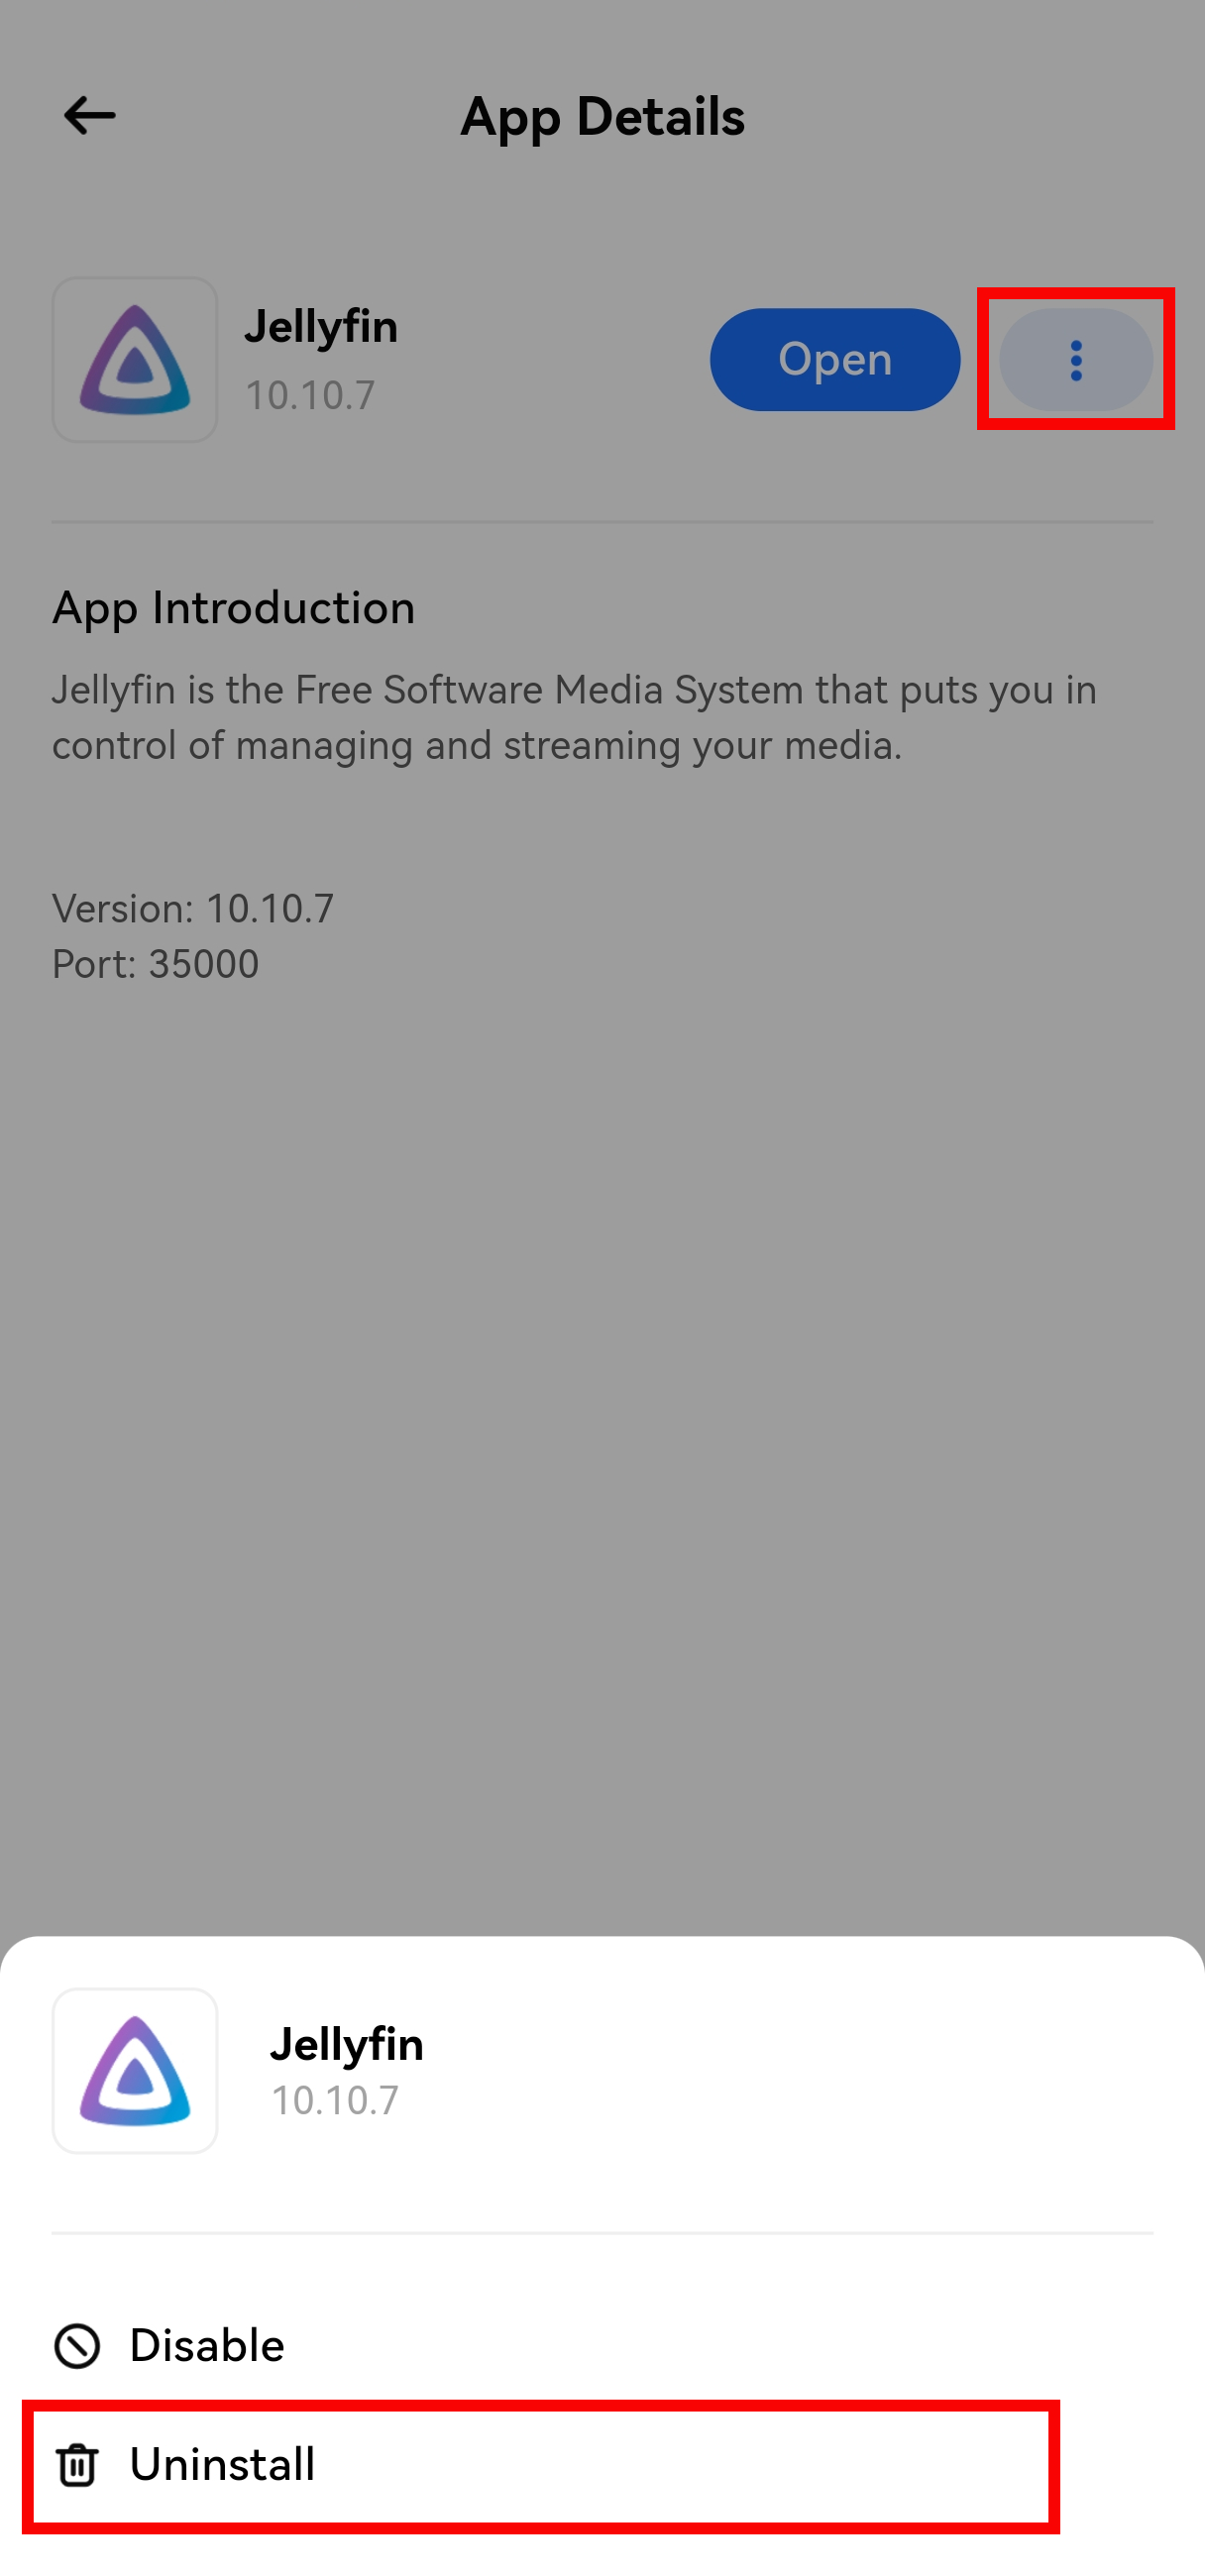
- The app port can be viewed in the app details;
- The IP address in the illustration is an example and needs to be replaced with your device’s actual IP.
¶ Deactivating/Activating Container Apps
Perform deactivation and activation operations in the 【App Center】.
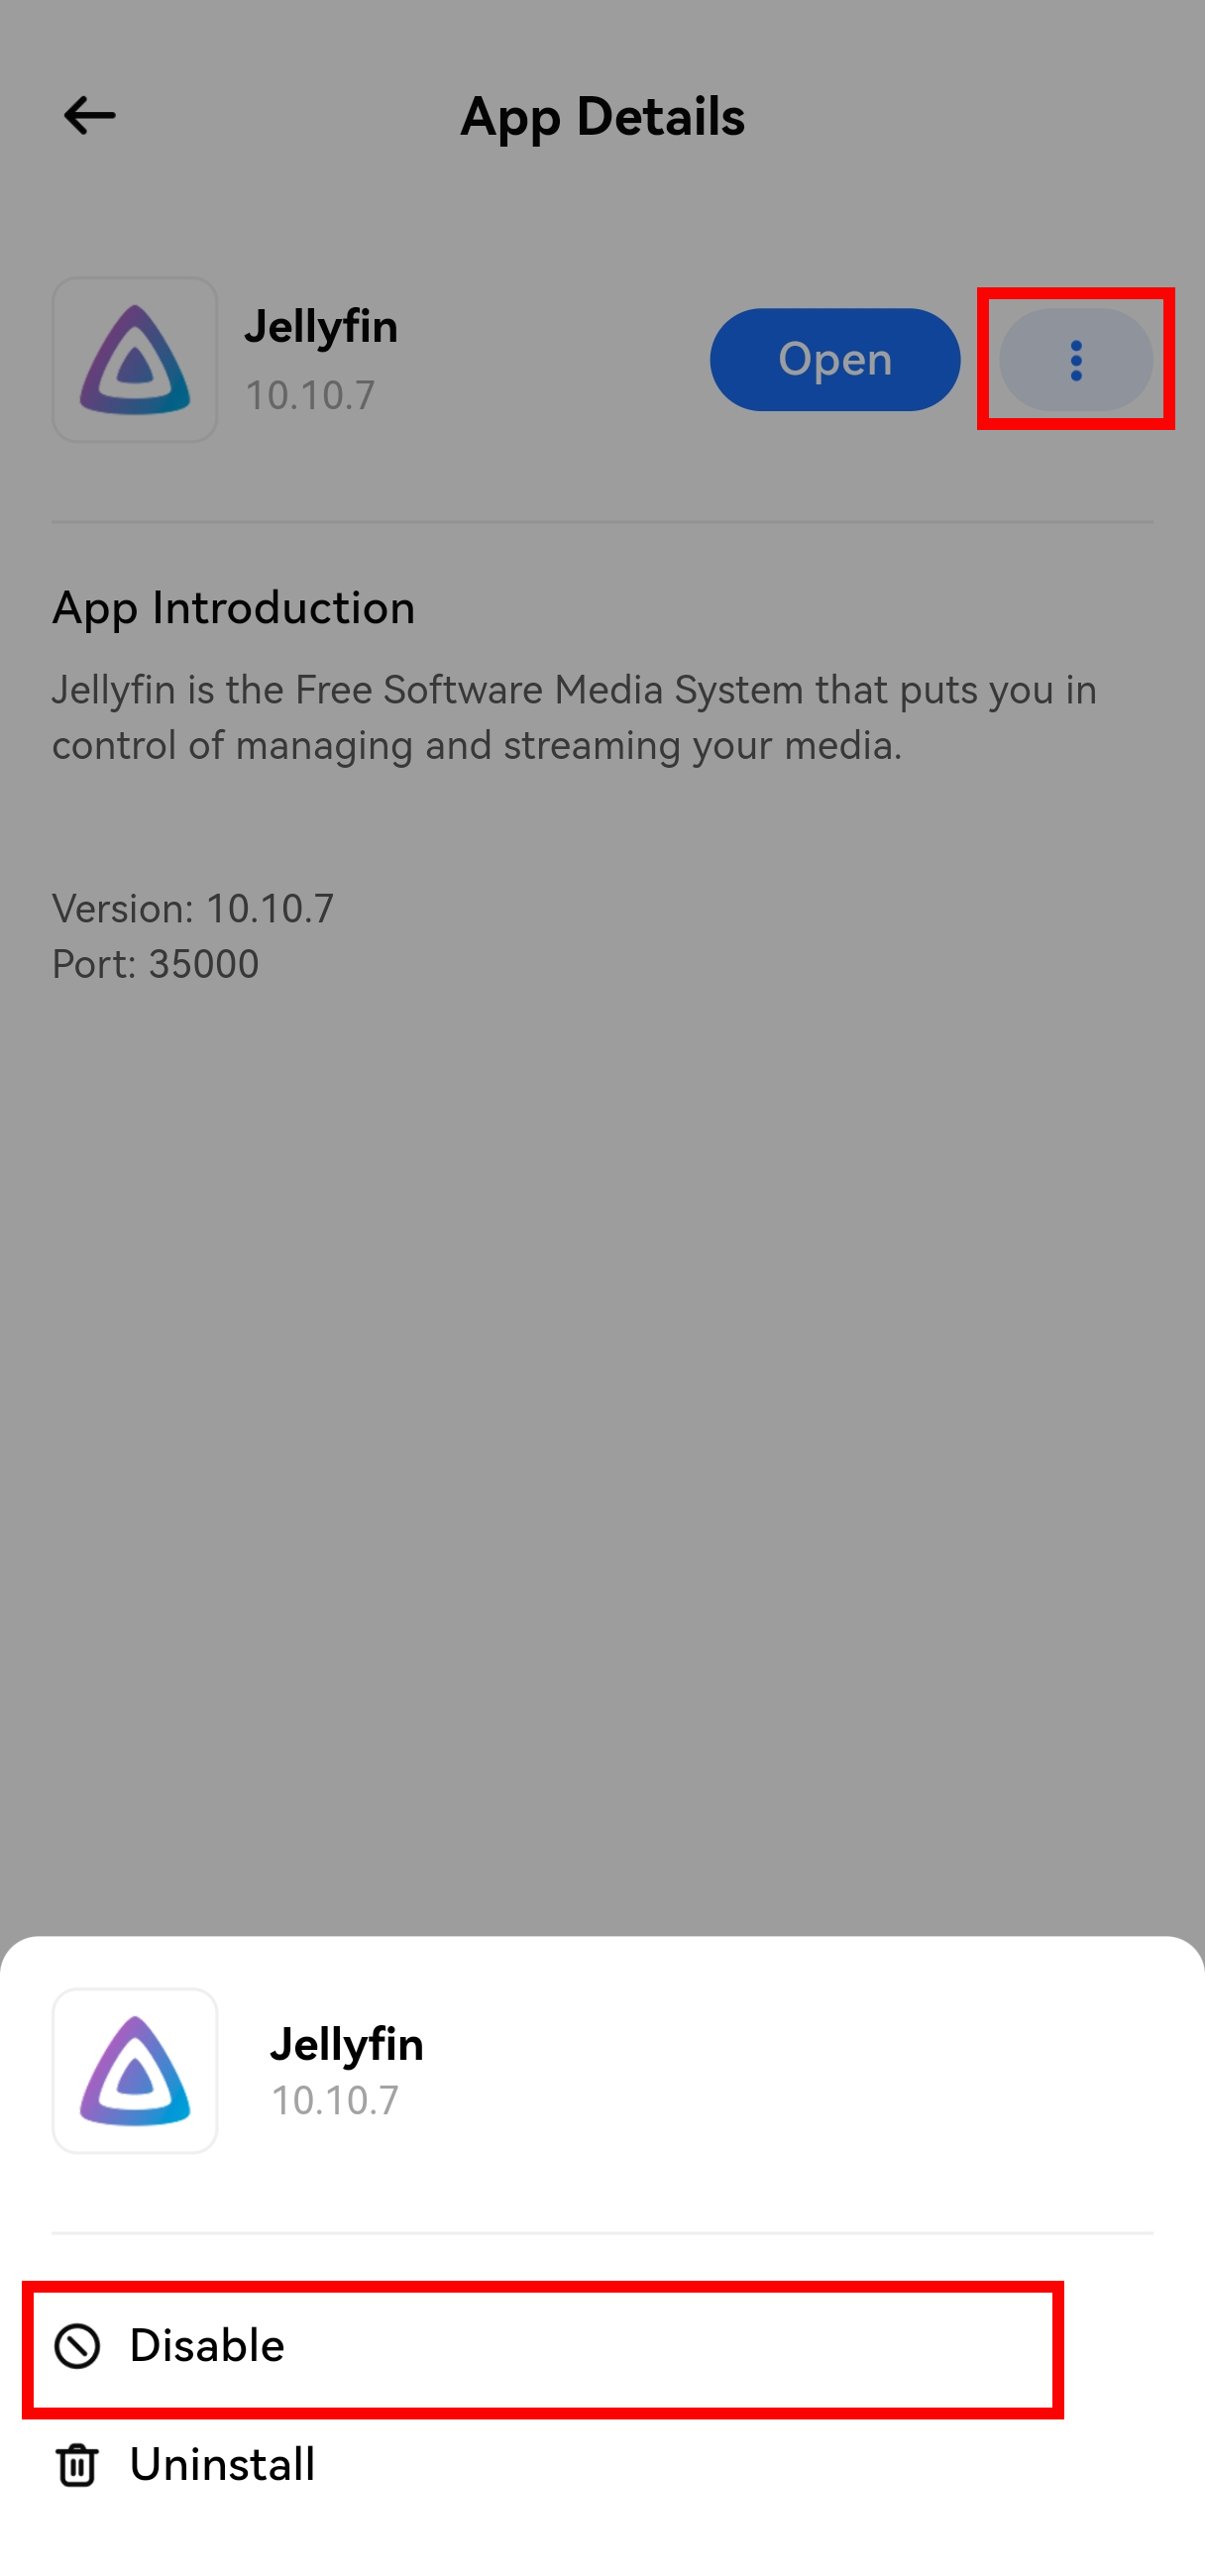
¶ Uninstallation
Uninstall apps in the 【App Center】.
¶ Compatible Apps
¶ App Information
| App Name | Version | Access Address | App Introduction |
|---|---|---|---|
| Jellyfin | 10.10.7 | IP:35000 | Jellyfin is a free media system software that helps you fully manage personal media resources and supports cross-device playback. |
| Plex | 1.42.2 | IP:35006/web | Plex integrates free movies, TV content, and various high-quality free media services, continuously opening up new chapters for you to explore the world of audio and video. |
| Syncthing | 2.0.10 | IP:35008 | Syncthing is a file synchronization tool that enables real-time, secure data synchronization between multiple computers, with full security protection to prevent unauthorized access. |
| Transmission | 4.0.6 | IP:35011 | A fast, simple, and free BitTorrent client. |
¶ Notes
¶ Accessible Directories for Apps
- Actual Directory: Located under the @docker directory on the main disk. Taking Jellyfin as an example, the actual directory is @docker/jellyfin/data/;
- Mapped Directories:
- App directory is mapped to /data;
- Main disk directory is mapped to /pocketcloud.
Note: Do not directly mount the root directory of the main disk, as this may affect the normal operation of the device.
¶ Jellyfin Notes
Adding a Media Library
- Go to Console → Media Libraries → Add Media Library;
- Click "Add Folder" and select the path:
- App Mapped Directory: / → Select data;
- Main Disk Mapped Directory: / → Select pocketcloud → Choose the target folder.
Issue: Prompted to Select a Server for Connection After Reinstallation After uninstalling Jellyfin, reinstalling it may not display the registration interface, and you will be prompted to select a server to connect to after launching. Solution:
- Long-press the server icon to bring up the operation menu;
- Click "Delete" and exit Jellyfin;
- Reopen Jellyfin, and the registration interface will appear, allowing you to create a new account.
Issue: Unable to Register a User After Reinstallation After uninstalling Jellyfin, reinstalling it may not display the registration interface and directly enter the login screen (but no account or password has been set). Solution:
- Use an incognito browser to access the device’s IP + port number (e.g., 192.168.10.140:35000);
- The registration interface should appear, and you can create a new account.
¶ Syncthing Notes
- When adding a folder, the path can only be entered as "data"; otherwise, it cannot be recognized;
- View synchronized data under @/docker/syncthing/data.
¶ Transmission Notes
- Supports adding torrent files or torrent links;
- Downloaded files are stored in the corresponding folder under @docker/transmission.