¶ How to Re-Index the Media Library?
When issues such as newly added video files not displaying, video metadata being incorrect, or residual records remaining after video deletion occur, you can re-index the media library to sync the latest status, ensuring the Cinema function can accurately recognize and display video content.
Note:
- After adding, deleting, or modifying media library files via USB mode, you need to manually re-index the media library to sync the changes.
¶ How to Manually Re-Index the Media Library?
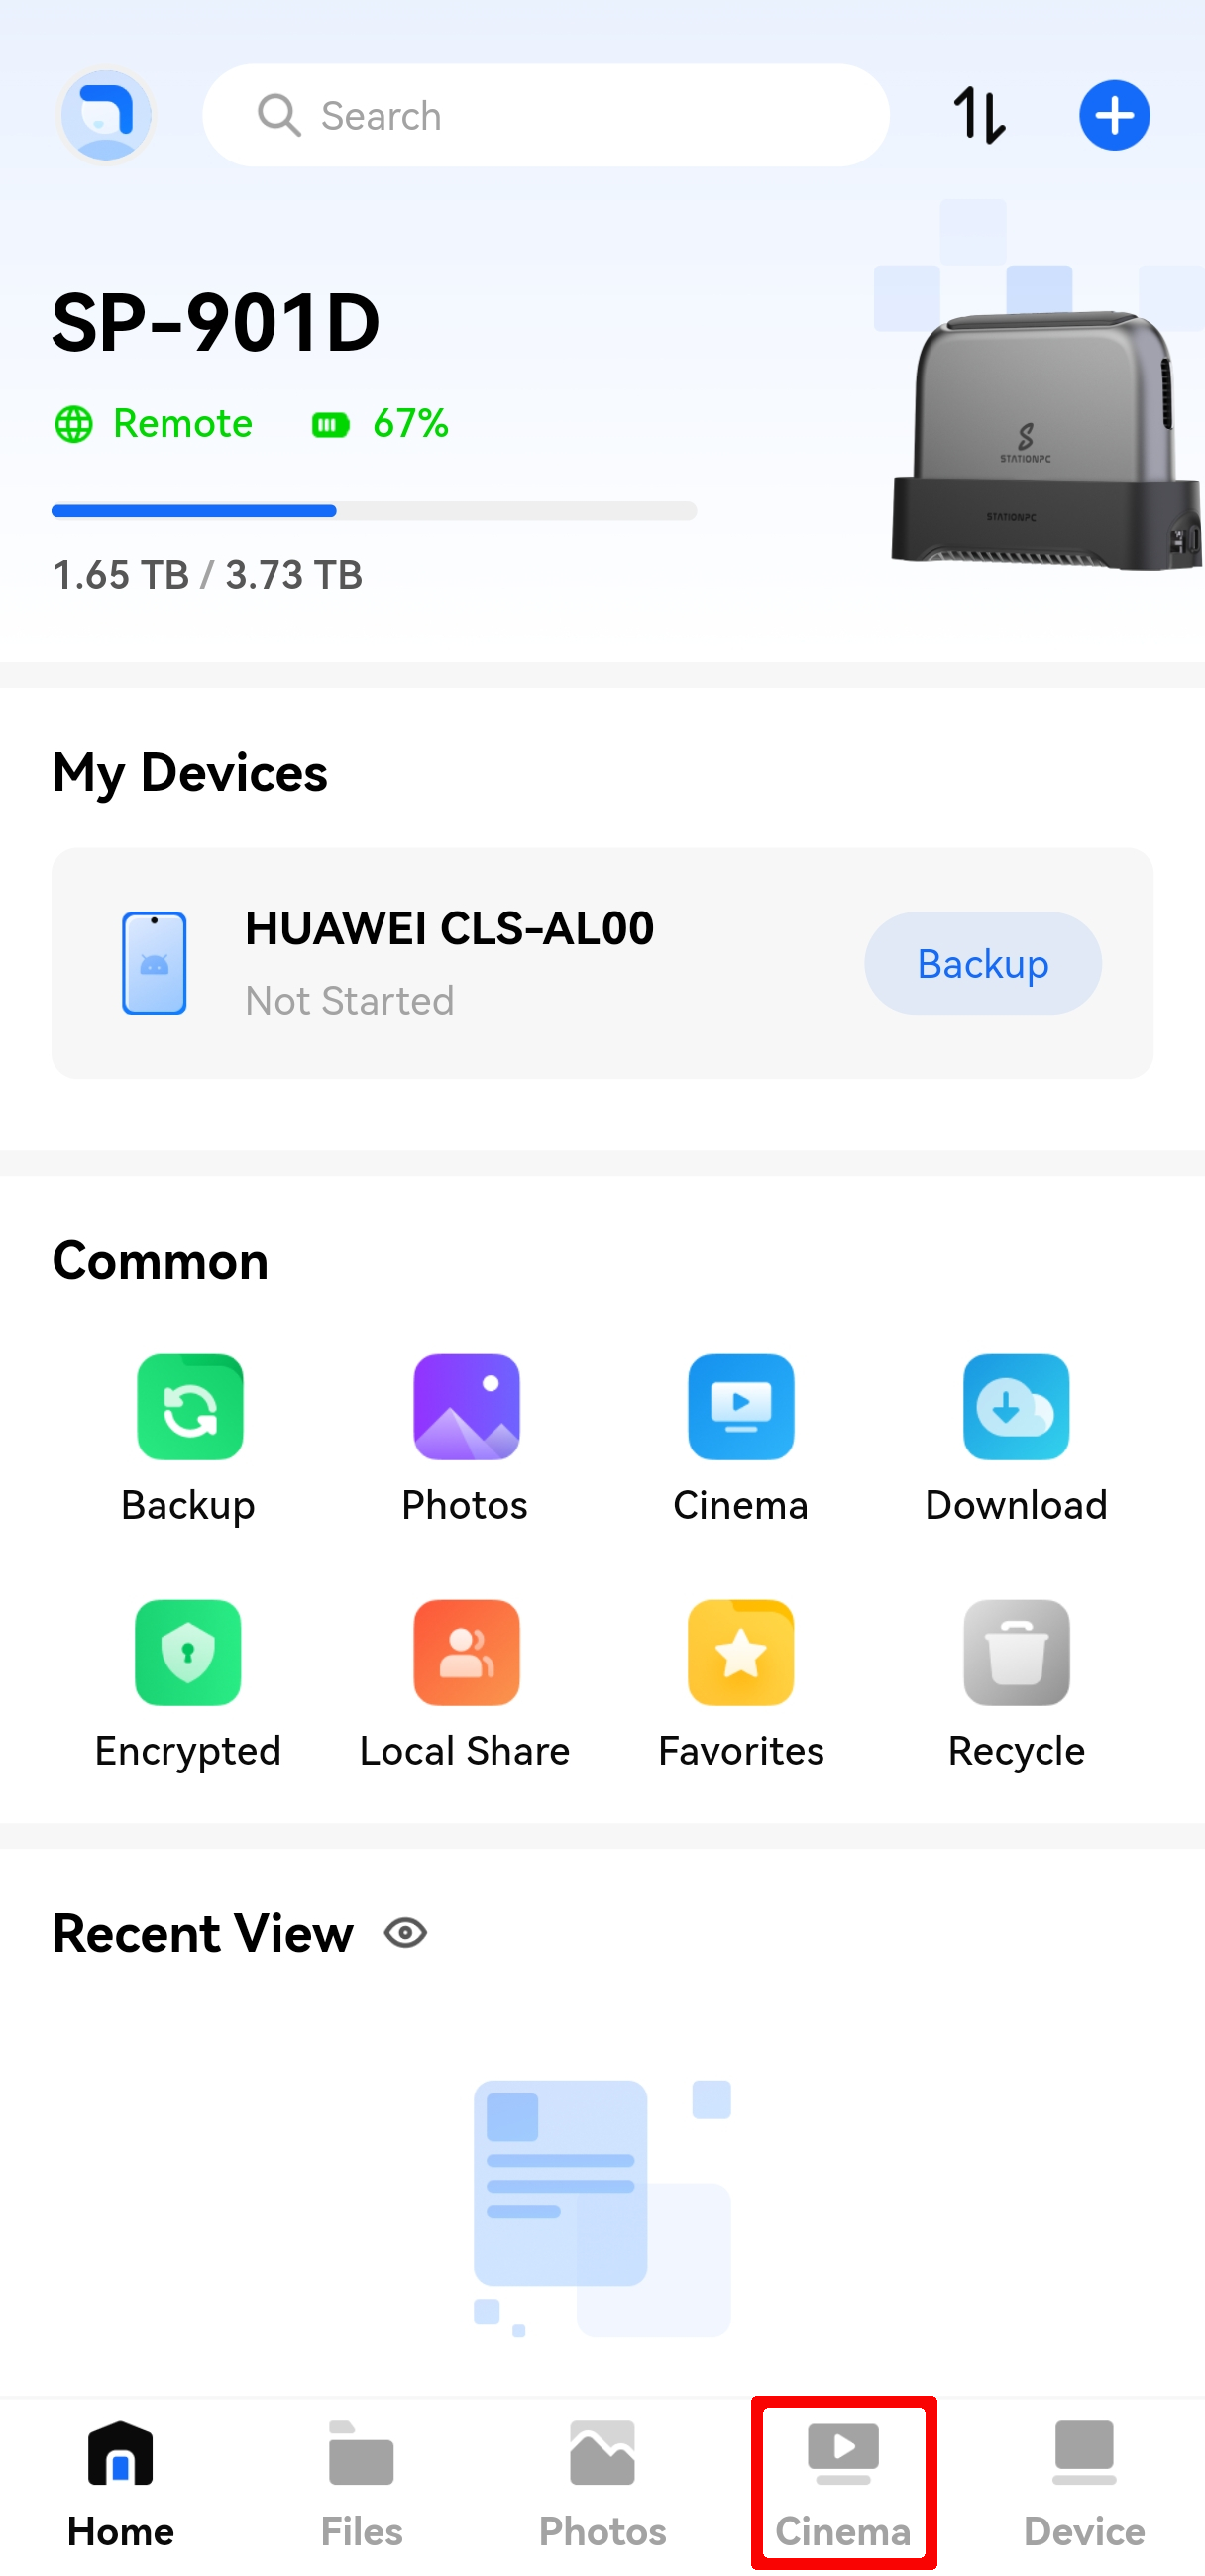
- Open the client and enter the Cinema module;
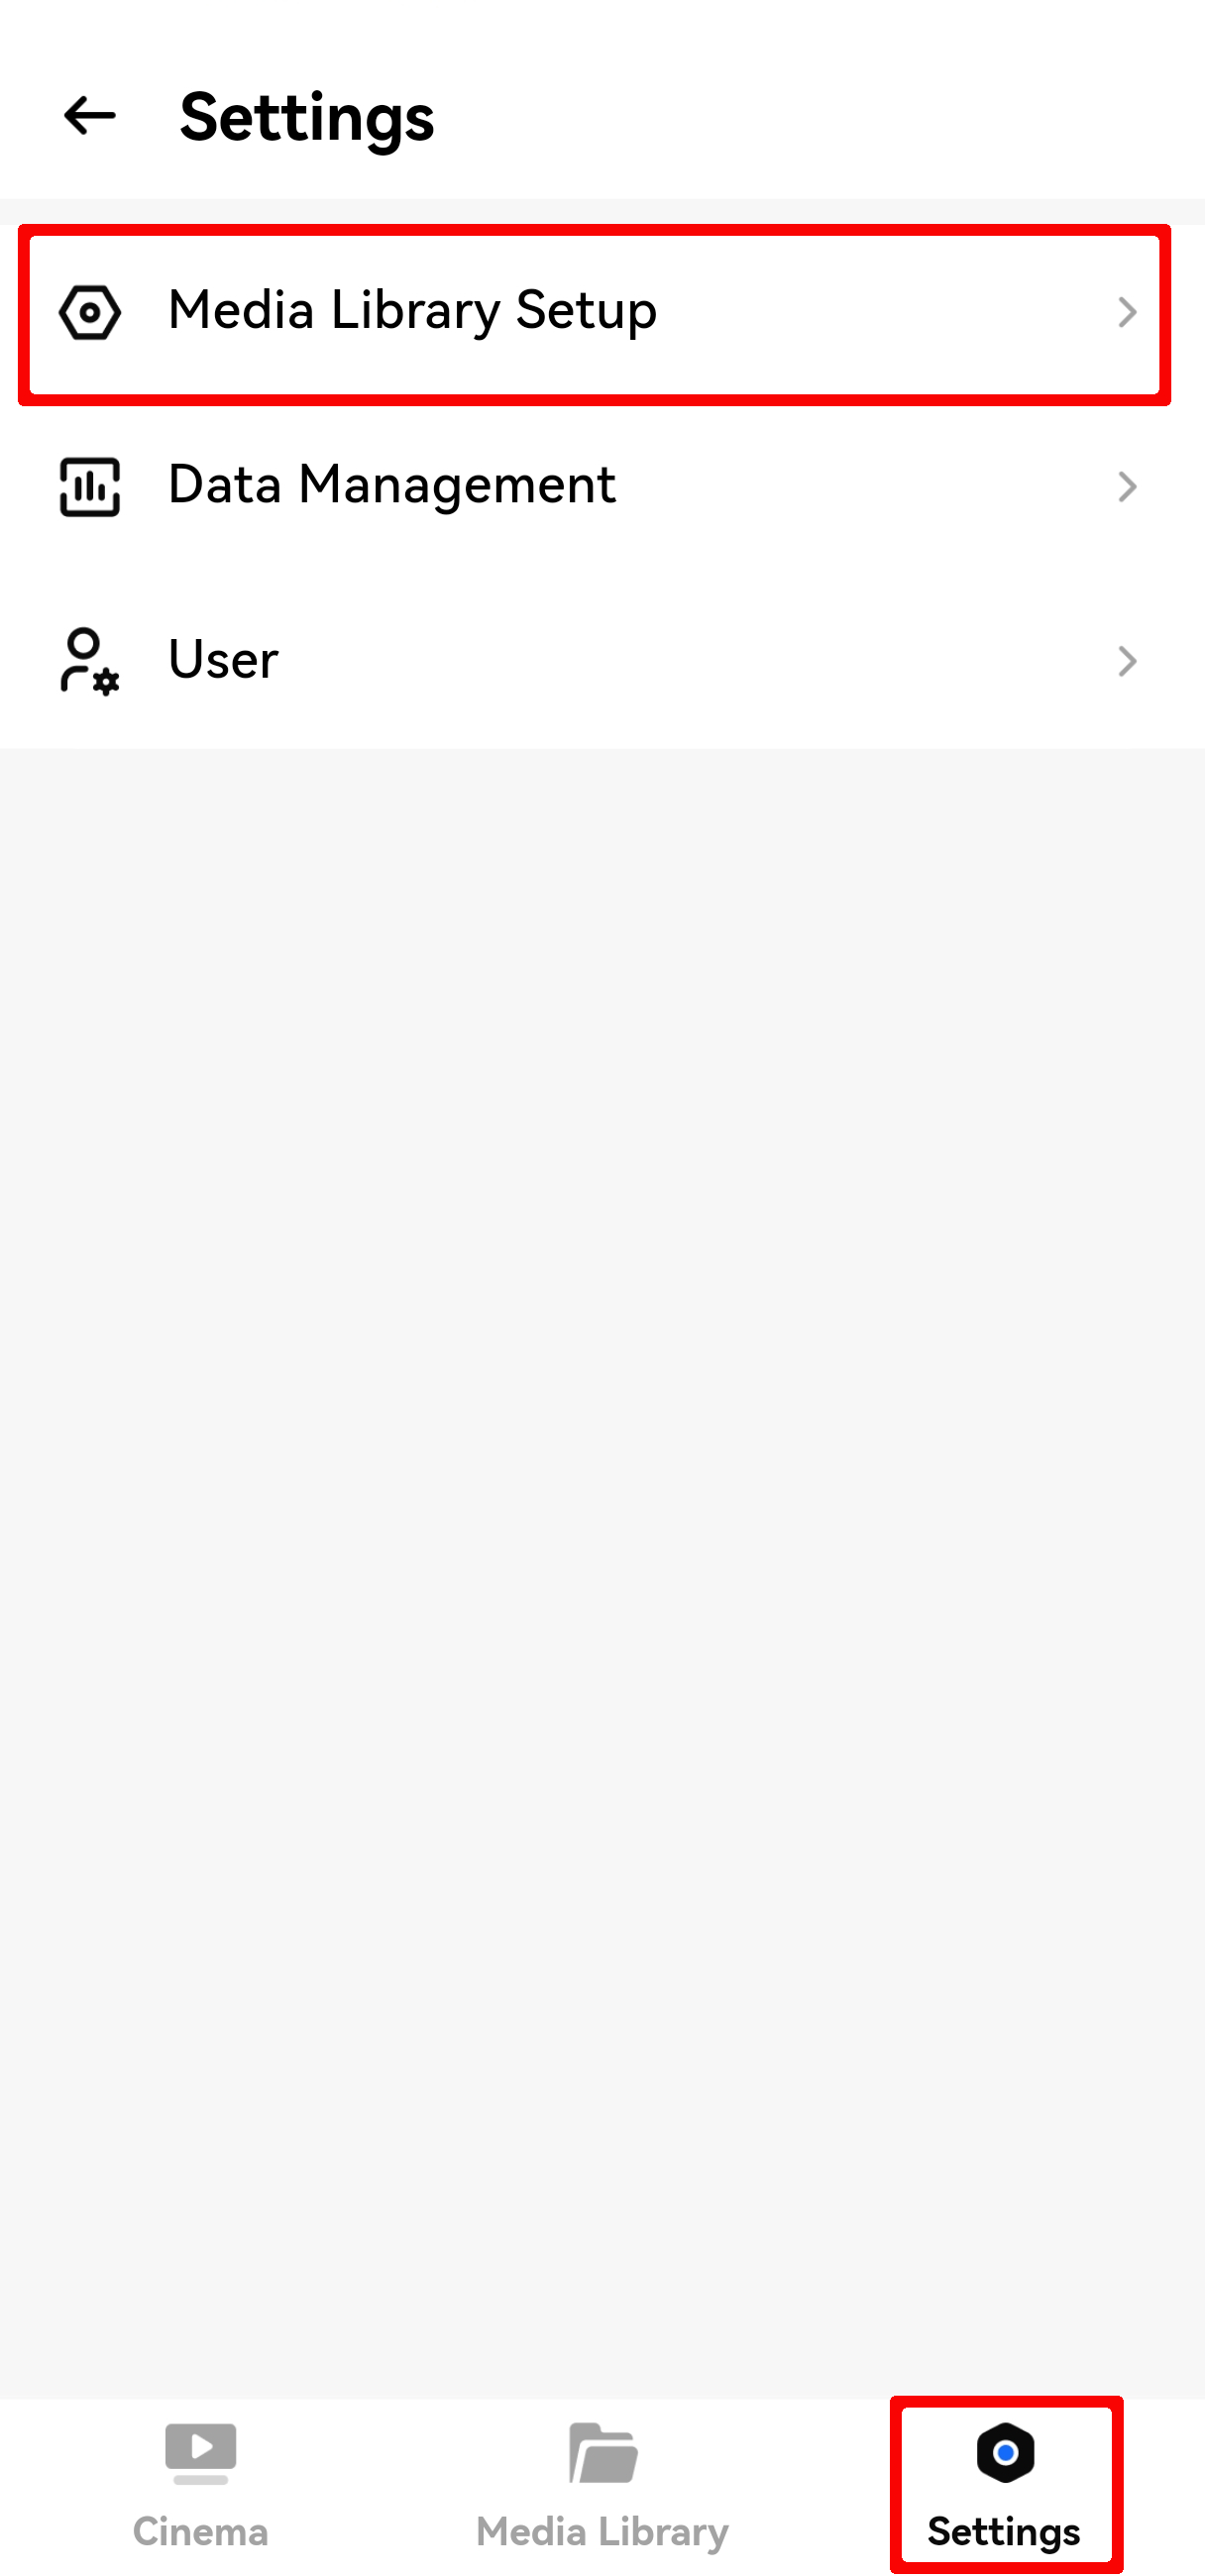
- Navigate to the Settings > Media Library Setup page, then find the media library that needs re-indexing;
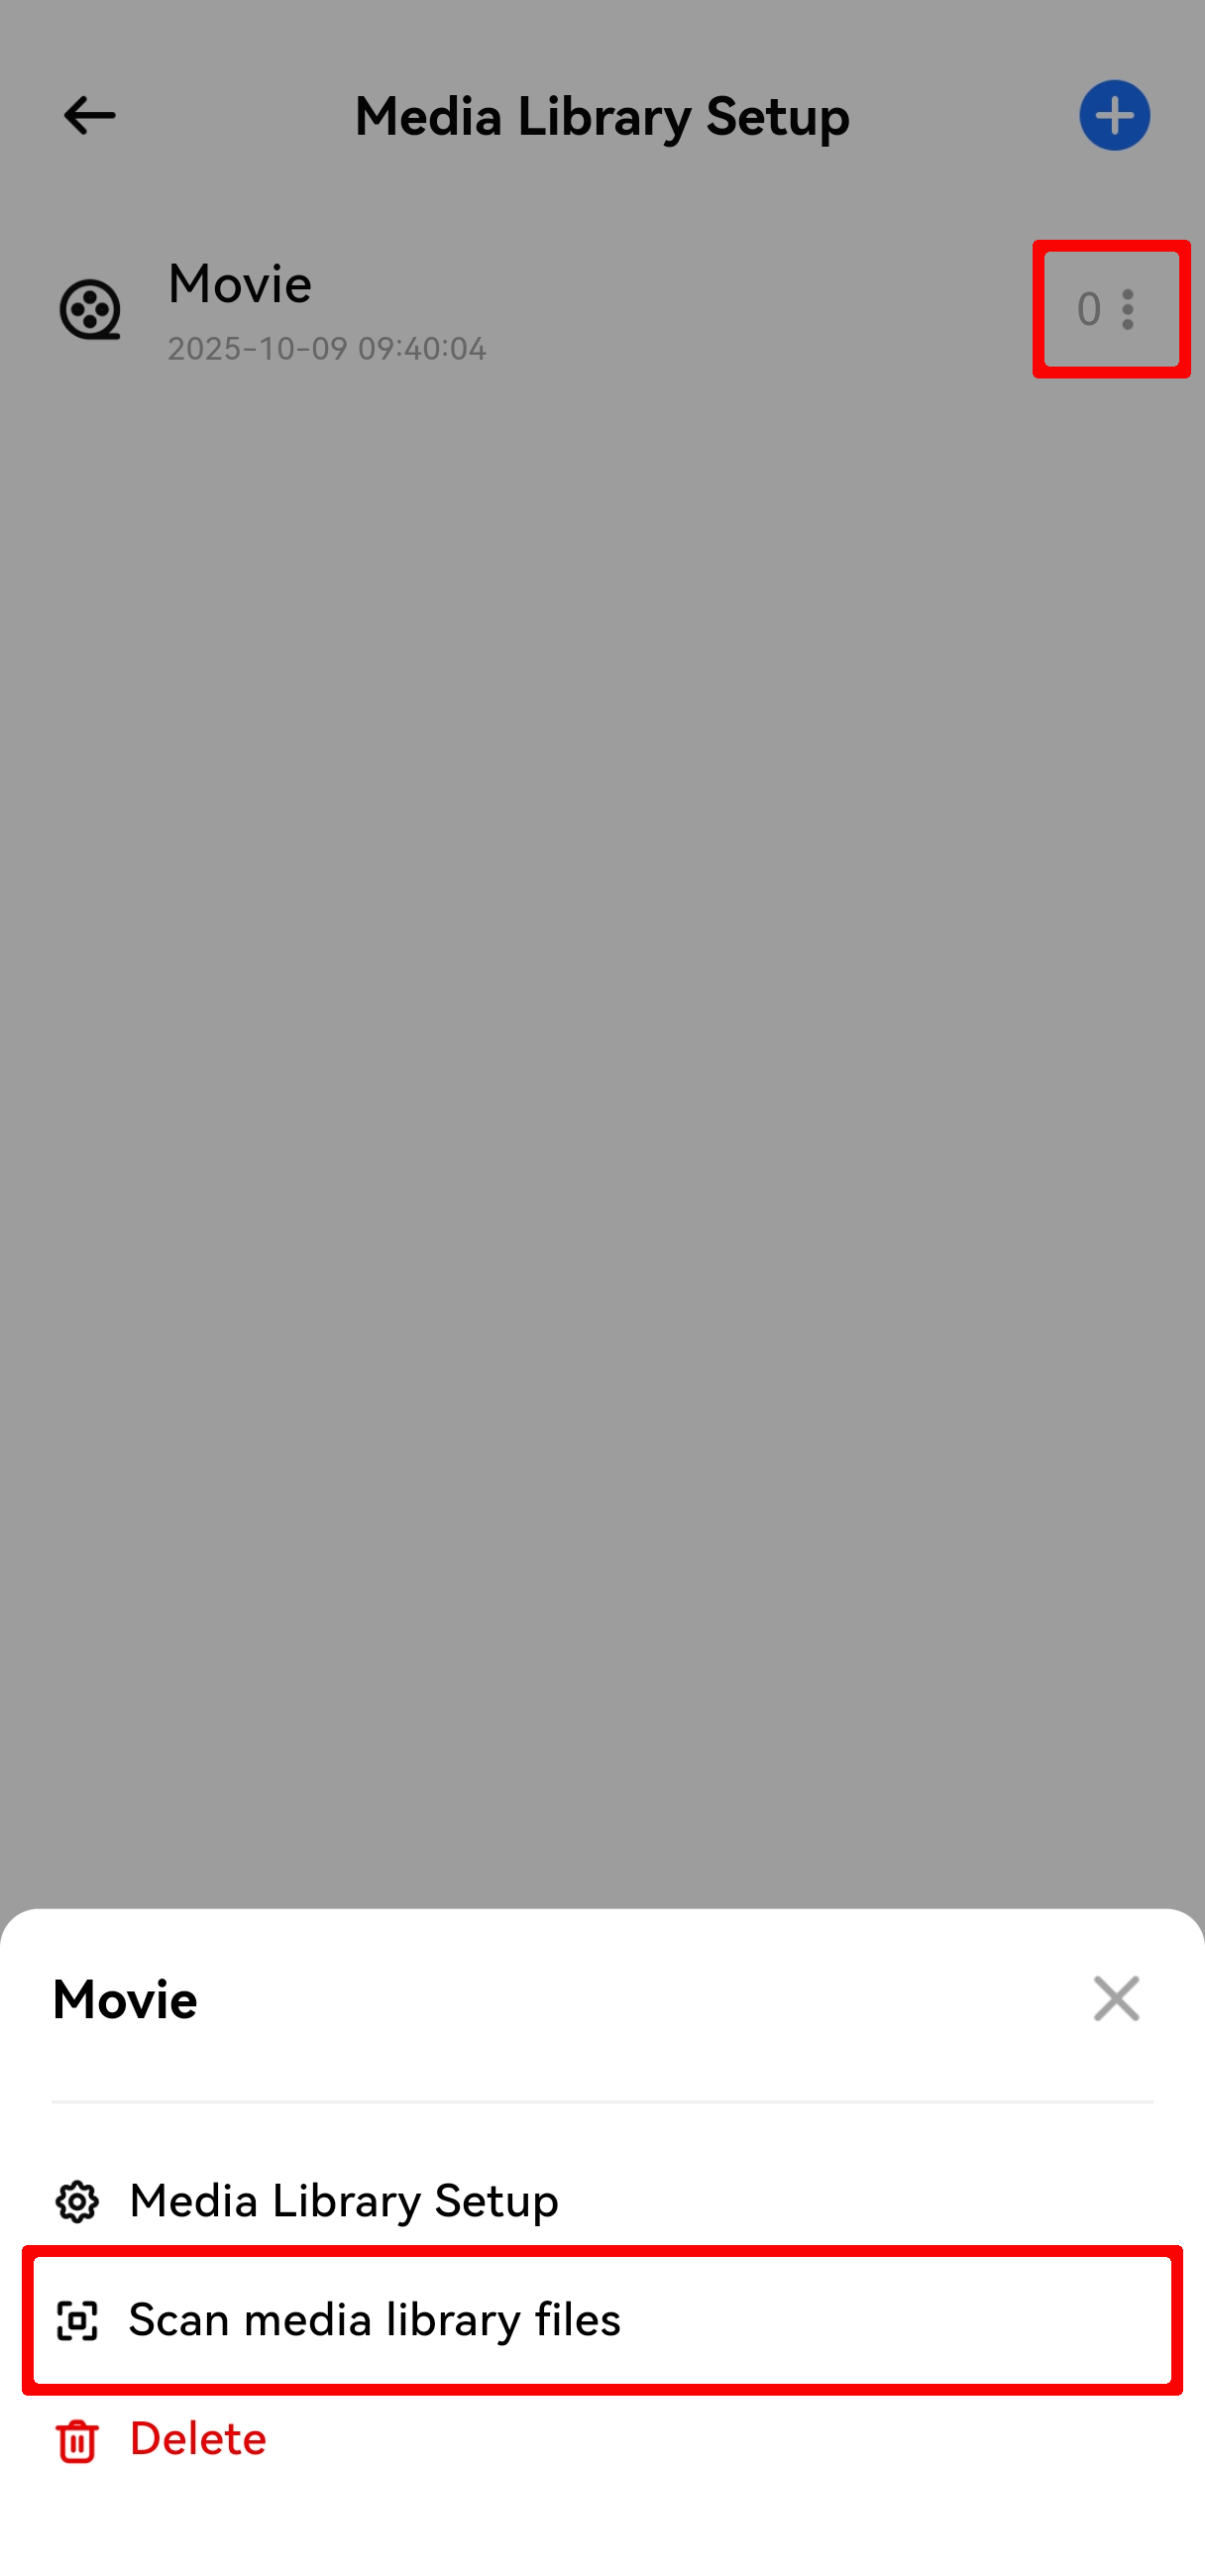
- Click the More icon to bring up the function menu;
- Click Scan Media Library Files—the system will automatically start scanning all files in the media library, sync newly added, deleted, or modified video resources, and re-verify/complement video metadata.
¶ Notes on Re-Indexing the Media Library
- Auto Re-Index Mechanism: When you upload new video files to the folder corresponding to the media library via a computer/mobile device, the system will trigger "auto re-index" by default, so manual operation is usually not required. Only when auto-sync fails (e.g., upload via USB mode) do you need to perform a manual re-index;
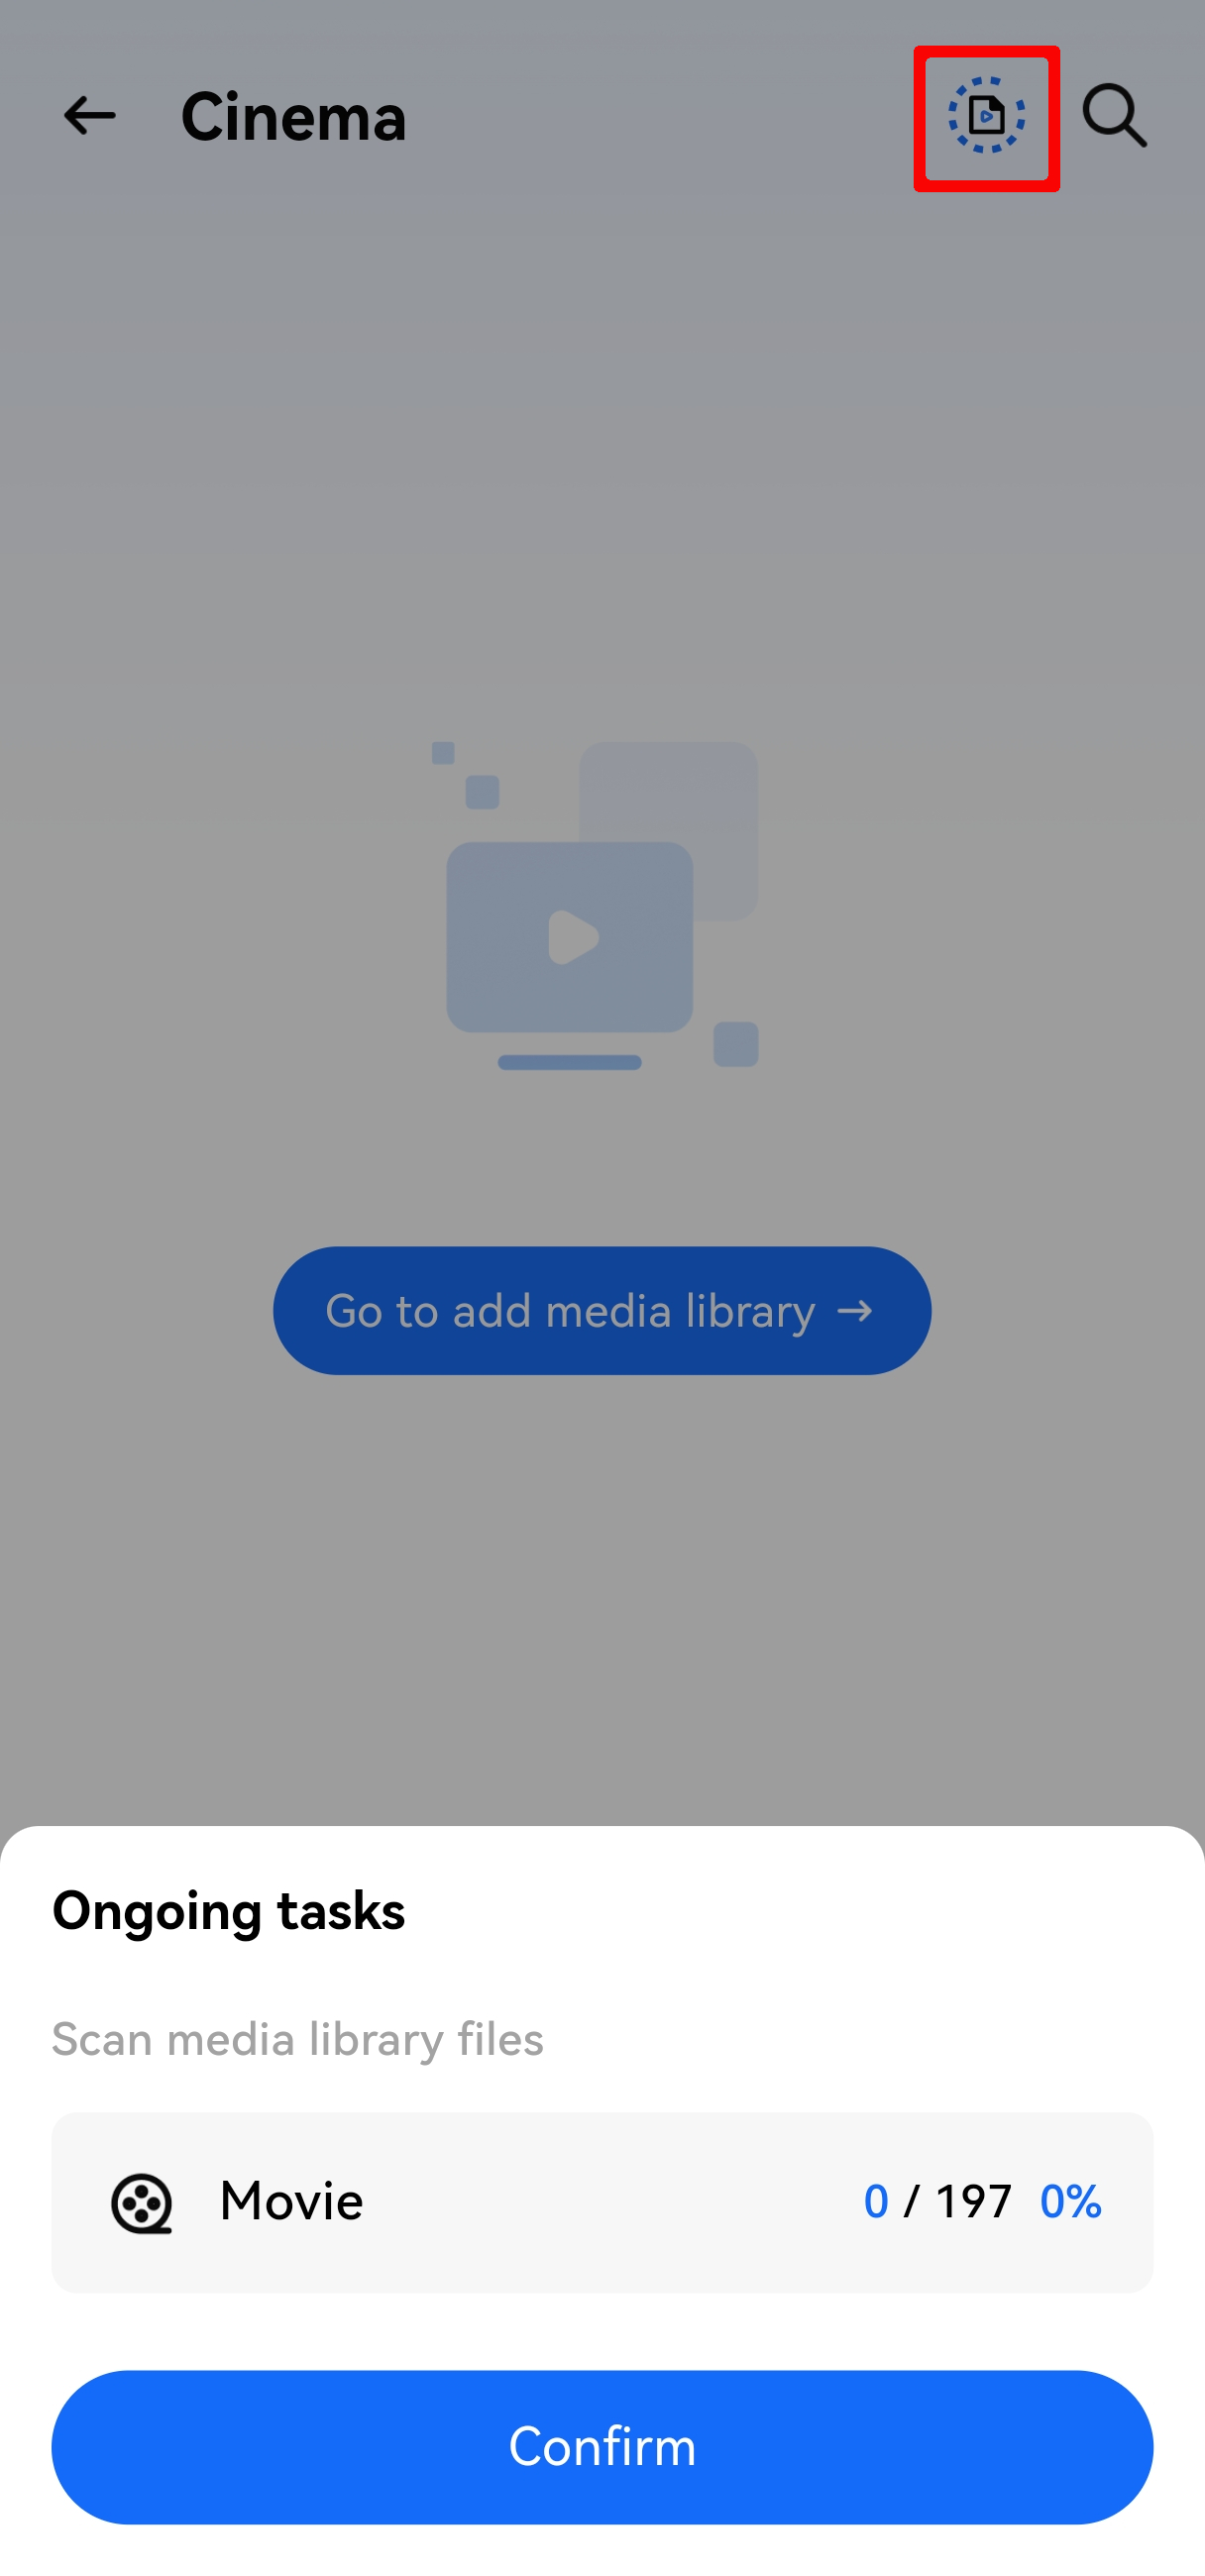
- Re-Index Duration and Video Scale: The scanning process will continue in the background, and the duration depends on the scale of video resources (the more videos there are, the longer the re-index takes). To check the progress, you can click to view the processing status via Cinema Homepage > Top Menu.